This post may contain affiliate links: full affiliate disclosure.
Homeschool organization can get complicated surprisingly quickly.
A few books on the table become a stack of worksheets. Art supplies start appearing in different rooms. Someone needs the maths counters, but nobody remembers which box they went into. By the end of the week, the dining table can feel more like a storage shelf than somewhere your family actually uses.
If that sounds familiar, you probably do not need a perfect homeschool room. You need a few simple systems that make the things you use every day easier to find, use, and put away.
That can look very different from one family to another. Some people have an entire room for homeschooling. Others work at the kitchen table and pack everything away when lessons are finished.
So rather than trying to recreate somebody else’s setup exactly, look for the ideas that solve the problems you actually have. A good homeschool organization system should make the day feel easier. If it takes more effort to maintain the system than it saves, it probably needs simplifying.
Start With the Things That Cause the Most Friction
Before buying another basket or drawer unit, think about the moments that slow your day down. Maybe worksheets are always getting mixed together. Maybe art supplies are spread across three cupboards. Maybe children keep asking what comes next.
Fix that problem first. If paper is the issue, start with a file system. If supplies move from room to room, a rolling cart may be more useful than a large shelving unit. If your child constantly asks what the plan is for the day, a visual schedule can make the next step much clearer.
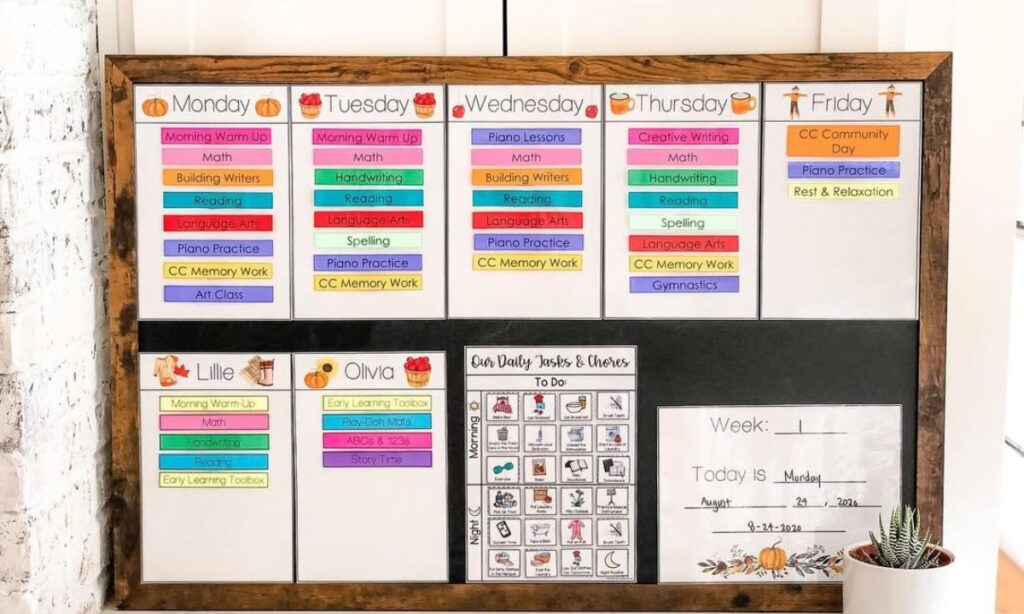
You do not have to organize everything at once. One system that removes a repeated annoyance is usually more useful than a complete room makeover.
Homeschool Organization Ideas
1. Learning Tools Bins
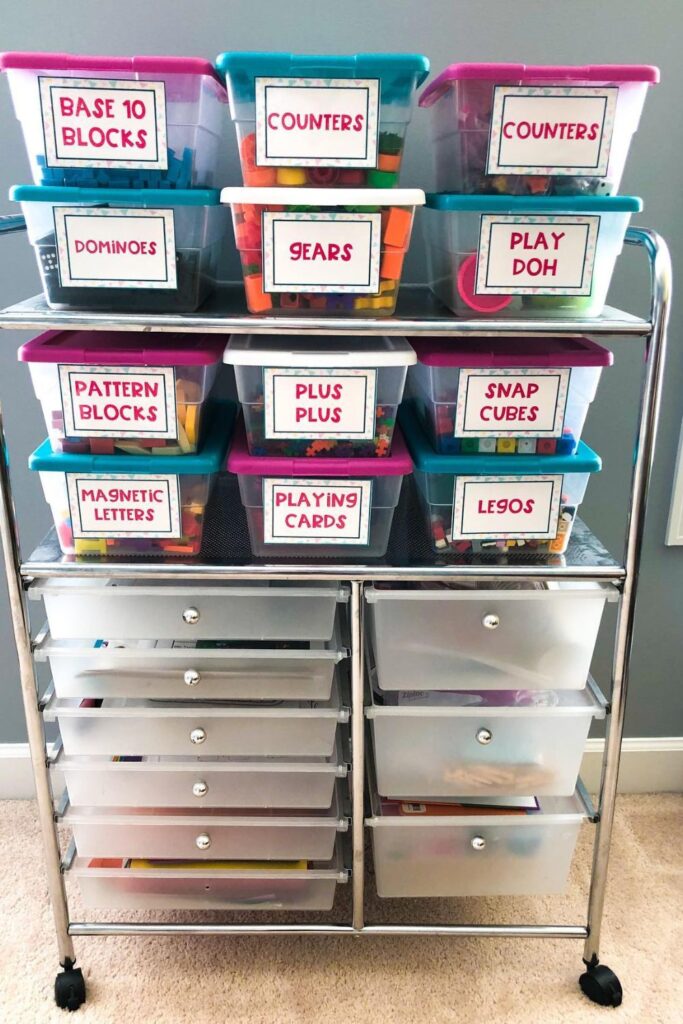
Hands-on materials are useful, but they are also very good at becoming one large mixed pile.
Math counters, letter tiles, pattern blocks, playdough tools, flashcards, and small manipulatives are much easier to use when each broad group has its own container.
Clear bins work especially well because children can see what is inside without opening every box. Keep the categories simple so children can also begin taking more responsibility for setting up and packing away their own activities.
A rolling cart makes this even easier when learning happens in different places around the house.
Want to try this setup? See clear rolling storage carts on Amazon →
2. Subject-Sorted Drawers
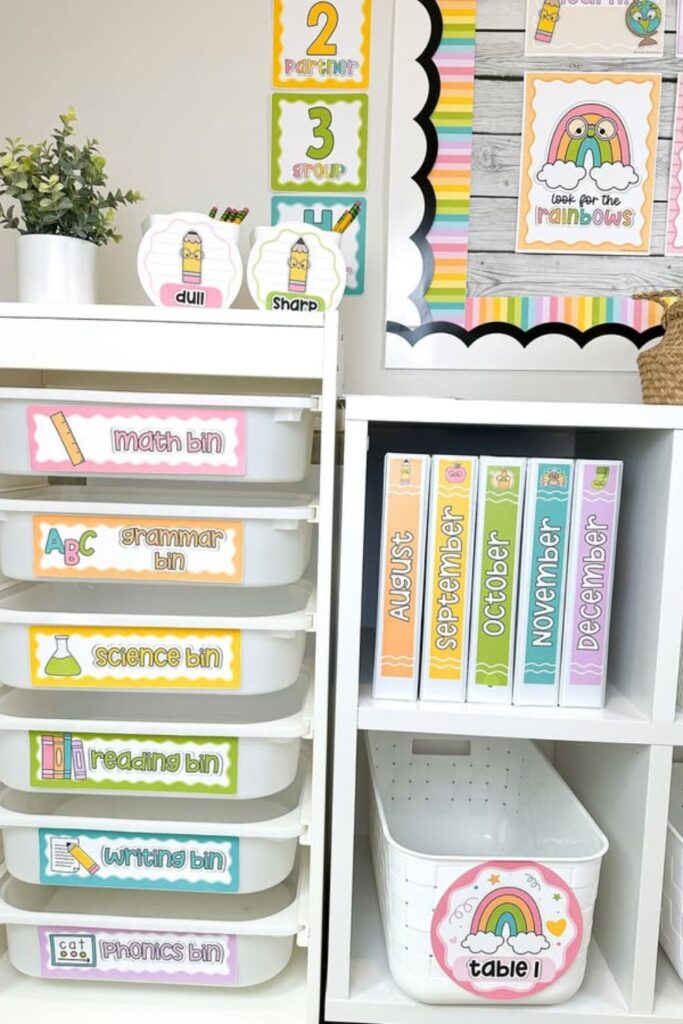
A tall drawer unit can make subject storage very straightforward. Give maths one drawer, science another, reading another, and keep the materials for each subject together.
Then when it is time to begin a lesson, you are opening one drawer instead of searching through several shelves. For younger children, labels with simple pictures can make the system easier to follow. Older children may only need the subject name.
You could also organize the drawers by child rather than subject if several students share the same learning space. The exact labels matter less than consistency.
Want to create something similar? See multi-drawer organizers on Amazon →
If loose papers are the bigger problem in your space, the ideas in our Paper Organization guide may help more than adding additional drawers.
3. Chalkboard Learning Boards
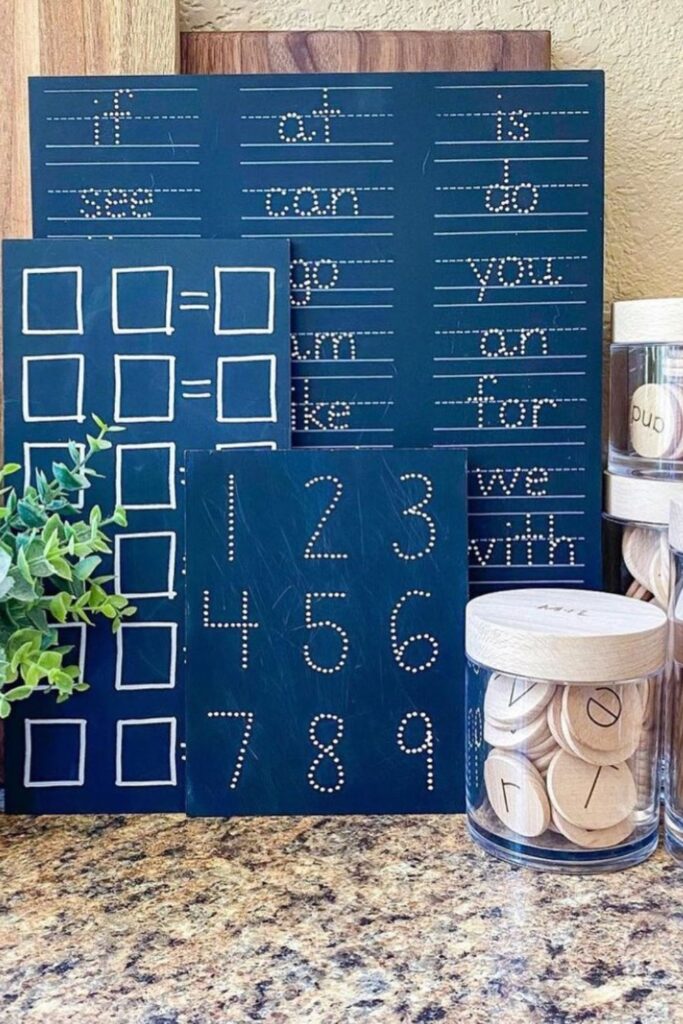
Reusable learning boards are handy for skills children practise again and again, such as handwriting, spelling, numbers, ten frames, or simple maths activities.
The organization trick is to store the board together with the pieces used with it. If a tracing board needs wooden letters, keep the letters nearby. If a number board is normally used with counters, store the counters in the same small basket or jar.
That means the activity can be taken out and used without spending the first five minutes gathering materials. For younger children especially, a setup like this can become part of a familiar routine.
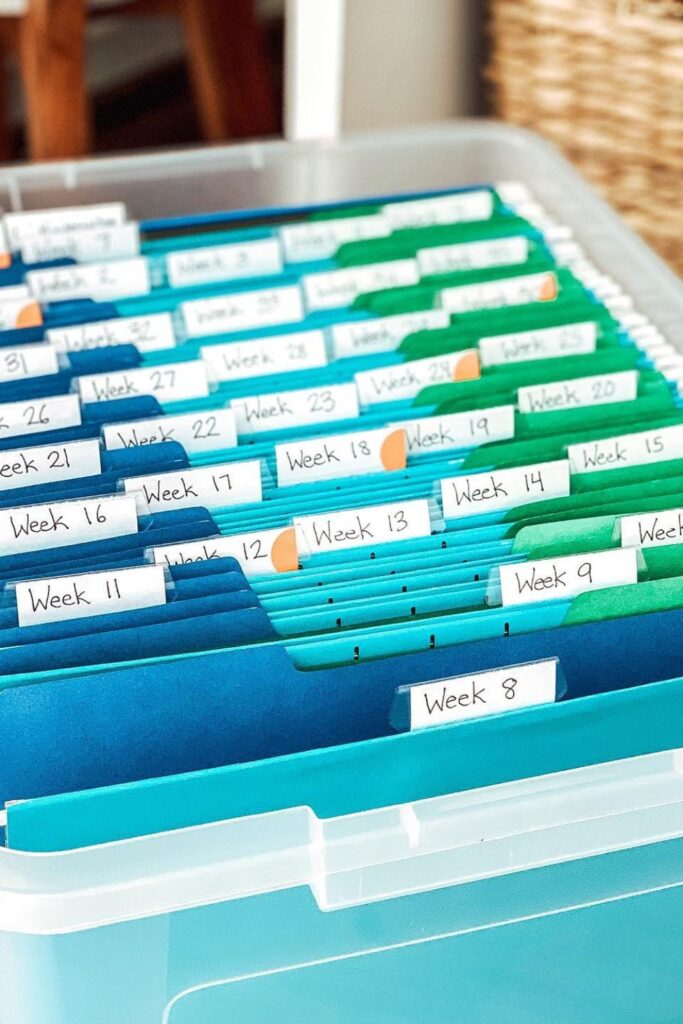
4. Weekly File System
Homeschool paper can become overwhelming because there is often a mixture of things you need now, things you will need later, and things you need to keep.
A weekly file box gives upcoming lesson material its own place. Label folders by week and add the worksheets, lesson notes, reading pages, or activity sheets you expect to use.
You do not need to prepare an entire year in advance. If planning thirty weeks at once sounds exhausting, prepare the next month instead. At the end of each week, move the next folder forward and refill the system when you have time.
It is also useful to keep completed work somewhere separate so finished papers do not slowly migrate back into the current-week folders.
Want to create a weekly file system? See file boxes and hanging folders on Amazon →
5. Rolling Art Cart
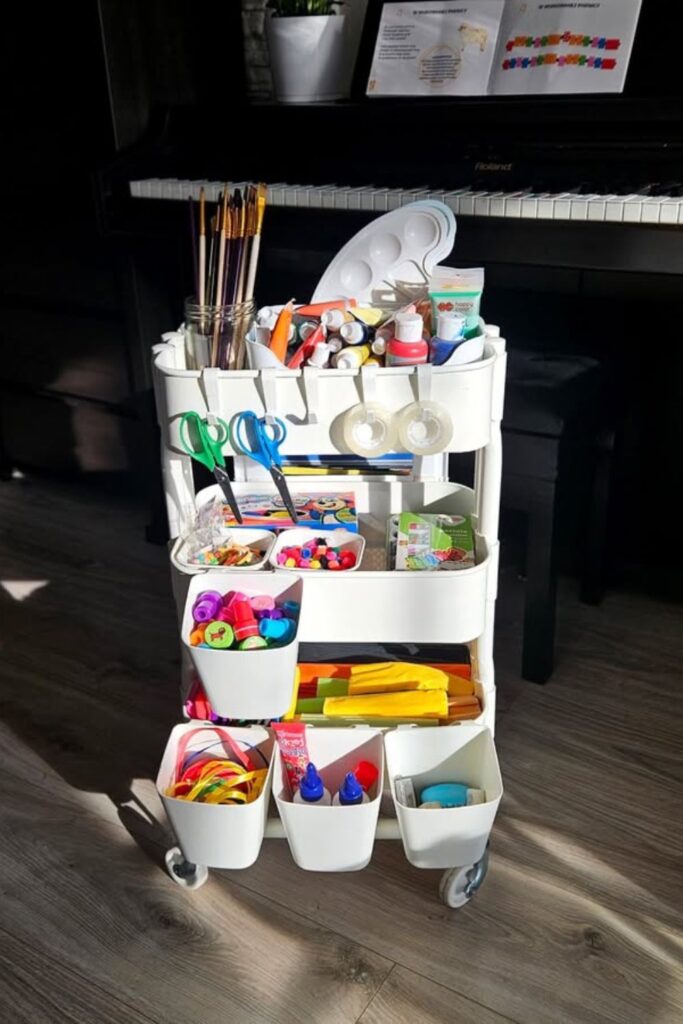
Art supplies need a home that can handle lots of small, awkward things. A three-tier cart works well because paints, brushes, glue, scissors, markers, tape, and craft materials can all stay in one place without occupying the learning table permanently.
Use cups or small containers inside the cart so every tier does not become one deep pile. Keep the everyday materials easiest to reach and move supplies that need adult supervision somewhere less accessible if necessary.
The real advantage is mobility. Bring the cart to the table for art time, then roll it away when you need the room back. That is particularly useful in homes where the homeschool space is shared with normal family life.
If craft supplies are a larger part of the clutter, you may also find useful storage ideas in our Playroom Organization guide.
6. Dual Workstation Setup
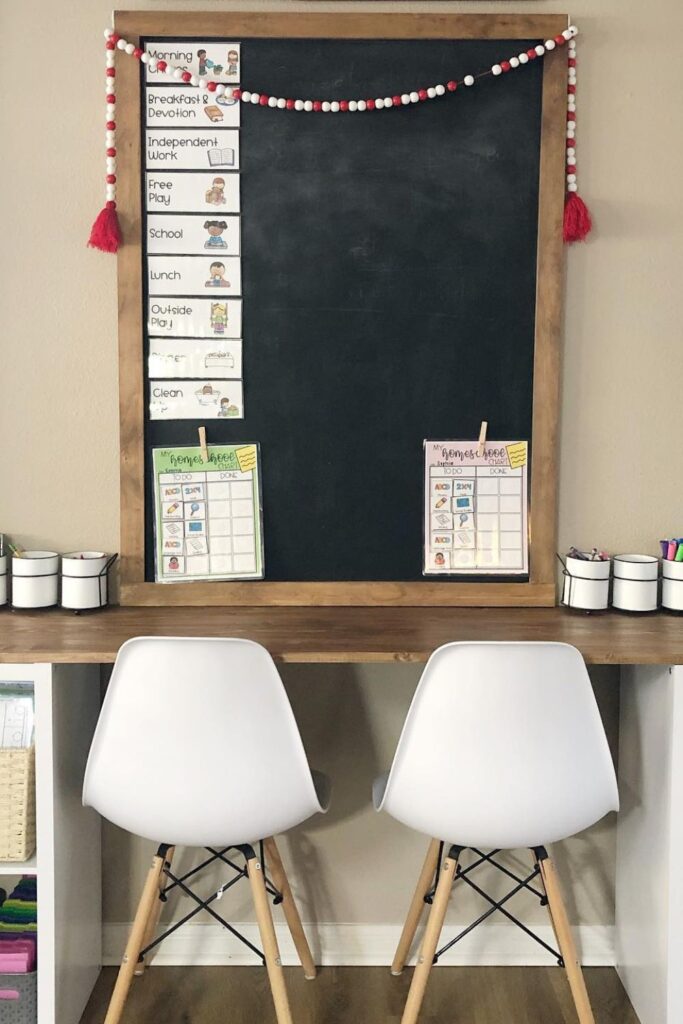
Two children can share one learning area without sharing every inch of the workspace. A long desk with two chairs gives each child a clear place to work while allowing supplies and storage to remain shared.
Small caddies or drawers can hold personal pencils, notebooks, and everyday materials. Shared resources can stay in the middle or underneath the desk.
If your children distract each other easily, adjust the arrangement rather than assuming the desk itself is the problem. A small shelf between them, different chair positions, or facing slightly different directions may make a bigger difference than creating two separate rooms.
The goal is not symmetry. It is giving each child enough space to work comfortably.
7. Compact Audio Stations
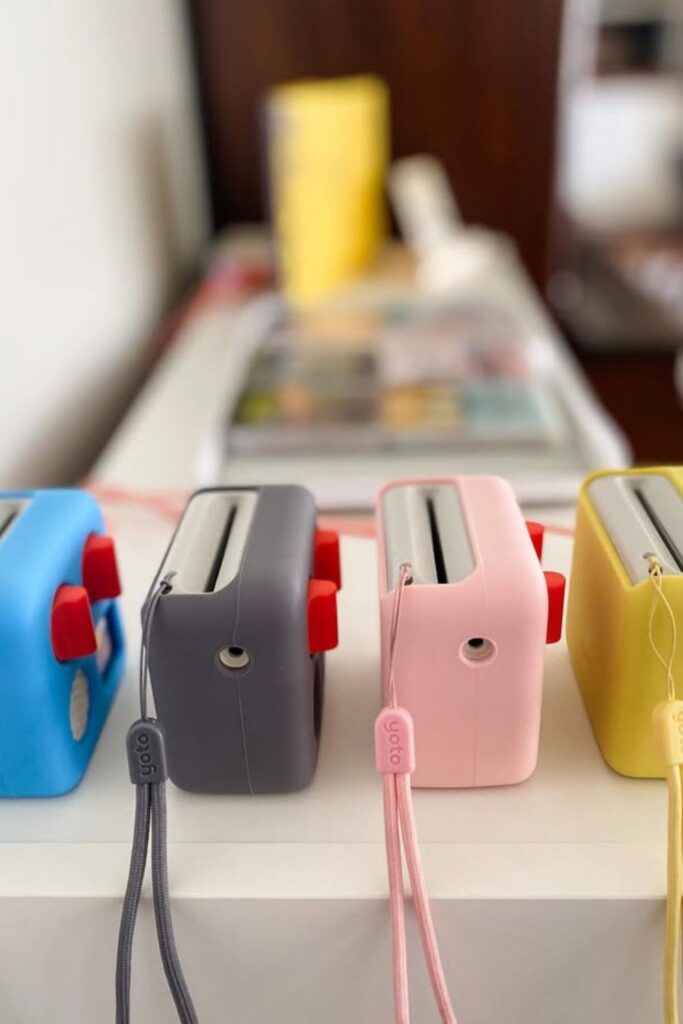
If you use audio players, headphones, listening activities, or audiobooks, give the equipment one permanent charging and storage area.
Keep the player, headphones, charging cable, and related cards or accessories together. The charger is often the piece that creates the most frustration because it gets moved somewhere else and nobody can remember where.
Keeping it permanently connected at the station solves that small but repeated problem. If several children use the equipment, simple labels can help everyone return the right pieces.
The station itself does not need to be large. A shelf, ledge, or small tray may be enough.
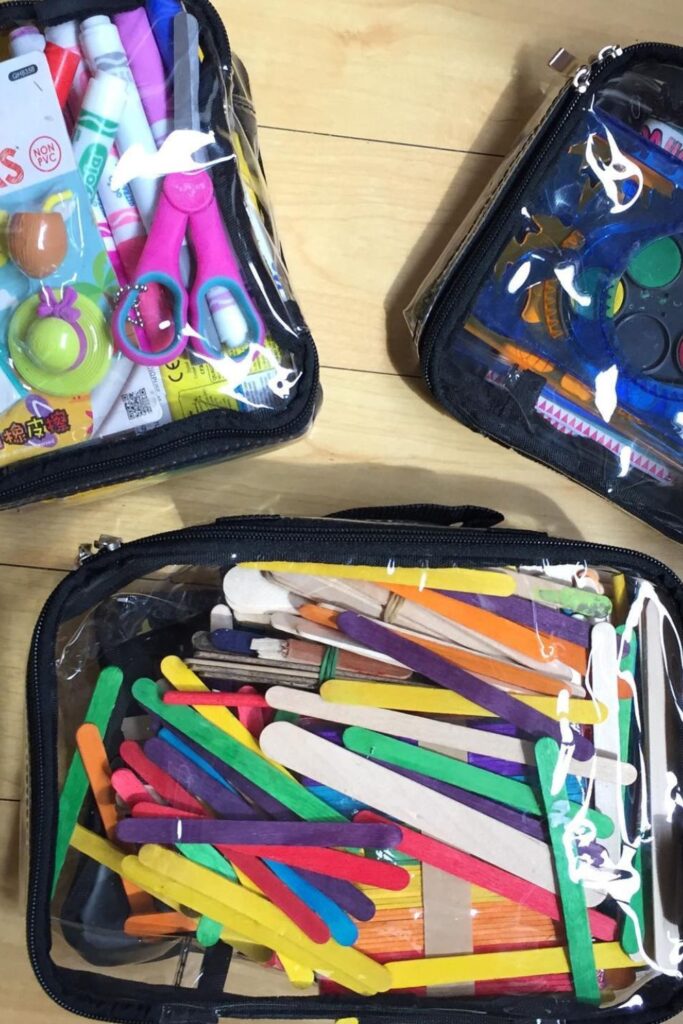
8. Clear Supply Pouches
Clear zipper pouches are useful for supplies that need to stay grouped but still move around easily.
Markers can have one pouch. Geometry tools can have another. Flashcards, craft sticks, scissors, glue, and small manipulatives can each stay together without taking over a whole drawer.
Because the pouch is transparent, children can usually identify what they need without opening several containers. They are also convenient when you homeschool outside the house or move between rooms.
Keep your categories fairly broad so the system remains easy to maintain.
Want to organize small supplies this way? See clear zipper pouches on Amazon →
9. Drawer Desk Setup
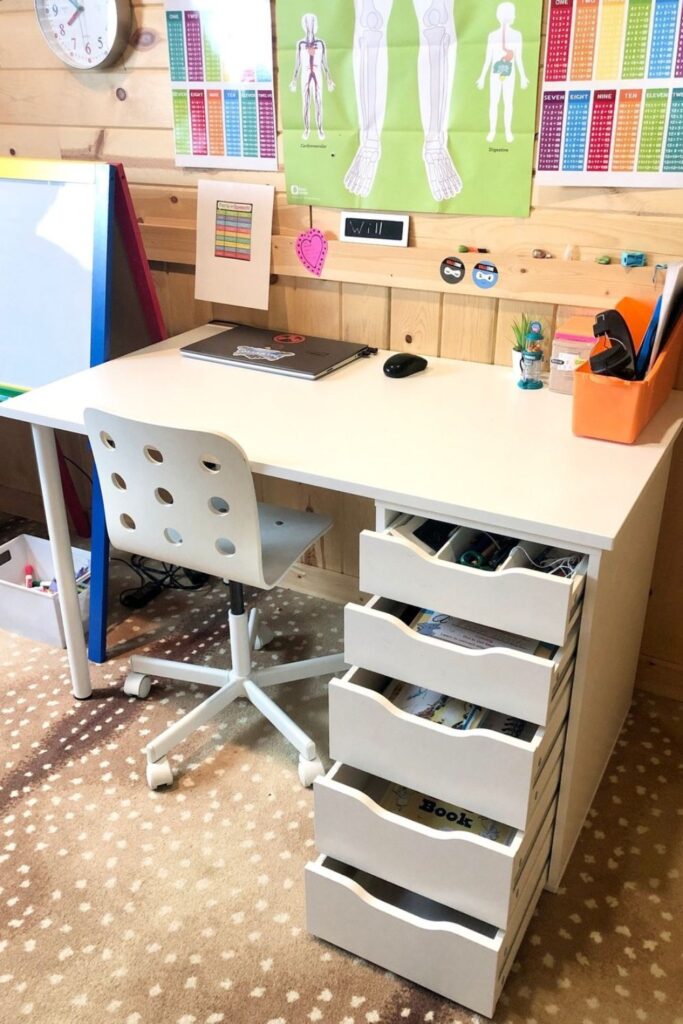
A desk with drawers is helpful when you want everyday materials directly beside the person using them. The key is deciding what each drawer is actually for.
The top drawer might hold pencils, an eraser, ruler, and a small notebook. Another can hold current workbooks. Things used only occasionally can live somewhere else rather than filling valuable desk space.
This helps prevent the drawers from becoming storage for everything that does not have another home. A small reference chart, whiteboard, or learning poster above the desk can also keep commonly used information visible without adding more paper to the drawers.
10. Cubby Storage Wall
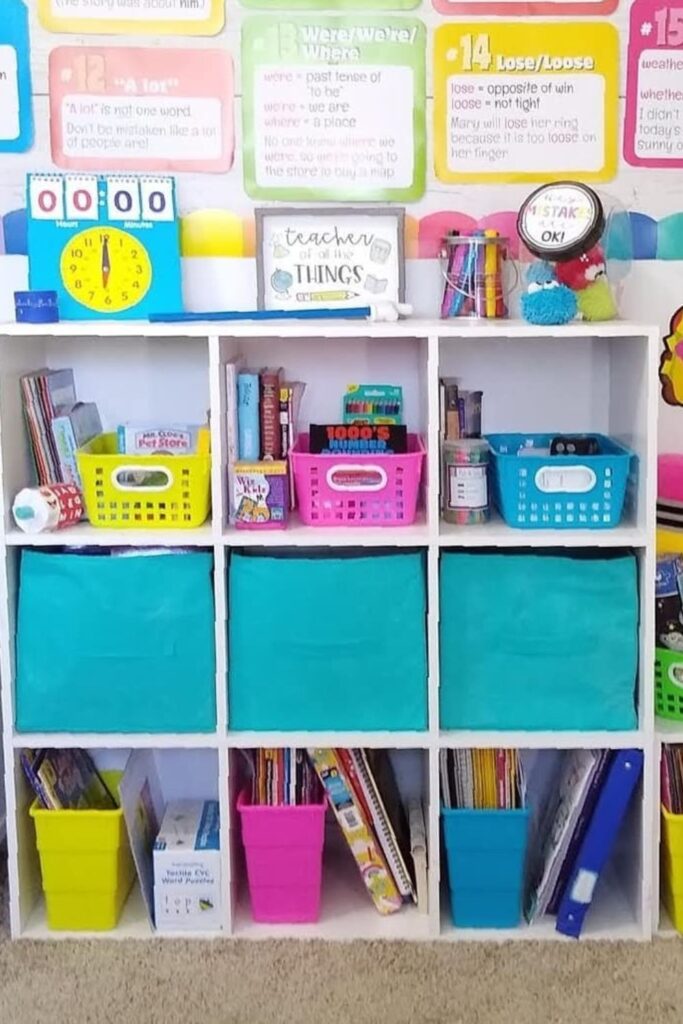
Cubby shelves are useful when you have many different types of homeschool materials. Instead of treating every cubby as another space that needs filling, give each one a broad purpose.
One may hold games, another science supplies, another books, and another resources for one particular child. Use baskets or bins inside the cubbies for smaller pieces.
Try to leave some open space as well. When every shelf is tightly packed, it becomes harder to see what you own and harder for children to return things properly.
Sometimes the best improvement is not adding another container but removing materials that are no longer being used.
11. Vertical Magazine Files
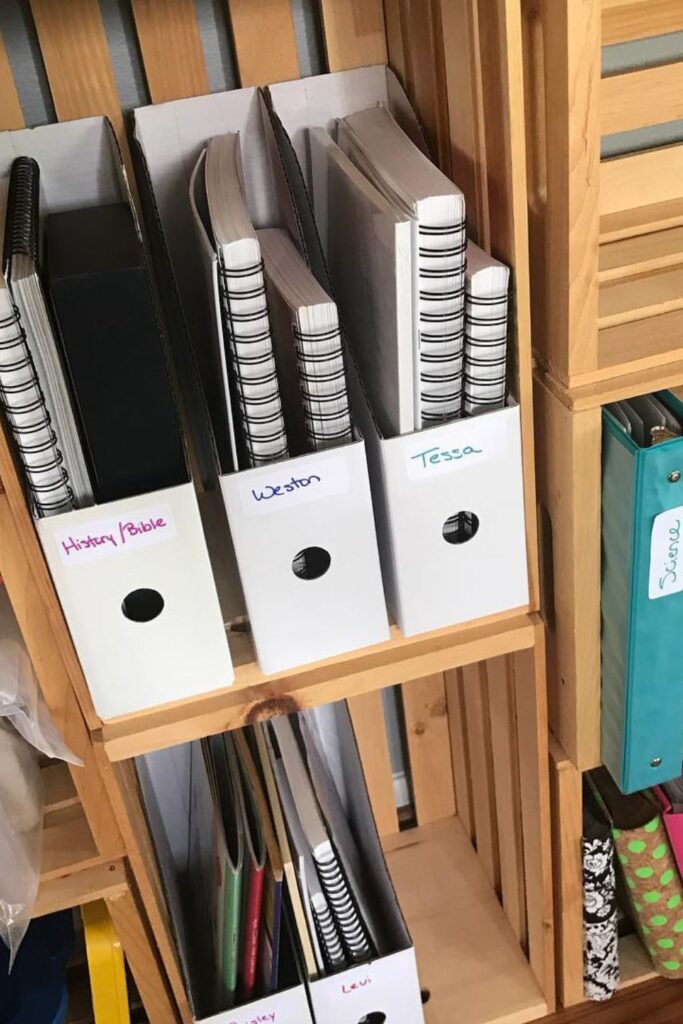
Workbooks and folders are much easier to manage when they are stored upright rather than stacked.
Magazine files let you pull out one subject without lifting everything sitting above it. Label each file by subject, child, or purpose.
You might have one for maths, one for reading, one for writing, and one for work that is currently being completed.
This system is especially helpful on narrow shelves because it uses vertical space efficiently. It may not be the most visually exciting organization idea, but those simple systems are often the ones that save the most time during an ordinary school day.
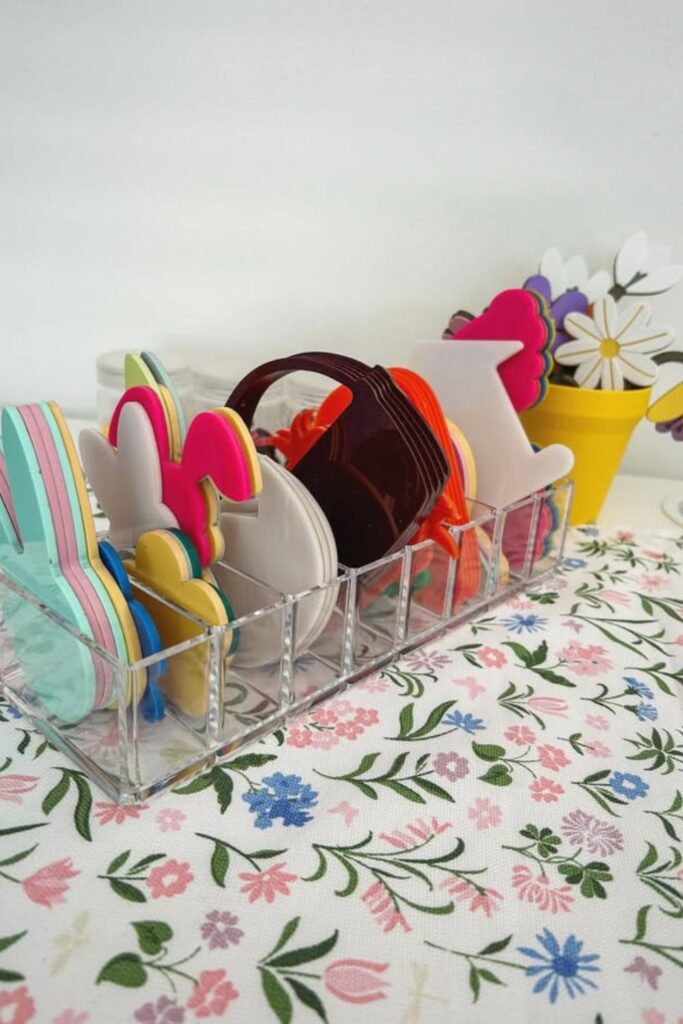
12. Thematic Organizer Tray
Not every learning resource needs permanent storage. For seasonal activities, unit studies, or short projects, use a tray or divided organizer as temporary storage.
Put everything connected to the current topic together. A nature unit might include identification cards, small specimens, books, and activity pieces. A holiday craft week may use the same tray completely differently.
When the topic is finished, empty the tray and reuse it. This prevents temporary materials from slowly becoming permanent shelf clutter.
Clear trays are especially useful for small pieces because you can see everything at a glance.
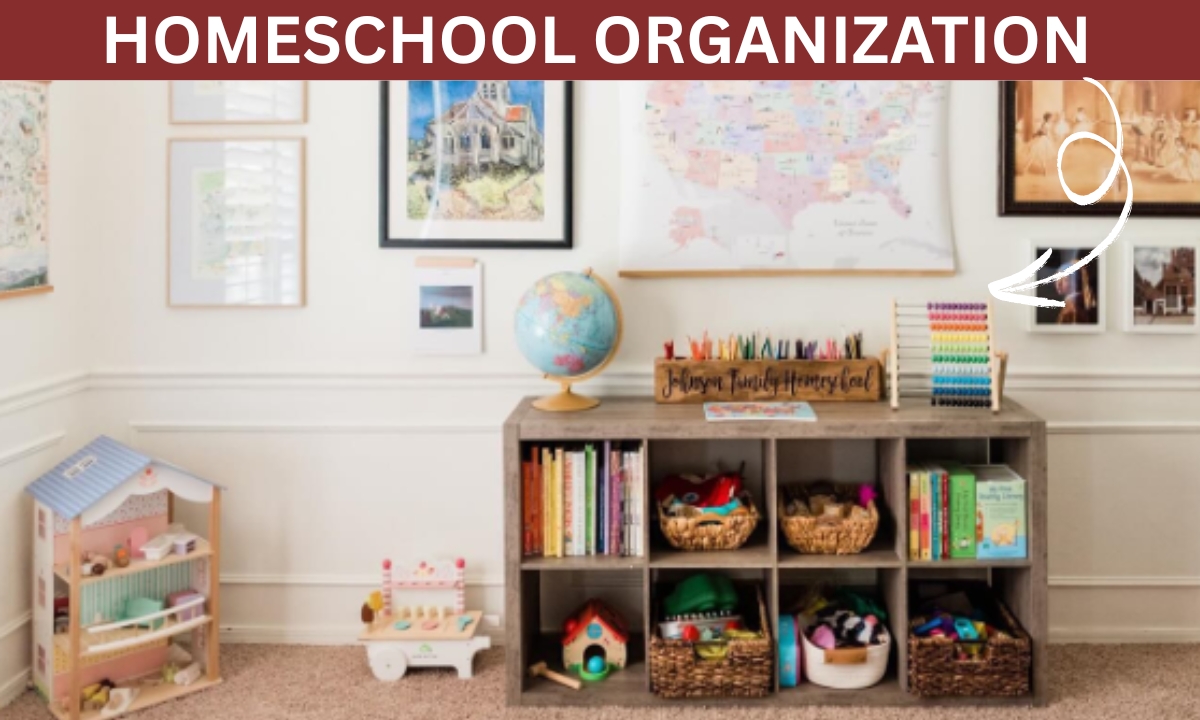
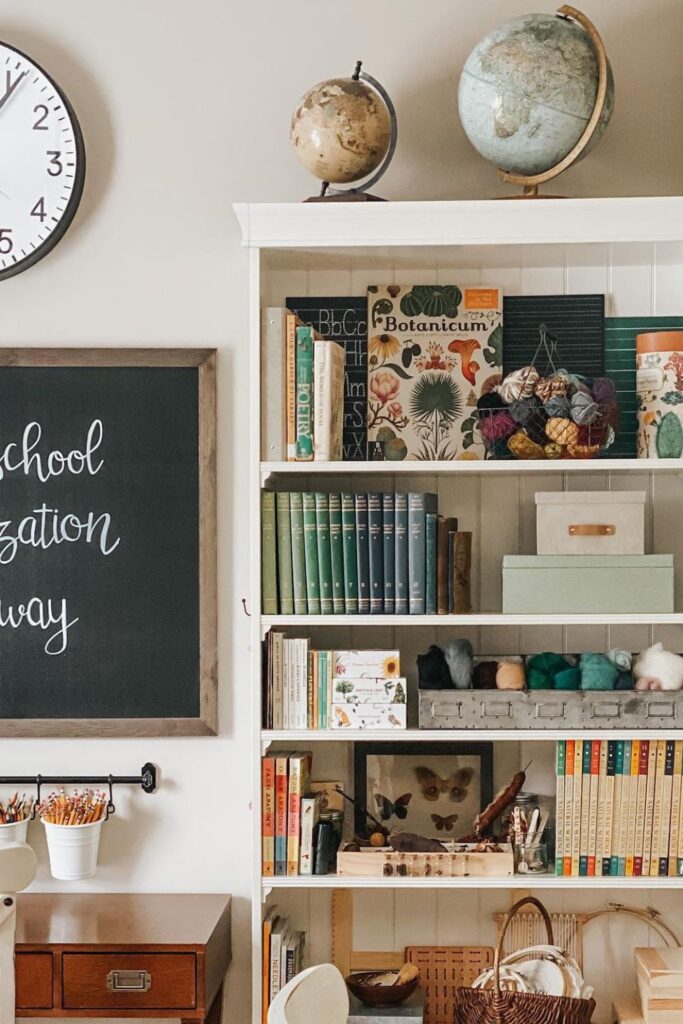
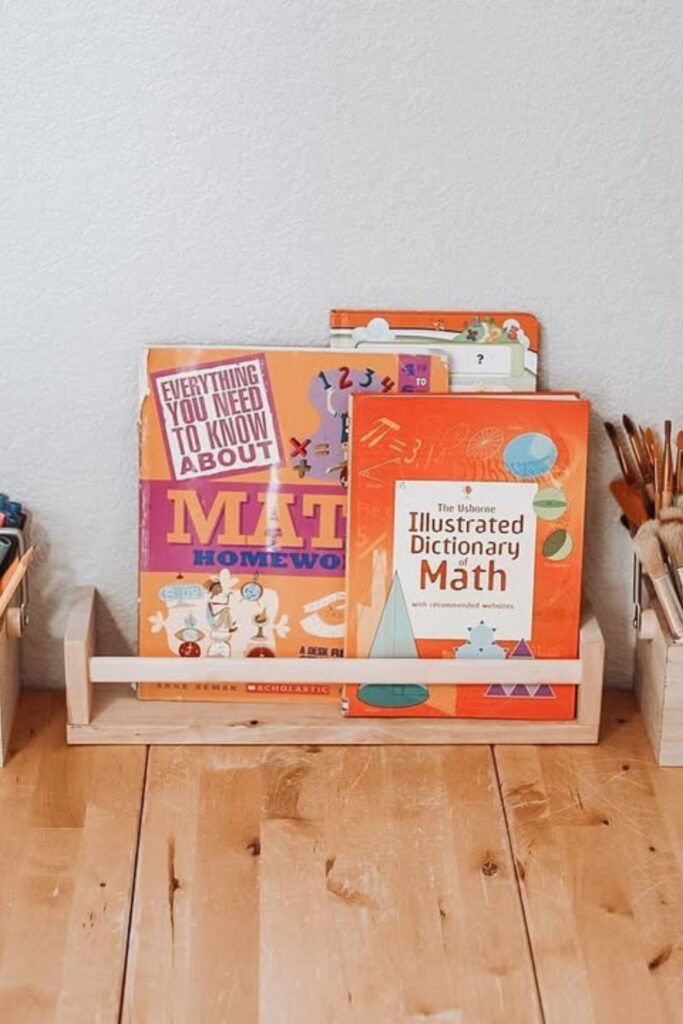
13. Bookshelf Corner
A homeschool bookshelf works best when the things you actually use are easy to reach. Keep current curriculum, reference books, and frequently read books in the most convenient areas.
Books you are not using right now can move higher, lower, or into longer-term storage. That is often better than trying to display the entire family library in one learning area.
Use boxes or baskets for awkward supplies that do not sit neatly beside books. You can also leave some room for a globe, science model, or current project.
A useful homeschool bookshelf should still feel like part of your home rather than a shelf you are afraid to touch because everything has been arranged too perfectly.
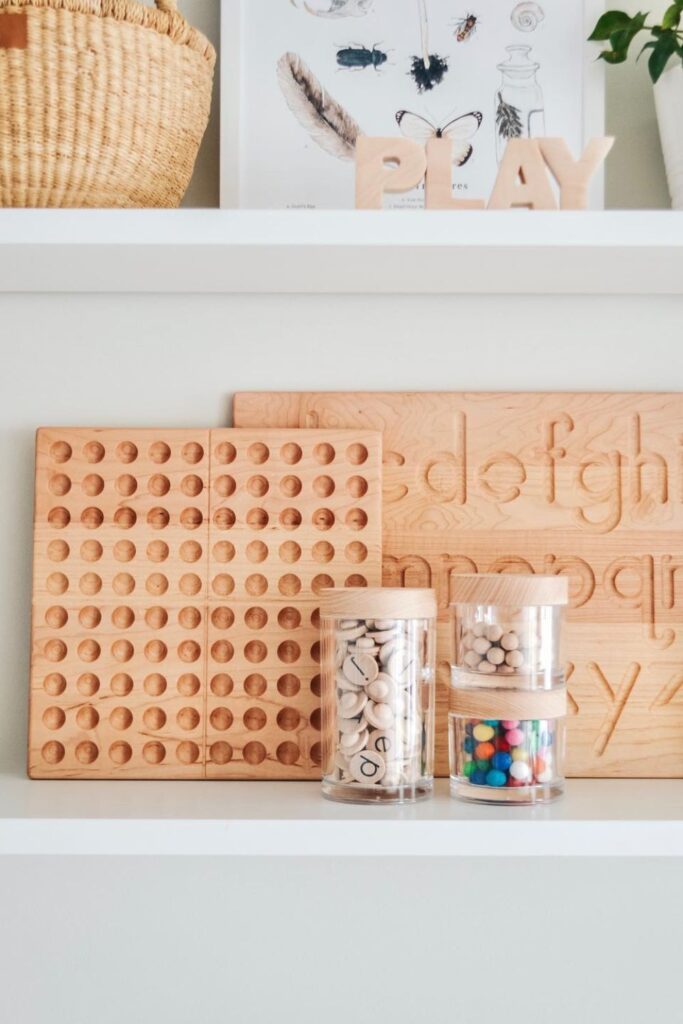
14. Wooden Learning Shelf
Open learning shelves are especially useful for younger children because they can see the activities available to them.
The important part is limiting what is displayed. Choose a manageable number of materials and give each one enough space that children can take it out without moving everything else.
When interest fades or your lessons change, rotate the activities. This can make a small collection feel fresh without buying more.
Natural wood and neutral storage can create a calm look, but there is no reason to replace useful colourful resources just to match an aesthetic. The system is useful because it is simple and accessible, not because everything matches.
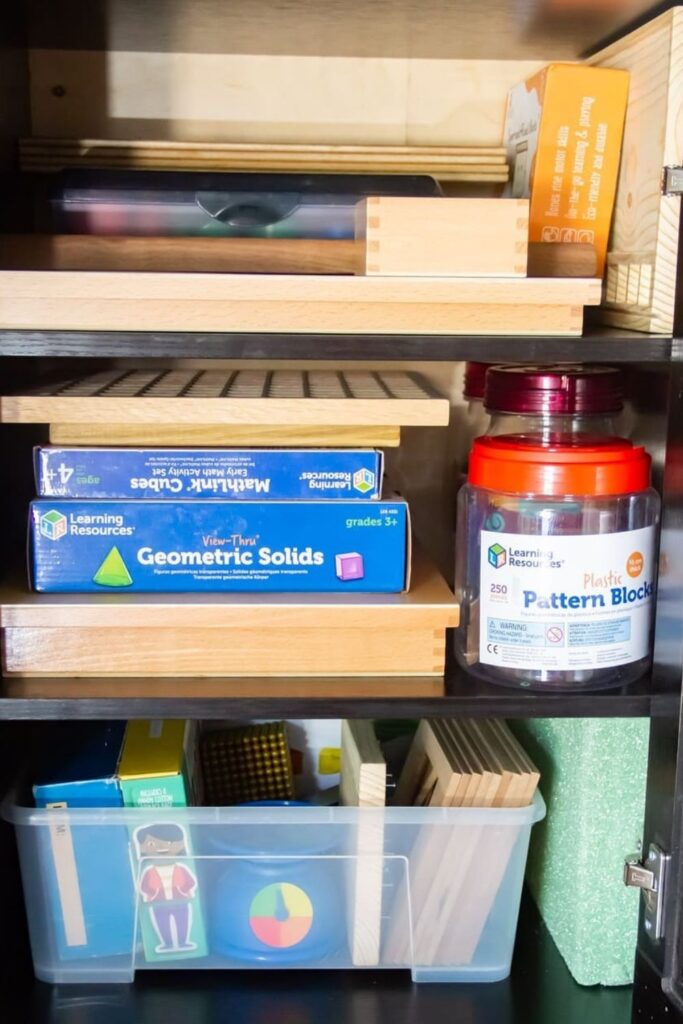
15. Cabinet Material Storage
Closed cabinets are helpful for homeschool supplies you need but do not necessarily want visible all day.
Science kits, extra curriculum, larger manipulatives, backup stationery, puzzles, and trays can all live behind doors. Inside, divide the cabinet into broad zones so it does not become one hidden pile.
Keep heavy materials low. Store rarely used items higher up. Reserve the easiest shelves for the resources you reach for most frequently.
Closed storage is particularly useful when your homeschool area is part of a dining room or living room. At the end of the school day, closing the doors can make the space feel like home again.
16. Open Tabletop Caddies
A supply caddy is one of the easiest solutions for families who homeschool at the kitchen or dining table.
Keep pencils, markers, scissors, glue, rulers, and other everyday tools together. Bring the caddy to the table when lessons begin and put it away afterward.
You can use one shared caddy or give each child their own. Avoid overfilling it. If children have to move several things just to find a pencil, the caddy is holding too much.
The point is to keep the supplies you reach for constantly in one portable place so the table does not need to remain a permanent school desk.
17. Clear Bin System
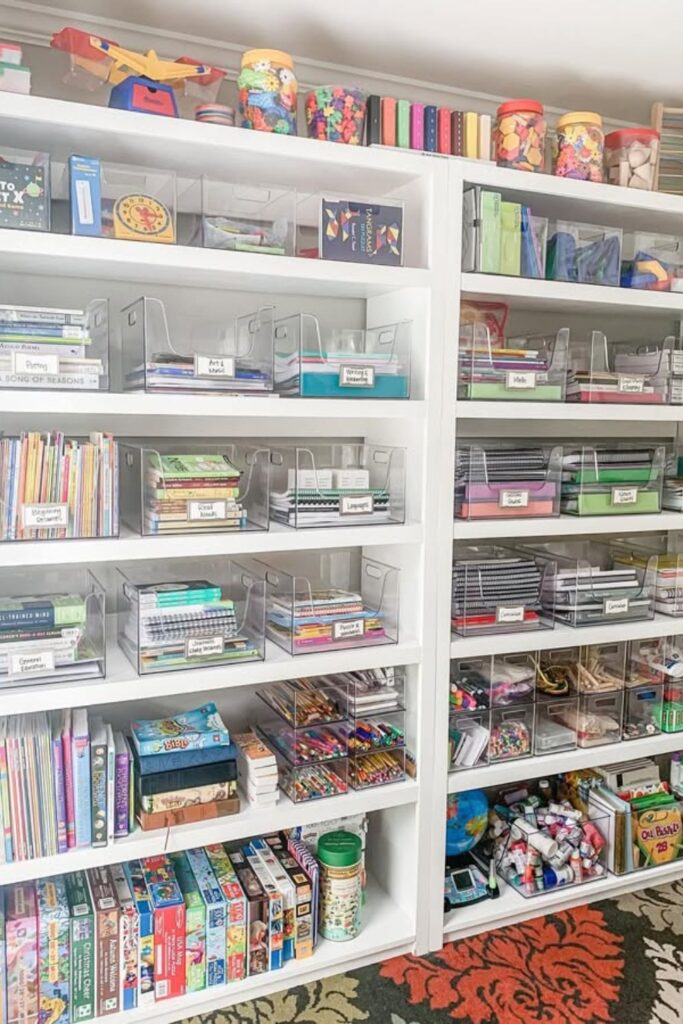
When you have a larger collection of resources, clear bins can make shelves easier to understand.
Use broad categories such as art, phonics, maths, science, games, or sensory materials. The transparent sides let you see what is inside without opening each container, which also reduces the chance of buying something you already own.
Keep the most frequently used bins within easy reach. Backup materials can sit higher or farther away.
Try not to make the categories overly specific unless you have enough items to justify it. The simpler the system, the more likely everyone in the house is to use it properly.
18. Basket Book Holders
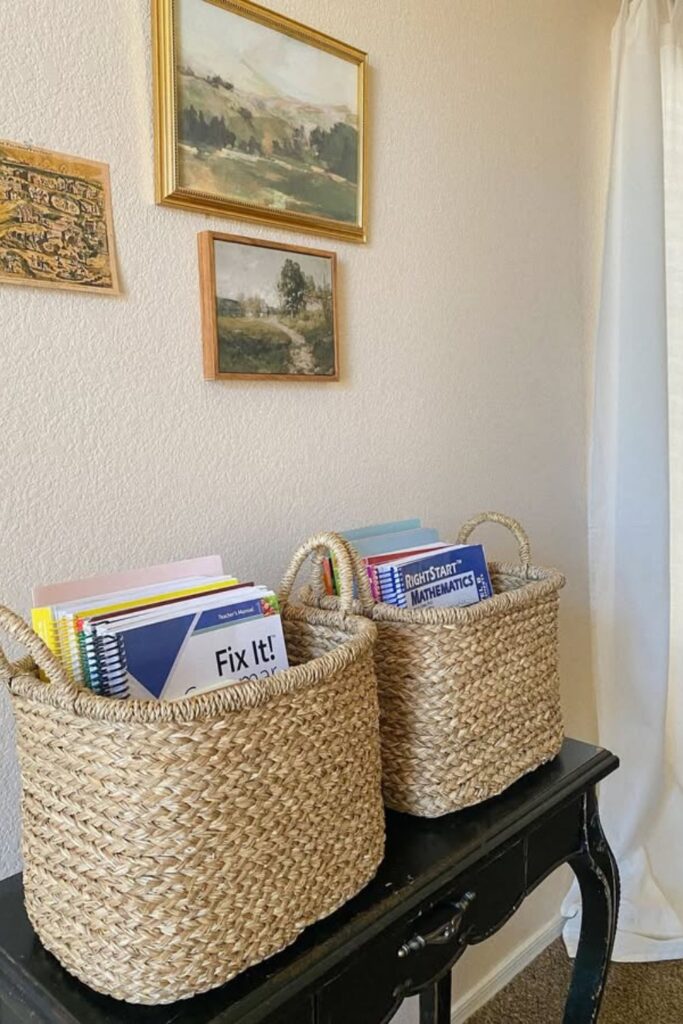
Baskets are useful when you want school materials to blend into the rest of your home.
Use one for current curriculum, one for reading books, or give each child their own basket. Then the whole collection can move easily from a shelf to the table and back again.
For younger children, baskets can also make picture books easier to browse because they can flip through covers rather than reading titles along a tightly packed bookshelf.
You do not need matching baskets. Use what you already own if it works. A practical system that your family understands is more valuable than perfectly coordinated storage.
19. Visual Daily Schedule
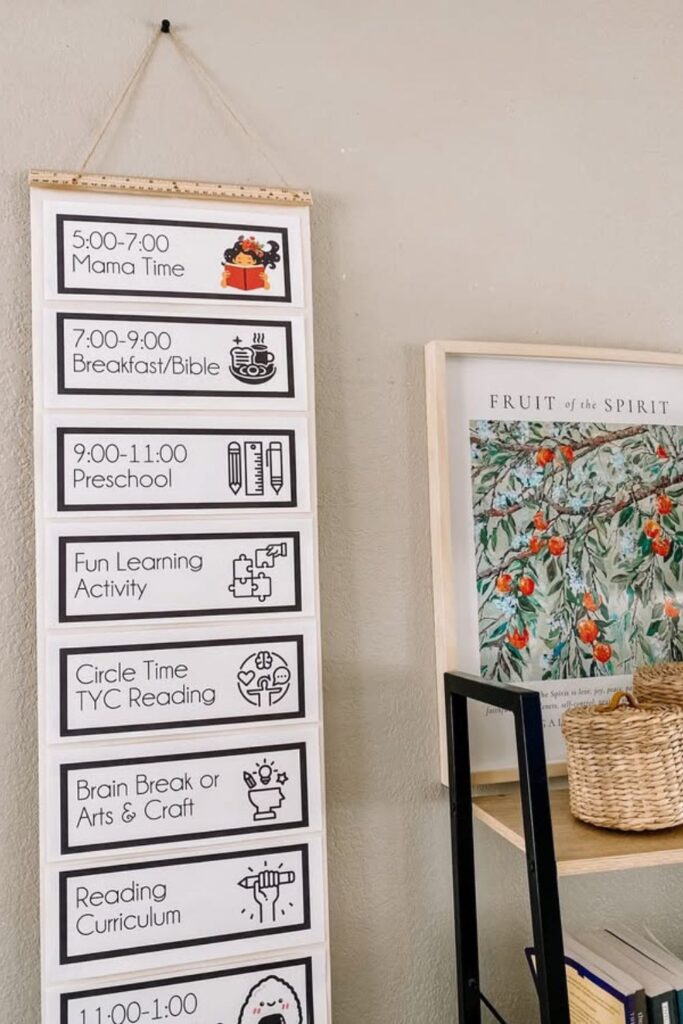
A visual daily schedule can be more useful than another storage container if the bigger problem is knowing what happens next.
Keep the schedule simple. Show the main parts of the day rather than trying to plan every minute. For younger children, pair words with pictures. Older children may prefer a whiteboard or checklist they can mark themselves.
The schedule should create predictability without making the day rigid. If maths takes longer than expected or everyone needs an earlier break, change the plan.
A schedule is there to support the family, not to become another thing everyone has to perform perfectly.
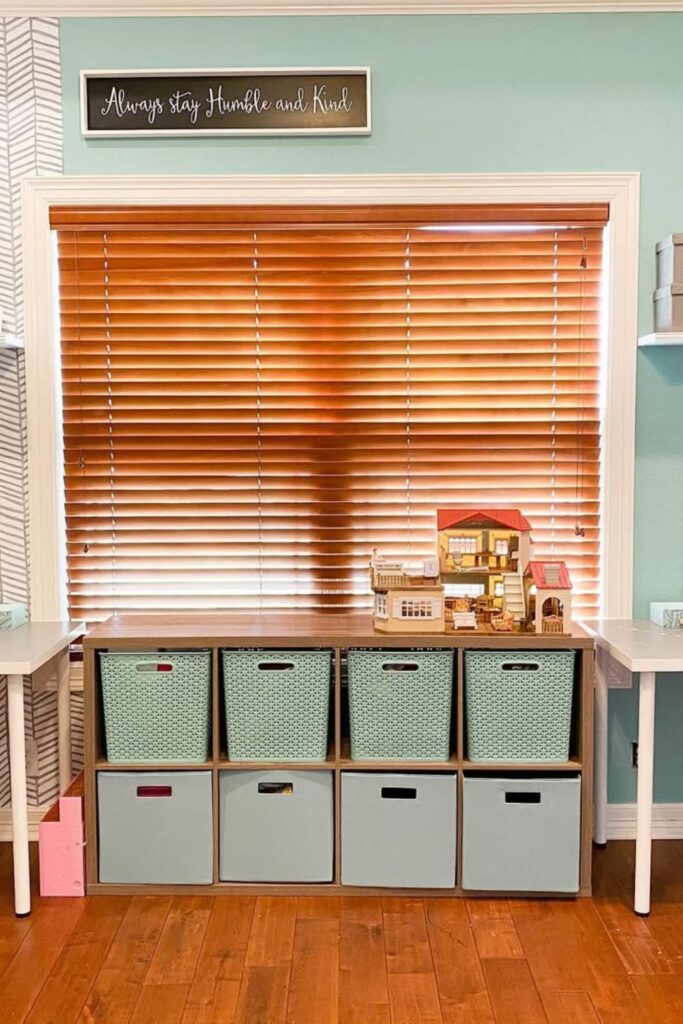
20. Twin Desk Setup
Separate desks can work well when siblings need more personal space.
Give each child their own working surface and a small amount of personal storage. Shared supplies can stay in a central shelf or cubby unit.
This setup gives children a sense of ownership without forcing you to buy two of everything. Think about how your children actually concentrate when positioning the desks.
Some enjoy working side by side. Others do better with a little distance or visual separation. The best arrangement is the one that creates fewer distractions during the day.
21. Mixed Shelf Wall
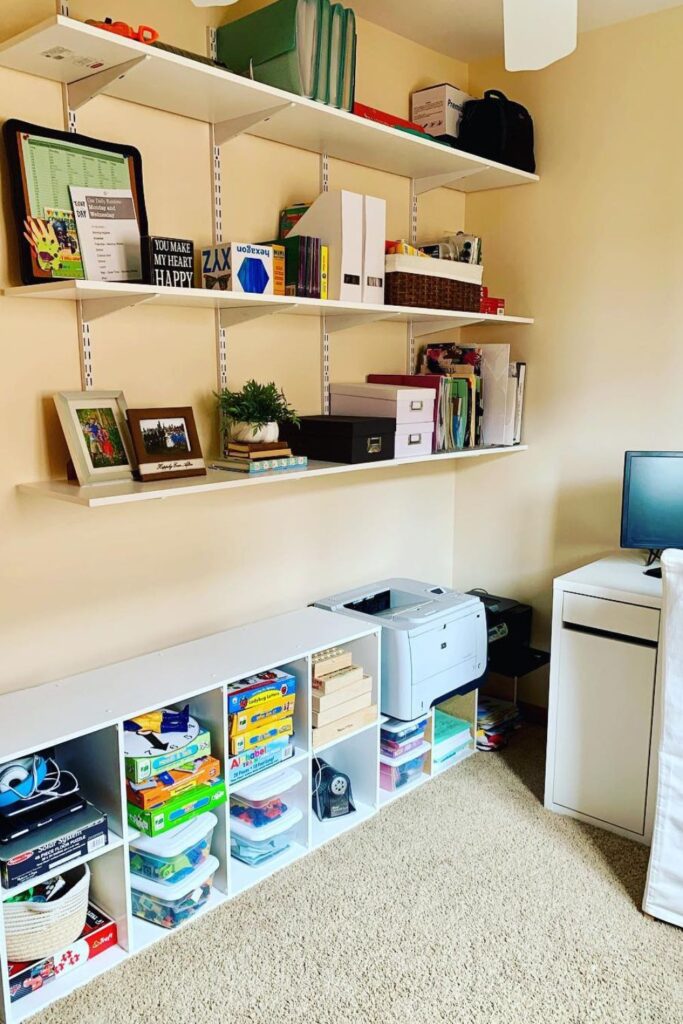
Combining open shelves with lower storage gives you somewhere for both attractive everyday materials and the things you would rather keep contained.
Current books and curriculum can stay visible. Printer paper, backup supplies, games, and bulkier resources can go into bins or lower cubbies.
If your homeschool area is small, use the height of the wall rather than adding more furniture to the floor. Floating shelves can hold lighter resources while a sturdy unit below handles heavier items.
For more ideas that work when space is limited, our Small House Organization guide has systems that can also translate well into homeschool storage.
22. In-Home Library
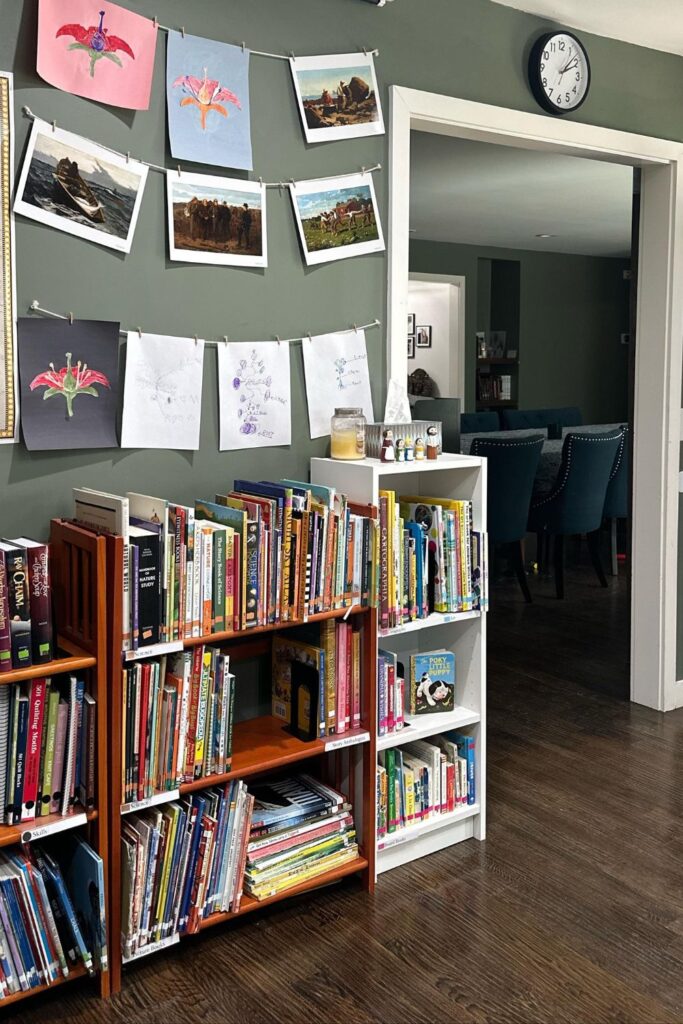
If reading is a big part of your homeschool, creating a dedicated book area can make sense.
That does not require built-in shelves or an entire room. One bookcase, one wall, or even one comfortable corner can work.
Organize the books in whatever way your family can realistically maintain. That might mean fiction and non-fiction, subjects, reading levels, or simply current books and everything else.
Add a chair, floor cushion, or small reading spot if you have space. The existing setup also includes children’s artwork, which is worth keeping. A homeschool space feels warmer when it includes evidence of the children who actually use it.
23. Rolling Resource Cart
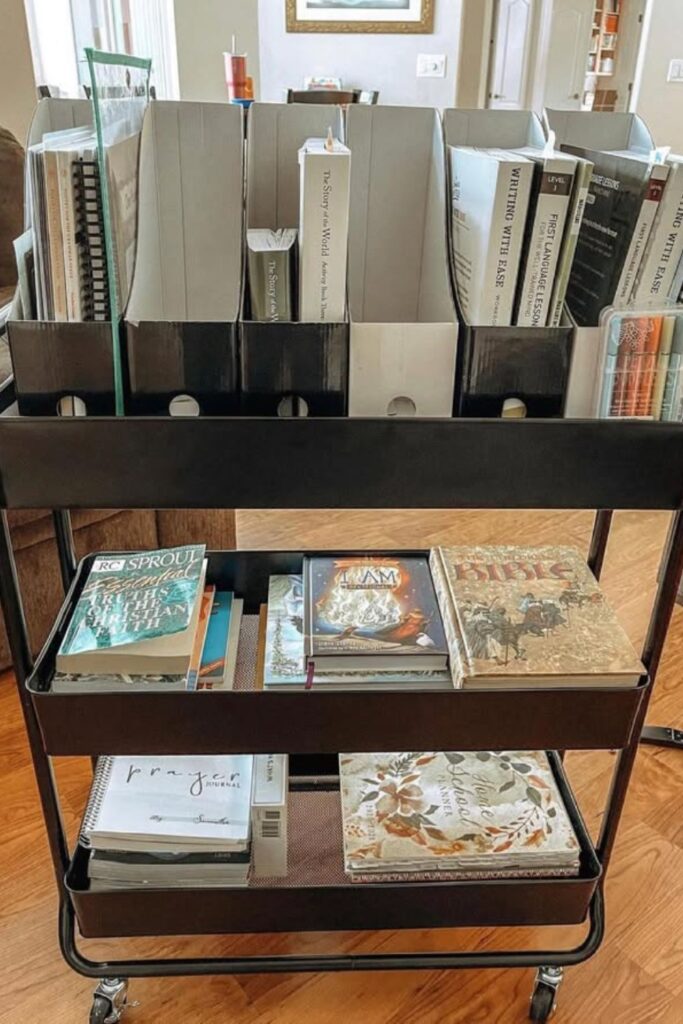
A rolling resource cart is a good solution when lessons happen in several rooms.
Instead of trying to keep every homeschool book on it, use the cart for the materials you are currently working through. The top tier might hold today’s curriculum, another can hold notebooks and workbooks, and the bottom may hold independent reading or activities.
At the end of the day, roll everything away. This can be much easier than trying to create a permanent classroom in a home that does not have space for one.
As your curriculum changes, the contents of the cart can change too.
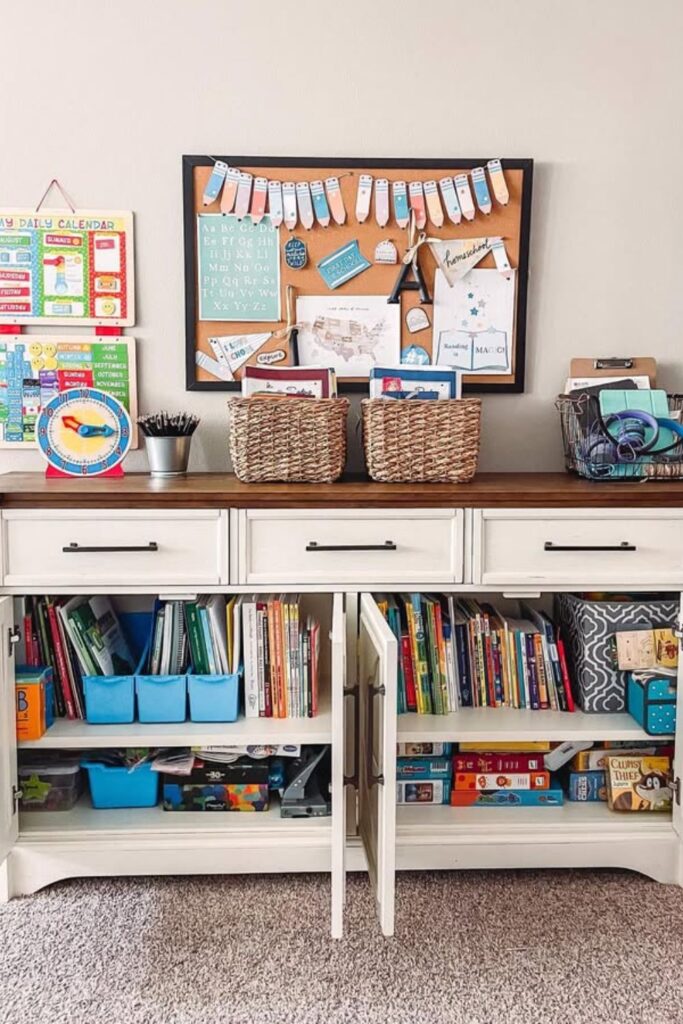
24. Multi-Function Sideboard
A sideboard is one of the best storage options when homeschooling happens in a shared living space.
From the outside, it still looks like normal household furniture. Inside, bins and baskets can hold curriculum, learning games, books, manipulatives, and supplies.
Keep the things you use regularly near the front. Materials for later in the year can sit farther back. The top can hold a planning basket, current books, or a calendar without turning into another permanent pile.
Then when lessons are finished, close the doors. You do not need furniture specifically marketed as homeschool storage. Sometimes ordinary home storage does the job better because it lets the room return to normal after the school day.
What Should Stay Within Easy Reach?
The easiest storage should go to the things you use most often.
Current workbooks, pencils, paper, scissors, glue, frequently used maths tools, current reading books, and this week’s lessons are usually worth keeping close to the main learning area.
Things used occasionally can move farther away. A science kit you open twice a month does not need the best drawer beside the table. Neither does curriculum you will not use until later in the year.
When storage feels overcrowded, look at frequency first. The resources you use every day should not have to compete with things you rarely touch.
How to Organize Homeschool Papers
Try separating paper based on what happens next. Current lesson pages belong with current work. Completed papers that need to be kept should move into their own filing system. Artwork and special pieces can have a separate keepsake space.
Anything you definitely do not need should leave the learning area rather than joining a growing pile of papers you plan to deal with later.
Weekly folders are helpful for upcoming work because they prevent future lessons from mixing with today’s materials. If paper is the biggest source of clutter in your homeschool, our Paper Organization Ideas article goes deeper into folders, files, and loose-paper storage.
How to Organize Homeschool Without a Dedicated Room
You do not need a separate homeschool room. You need a place where learning can happen and somewhere for the materials to go afterward.
A rolling cart can hold your current curriculum. A sideboard can hide supplies in a living room. One cupboard can become the school cupboard. A basket can carry this week’s books. Clear pouches can move pencils and learning tools to the kitchen table.
Portable systems are especially useful in smaller homes because the space does not have to stay permanently set up for school. The same table can hold maths in the morning and dinner in the evening.
How Much Homeschool Storage Do You Really Need?
Before adding more shelves, look at what is already being stored. Some resources are being used now. Some are for later. Some need to be kept long term. And some may no longer be useful to your family.
Those categories should not all compete for the same easy-access storage. Current resources deserve the best space. Future materials can move farther away. Important records need a proper long-term home.
Sometimes a room feels disorganized because the storage system is poor. Other times there is simply too much being stored. A new container cannot solve that second problem for very long.
Make the System Easy for Your Children to Use
A homeschool organization system works better when the children can understand it too.
Use broad categories. Put everyday supplies where they can reach them safely. Label things in a way that makes sense to the people actually putting them away. And avoid systems that require perfect placement.
It is much easier for a child to return scissors to a container labelled Art Supplies than to remember that the scissors belong in the third section of a complicated organizer. If you want children to help with cleanup, make the correct place obvious and easy to reach.
Try a Short End-of-Day Reset
You do not need to reorganize the whole homeschool area every afternoon. A few minutes is enough.
Put books back where they belong. Return everyday supplies. Clear the main working surface. Move tomorrow’s materials somewhere easy to find. Deal with obvious rubbish and loose paper.
That small reset gives you a much calmer starting point the next morning. The room does not need to look untouched afterward. A homeschool space is being used.
The goal is not perfection. The goal is making the next day easier.
Your Homeschool Space Can Still Feel Like Home
Beautiful homeschool rooms can be useful for inspiration, but they are not a standard you have to meet.
Your family may use mismatched baskets. Your learning table may also be the dining table. Your books may live in the living room. A science project may sit on the counter for several days because it is still in progress.
None of that means the space is badly organized. Choose systems that reduce the amount of searching, moving, and repeated cleanup you deal with during an ordinary day.
The best homeschool organization system is the one that quietly supports your family and lets you spend less time managing supplies and more time actually using them.

Hi, I’m Jenny, the founder of Fizzy Flare, and together with my team, we create practical content to help make everyday life a little easier. I’ve been blogging since 2021 and have worked on several websites over the years. Today, our focus is Fizzy Flare, where we share helpful ideas for organization, DIY projects, printables, self-care, and simple everyday living.