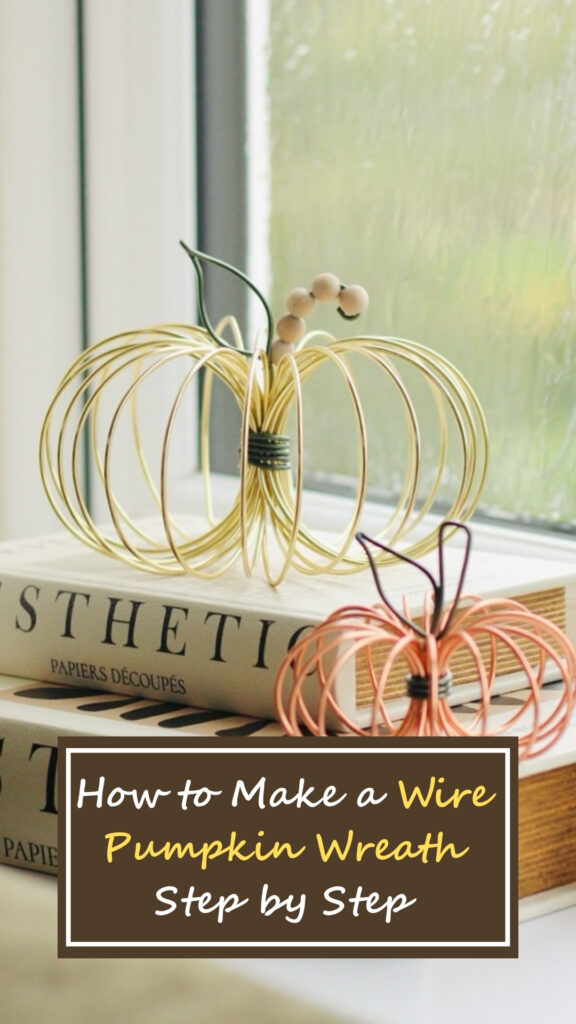
How to Make a Wire Pumpkin Wreath Step By Step

This post may contain affiliate links: full affiliate disclosure.
Every fall, store shelves are packed with beautiful wreaths, but the high prices are far from appealing.
And after spending all that money, you still end up with the same generic design as everyone else.
The good news is, you do not have to settle for that. In this guide, I will show you how to make a wire pumpkin wreath that is affordable, personal, and enjoyable to create.
With just a few low-cost supplies and less than an hour of your time, you can craft something unique that truly reflects your style.
Contents
What You Need Before Starting?
- Wire Pumpkin Wreath Frame
- Deco Mesh / Jute Rope / Wood Beads
- Faux Flowers & Greenery
- Pipe Cleaners or Floral Wire
- Decorative Ribbon
- Glue Gun & Glue Sticks
- Scissors and Wire Cutters
Save this article for later! 👇👇
Step-By-Step Wire Pumpkin Wreath Tutorial
1. Gather Materials
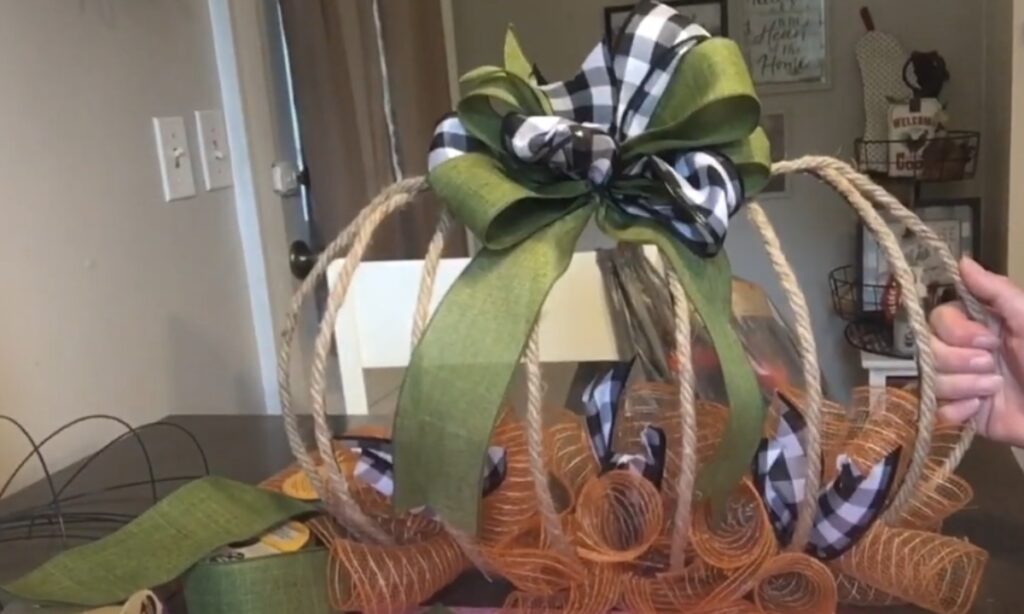
You will need a Dollar Tree pumpkin wire frame, two nautical ropes, 10-inch orange mesh, green and buffalo check ribbons, eucalyptus sprigs, hot glue, scissors or a rotary cutter, and either zip ties or a pipe cleaner.
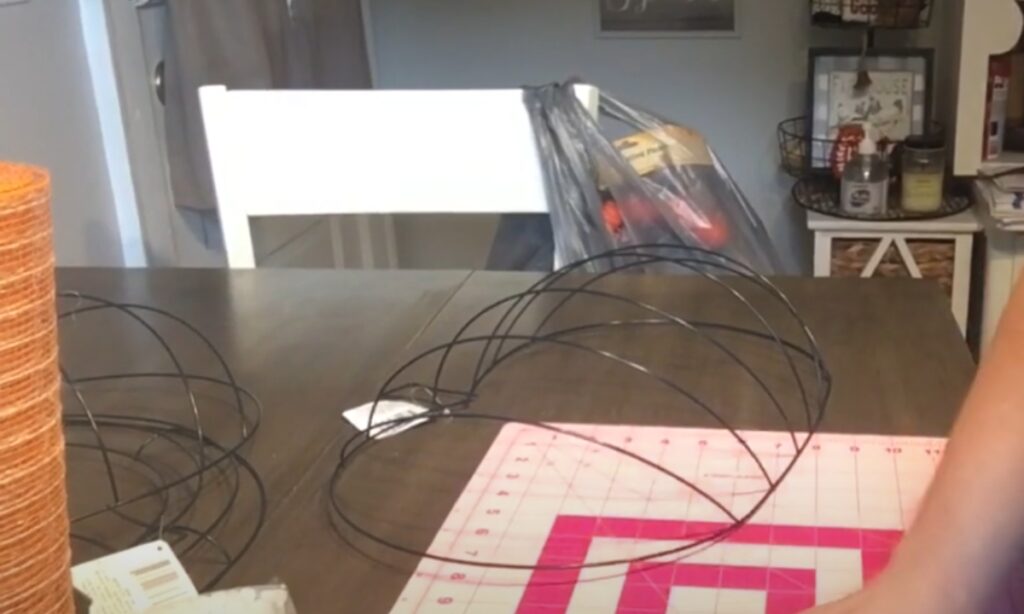
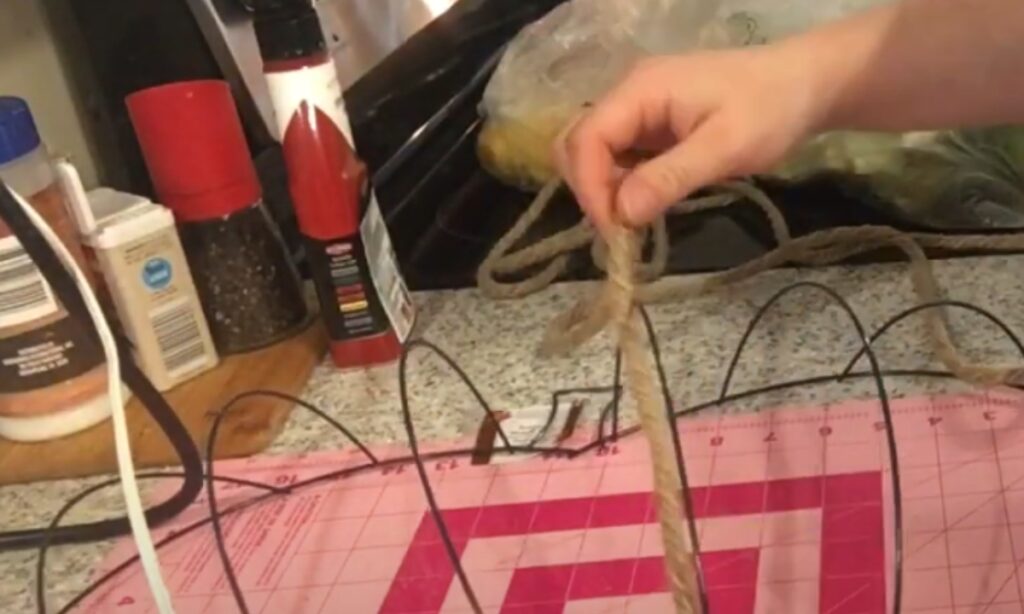
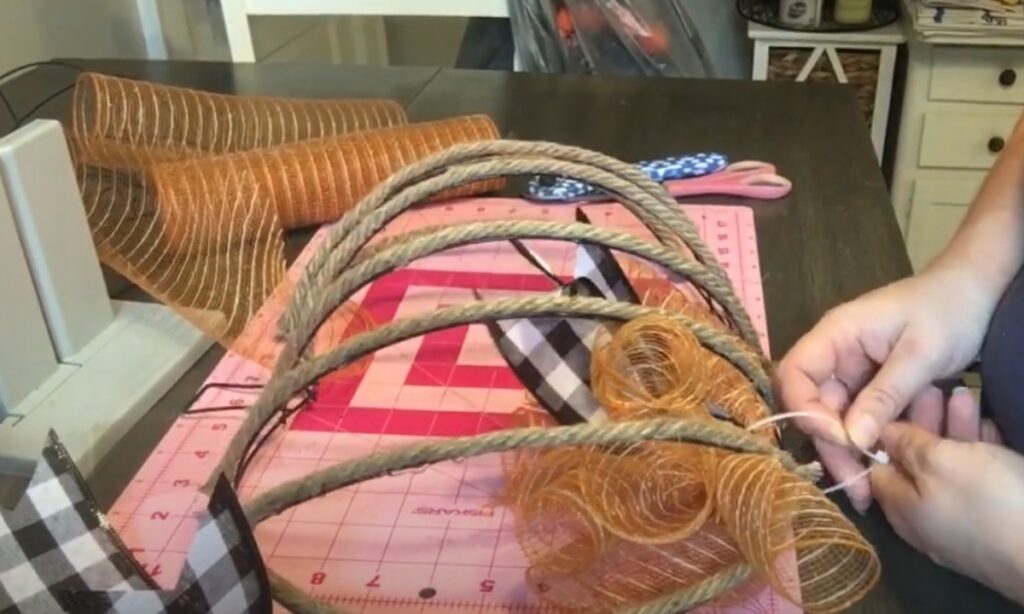
2. Prep the Frame and Rope
Cut off the plastic tips from the ends of the rope. Start at the center rib of the frame and glue the rope from the bottom to the top.
Repeat this for every rib, leaving the top and bottom wires uncovered.
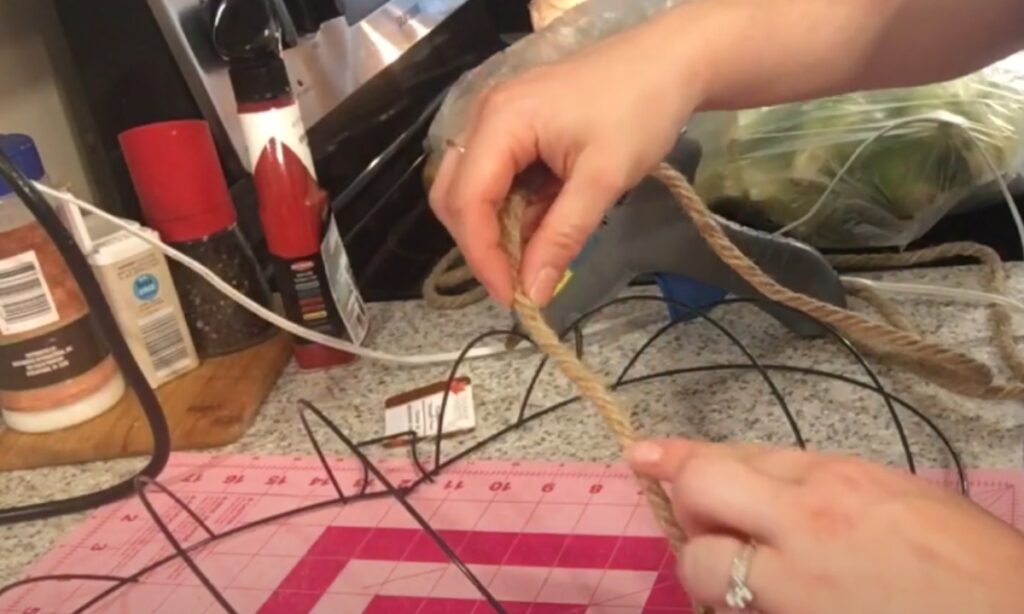
3. Cover All Ribs
Keep gluing the rope across all the vertical ribs of the pumpkin. Trim the ends of the rope neatly.
Do not worry if the ends show because the bow will cover them.
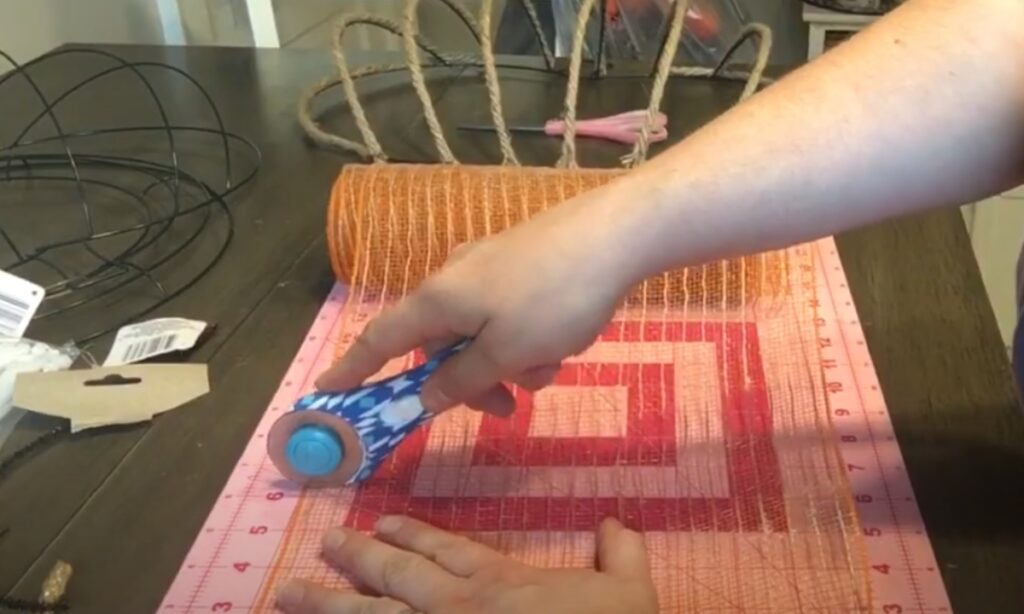
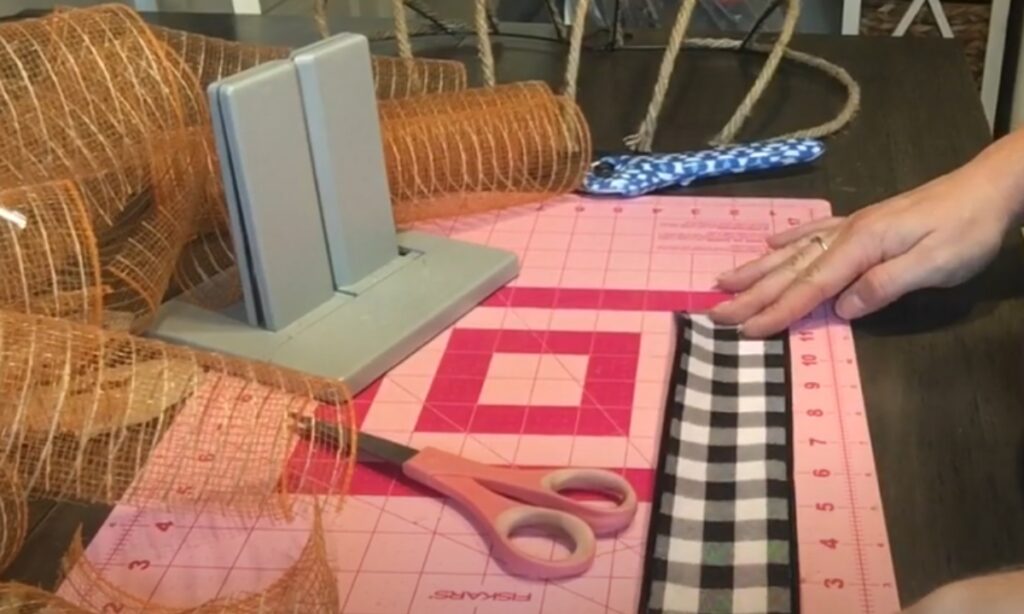
4. Cut Mesh and Ribbon
You’ll just cut fifteen mesh pieces about six inches each and roll them into curls.
After that, cut three ribbons, twelve inches long, and snip the ends into a dovetail.
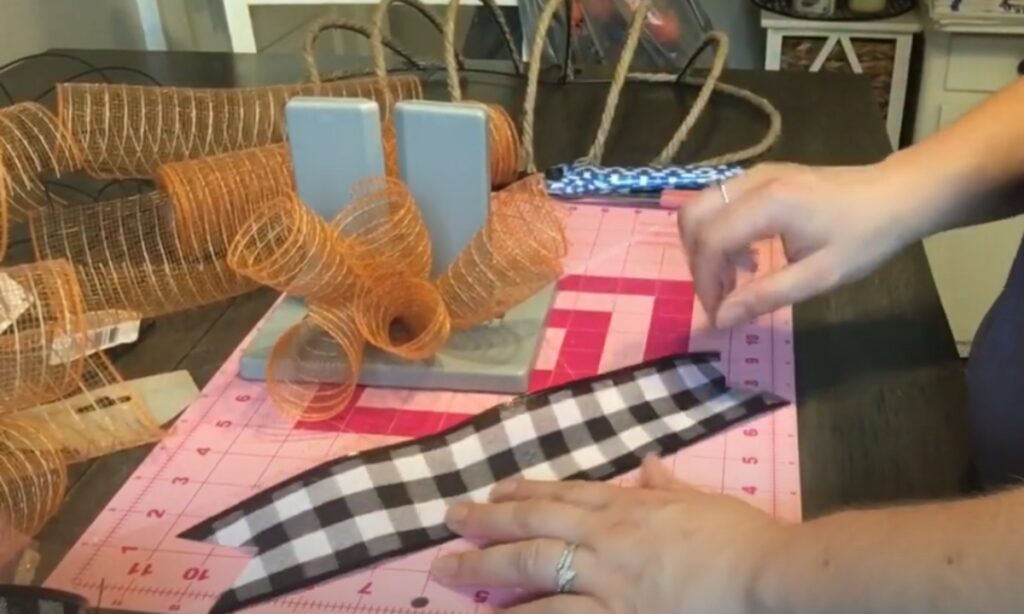
5. Make Mesh Bundles
Take five mesh curls and one ribbon strip. Pinch them together in the center and secure with a zip tie.
Repeat this step until you have three complete bundles.
6. Attach the Bundles
You’ll grab a zip tie, attach one bundle on the lower left of the pumpkin, another on the lower right, and the last in the middle.
After that, just fluff the curls to cover the gaps.
7. Add the Bow
You just need to make a bow with your ribbon, trim the ends on a little angle, and then fasten it to the pumpkin stem with a zip tie or even a pipe cleaner – whatever’s easier for you.
8. Finish with Eucalyptus
Take four small eucalyptus sprigs and remove them from their stems. Hot glue two sprigs on each side of the bow, tucking them neatly behind it.
Adjust everything, trim any extra zip ties, and hang your pumpkin wreath.
Styling & Color Ideas for Your Wreath
Making your own wire pumpkin wreath gives you the chance to create a look that fits your personal style.
For a warm fall feeling, pick orange mesh, sunflowers, and plaid ribbons.
If you want something gentler, go with a neutral farmhouse style using cream colors, wooden beads, and burlap bows.
For a sleek, modern look, choose white mesh, eucalyptus, and gold touches, or add a Halloween twist with black mesh, purple accents, and sparkly pumpkins.
Common Mistakes and Quick Fixes
When you are new to making a wire pumpkin wreath, you might run into a few small problems, but they are simple to solve.
If your mesh looks a little lopsided, make sure you cut all the strips to the same length about 10 inches is good and fluff each one as you attach it.
When your decorations keep shifting, use floral wire or pipe cleaners to hold them firmly in place before you add any glue.
If the wreath seems a bit thin, you can add more mesh or some extra greenery to give it more body.
Finally, always choose wired ribbon to create bows that look tidy and hold their shape.
Budget Hacks & Seasonal Reuse Tips
Making a beautiful wire pumpkin wreath does not have to cost a fortune.
You can find most supplies like wire frames, mesh, jute, fake flowers, and ribbons at Dollar Tree or other cheap stores.
This helps you create a stunning wreath for less than $15.
To save even more money, use leftover flowers, ribbons, and beads from old projects instead of buying new ones.
Here is a smart trick: make your wreath modular. Use floral wire to attach decorations instead of gluing them permanently.
This way, you can change the decorations each season and use the same frame for Christmas, Easter, Spring, or summer wreaths without starting over.
Conclusion
Making a wire pumpkin wreath is easy, fun, and affordable. With just a few supplies and less than an hour, you can create a one-of-a-kind decoration that fits your style.
Choose a classic fall theme, a cozy farmhouse look, or a fun Halloween design – the choice is yours.
Now that you know the steps, tips, and ideas, gather your supplies and start making your perfect wreath!
FAQs
How long does it take to make a wire pumpkin wreath?
You can finish this project in about 45 minutes to 1 hour, depending on what style and decorations you pick.
Mesh designs will take you a bit more time, while simple jute-wrapped styles let you finish faster.
Can I hang the wreath outdoors?
Yes, you can! Just make sure you choose weather-resistant mesh, artificial flowers, and wired ribbons so your wreath stands up to sunlight and water damage.
If your area gets a lot of rain, place your wreath under a covered porch to help it last.
You may also like to read!
- How to Make a DIY Pin Board – Ultimate Guide
- How to Make a DIY Backpack – Step By Step Guide
- Make Your Own Closet Shoe Rack Like a Pro
- DIY Patchwork Hoodie You Can Actually Make at Home

Fasial is the founder of the Fizzy Flare. He has been a passionate blogger since 2021. He ran three different websites in the past few years. Now he is focusing on Fizzy Flare to build an audience and help them organize their life.