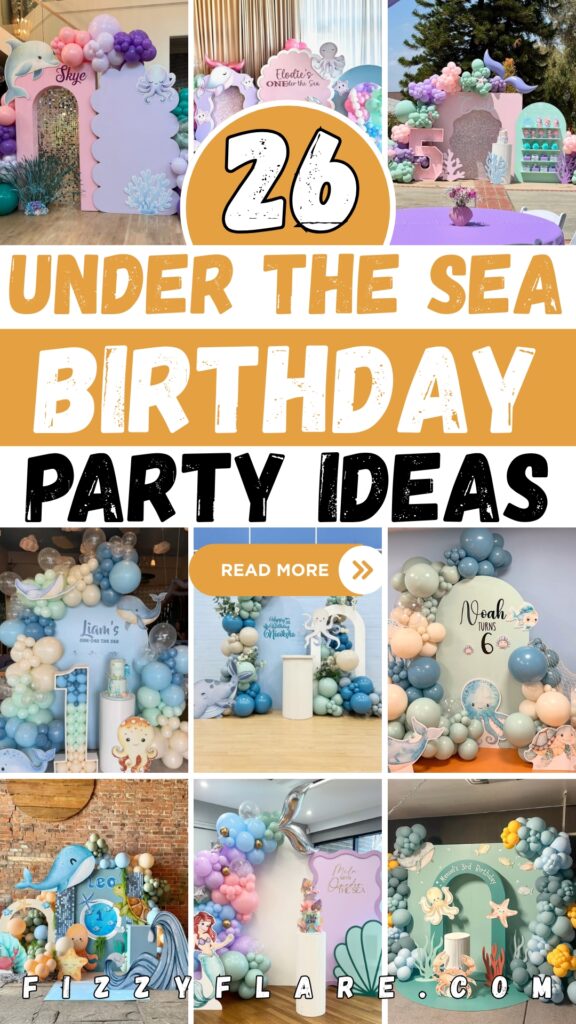
26 Under the Sea Birthday Party Ideas for 2026
This post may contain affiliate links: full affiliate disclosure.
You start decorating for an under-the-sea party with tons of ideas in mind, but somehow it ends up looking messy, overcrowded, or just not as magical as you imagined.
Colors do not match, decorations feel random, and instead of an ocean vibe, it looks like everything was thrown together. If that sounds familiar, you are not doing it wrong.
You just need a better way to organize it. Once you structure your setup correctly, you can make it look clean and coordinated while still feeling like a dreamy underwater world.
In this article, you’ll learn how you can organize a beautiful under the sea theme birthday party with these 26 ideas.
Let’s jump in!
Contents
- 1 How Do I Keep the Setup Organized While Still Creating a Magical Ocean Vibe?
- 1.1 Ocean Entry Arch
- 1.2 Pastel Party Wall
- 1.3 Soft Ocean Layers
- 1.4 Ocean Color Focus
- 1.5 Minimal Ocean Corner
- 1.6 Bubble Balloon Mix
- 1.7 Ocean Arch Frame
- 1.8 Mermaid Feature Corner
- 1.9 Ocean Scene Setup
- 1.10 Memory Display Wall
- 1.11 Coral Color Pop
- 1.12 Pastel Photo Spot
- 1.13 Floral Ocean Blend
- 1.14 Soft Balloon Frame
- 1.15 Balloon Side Stack
- 1.16 Shimmer Center Focus
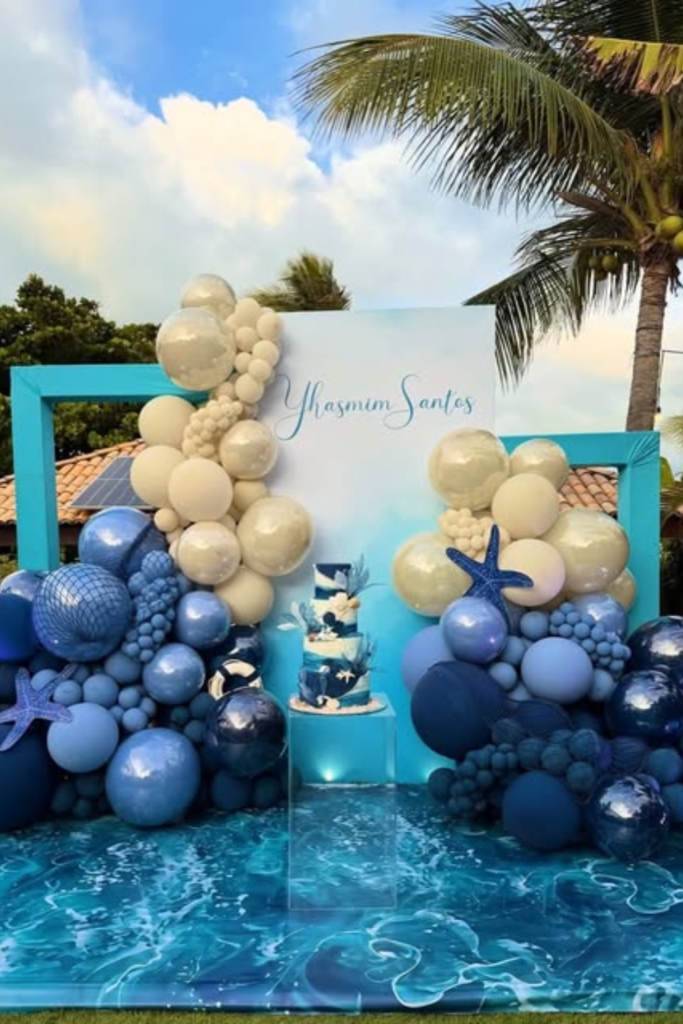
- 1.17 Mermaid Stage Setup
- 1.18 Dual Panel Setup
- 1.19 Poolside Ocean Setup
- 1.20 Layered Ocean Stage
- 1.21 Dessert Table Display
- 1.22 Elegant Ocean Entrance
- 1.23 Pastel Shell Corner
- 1.24 Underwater Scene Build
- 1.25 Outdoor Ocean Setup
- 1.26 Blue Tone Balance
- 2 FAQs
How Do I Keep the Setup Organized While Still Creating a Magical Ocean Vibe?
To keep your setup organized while still creating a magical ocean vibe, stop thinking about adding more decorations.
Start thinking about how everything works together. The magic does not come from using many items. It comes from placing the right things in the right way.
When you control your colors, define clear areas like the cake table and backdrop, and focus on one main highlight instead of decorating everything.
Save this article for later! 👇👇
Your setup instantly feels cleaner and more intentional. At the same time, small details like layered fabrics, soft lighting, and ocean-themed props.
Help you create a dreamy underwater feel without making the space feel crowded. Once you follow this approach.
You get both things at the same time, a setup that looks organized and still feels like a magical under-the-sea experience.
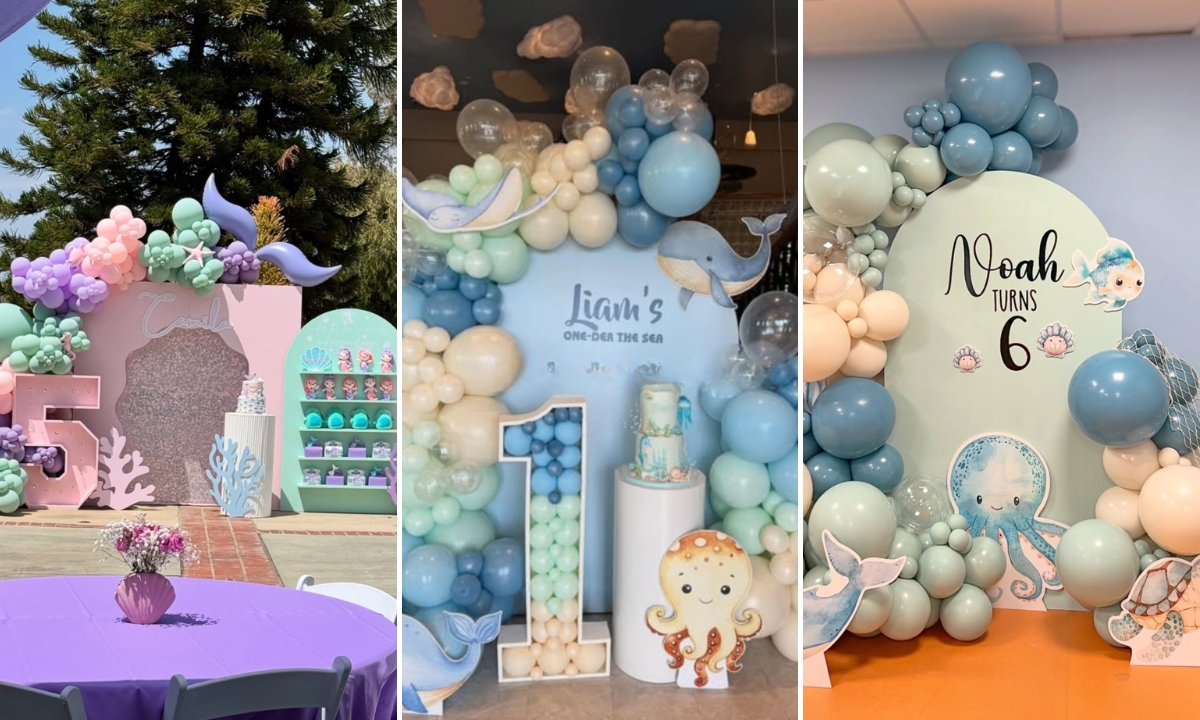
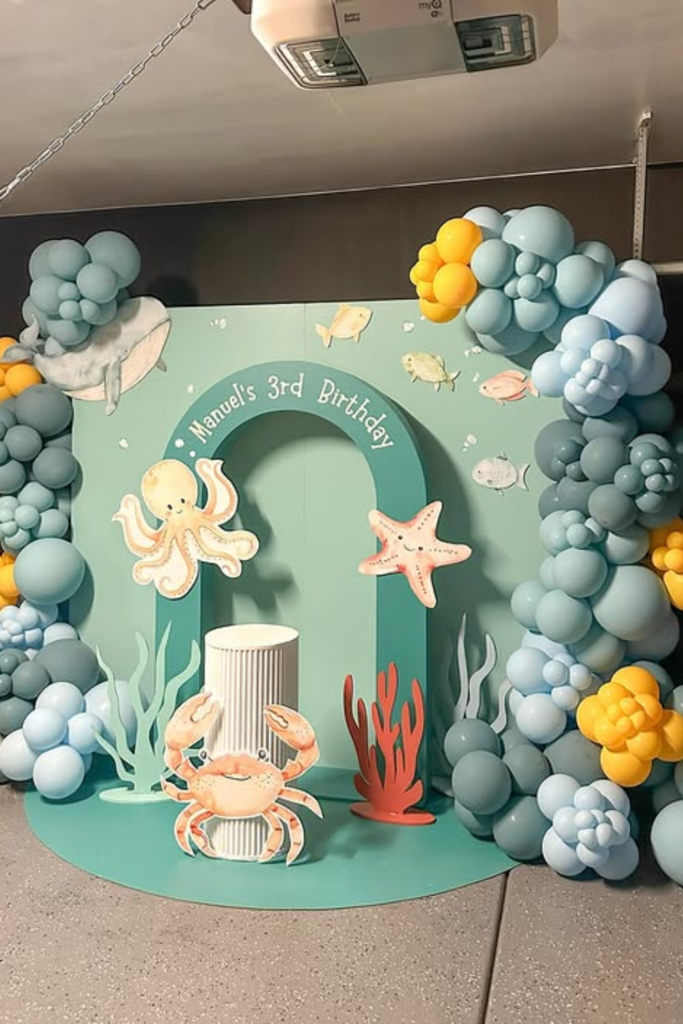
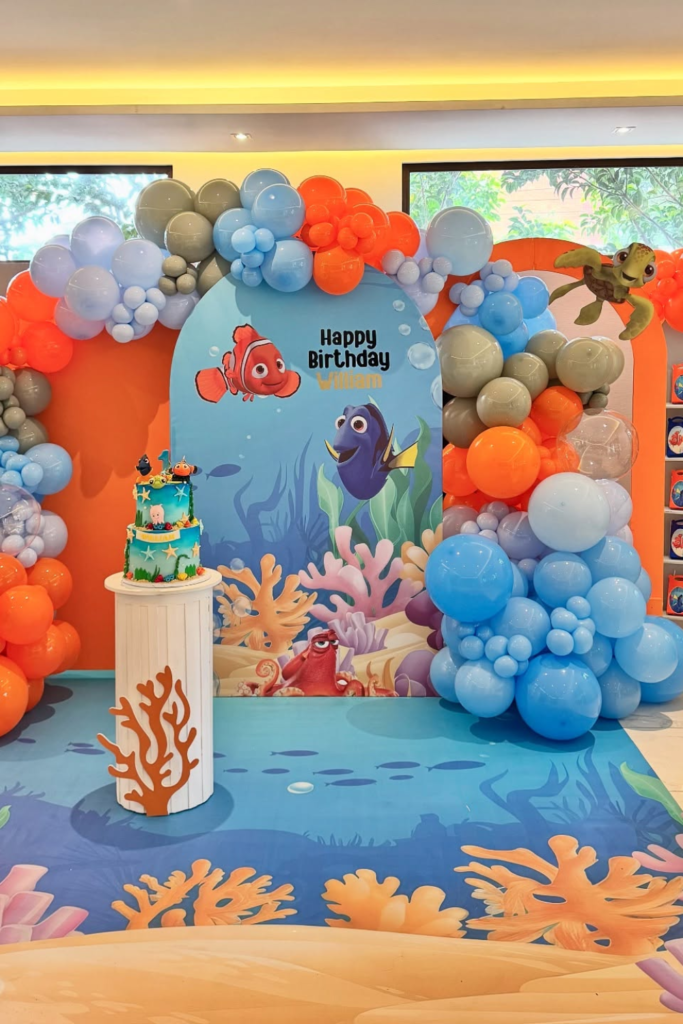
Ocean Entry Arch
Turn your entrance into a photo spot by building a soft pastel arch like this right at the entry or behind the cake table.
Use a foam or board cutout for the arch shape. Layer balloon clusters in 3–4 colors like pink, lavender, and teal to keep it controlled but still playful.
Add sea creatures like a dolphin or an octopus on the sides to anchor the theme. The shimmer curtain inside the arch reflects light beautifully.

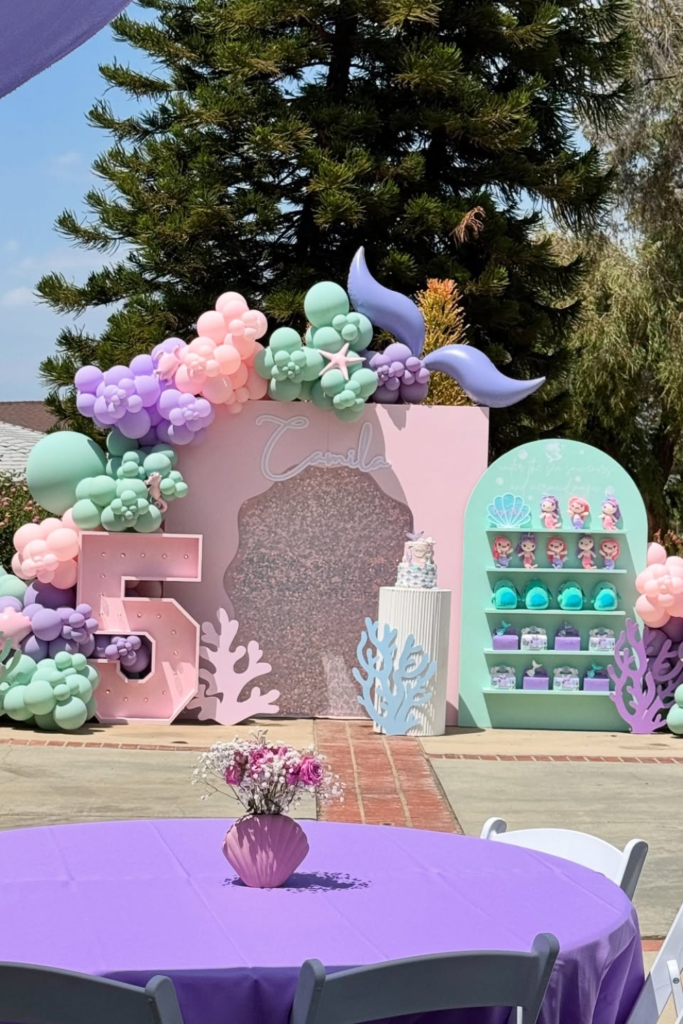
Pastel Party Wall
Build one full-featured wall like this and let it carry the entire theme, rather than spreading decorations everywhere.
Place it behind your cake table or as a main photo area so everything feels organized. Use soft pastel balloons in 3 main colors.
Add cutouts like coral shapes, a big number, and a small shelf for favors to keep everything functional.
Outdoor daylight works best here, but you can enhance it with soft white lights if needed for the evening.
Soft Ocean Layers
Add depth to your setup by layering different backdrop shapes. Keep balloon colors soft and blend them across sections.
Place scalloped panels, arches, and a shell cutout, slightly overlapping, to create a full ocean scene without clutter.
Add a shimmer panel behind one section to catch light and create a subtle underwater sparkle without extra lighting.
Ocean Color Focus
Lock your setup into two main tones like soft blue and sand beige so everything instantly feels clean and coordinated.
Build your backdrop with a simple, rounded panel, then stack balloon clusters only on one side to avoid visual clutter.
Add sea creature cutouts at the base to ground the theme. Place this near your cake stand so both elements connect naturally.
Use soft indoor lighting or ceiling lights like this to keep the colors calm and smooth, rather than overly bright.
Minimal Ocean Corner
Place a simple round backdrop and build balloon clusters on one side and around a small arch to create balance without crowding.
Add a single stand in the center for the cake. Bring in small greenery or white florals to soften the look and break the balloon-heavy feel.
Indoor lighting works well here, but you can add a soft spotlight to highlight the backdrop and make the setup feel more polished.

Bubble Balloon Mix
Create that underwater feel by mixing solid balloons with clear bubble balloons, so the setup looks light and airy rather than heavy.
Place your backdrop in the center and build balloon clusters on both sides, keeping the colors soft and in blues, mint, and cream to keep it cohesive.
Hang or place clear balloons slightly higher to mimic floating bubbles, and let warm indoor lights filter through them to create a soft, glowing effect.
Ocean Arch Frame
Frame your entire setup with a full balloon arch to keep everything contained and visually organized.
Build the arch around a rounded backdrop and keep most balloons in ocean tones like teal and blue.
Add small pops of yellow to bring life. Place sea creatures across the center to guide the eye toward the cake stand.
Keep the floor space minimal with just a few coral props. Use focused indoor lighting to highlight the center and make the colors pop.
Mermaid Feature Corner
Turn one side of your space into a statement corner by combining a character cutout with a bold balloon stack.
Place the balloons vertically along the wall. Keep the cake on a single stand in front so the focus stays clean and not crowded.
Use ceiling lights and nearby natural light to keep colors bright, while metallic balloons catch reflections and add that soft ocean shine.
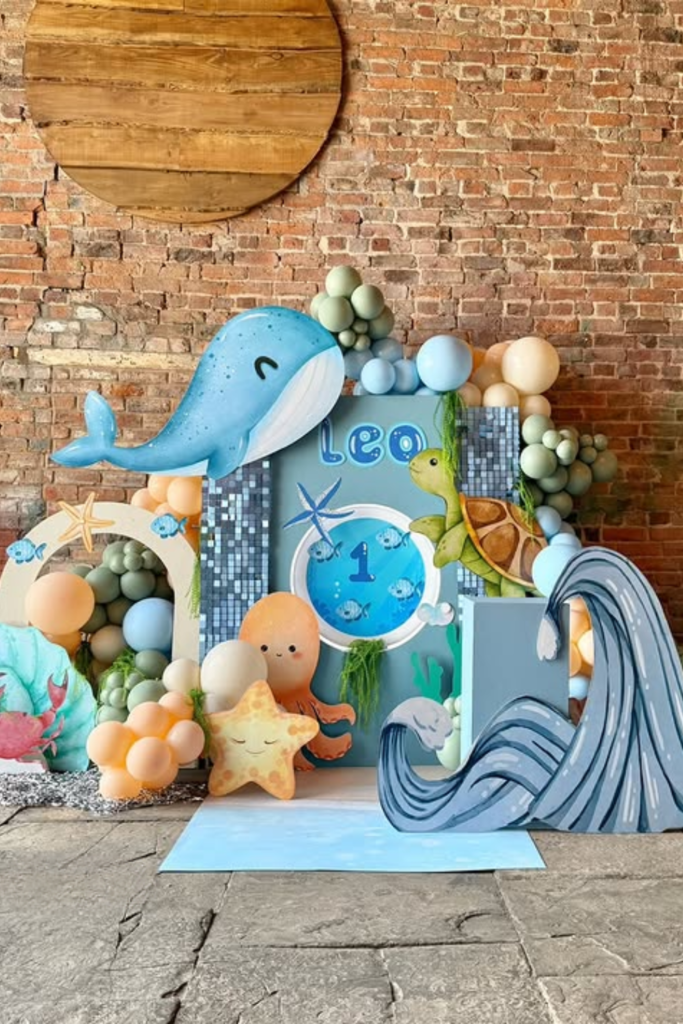
Ocean Scene Setup
Build a full ocean story instead of just a backdrop by combining waves, sea animals, and layered panels in one area.
Place this along a wall where you have enough width so each element has space to stand out without overlapping too much.
Use muted blues, sand tones, and soft greens to keep everything balanced against a textured background, such as brick.
Add small details like seaweed or mosaic panels for depth, then keep lighting natural so textures and colors stay rich.
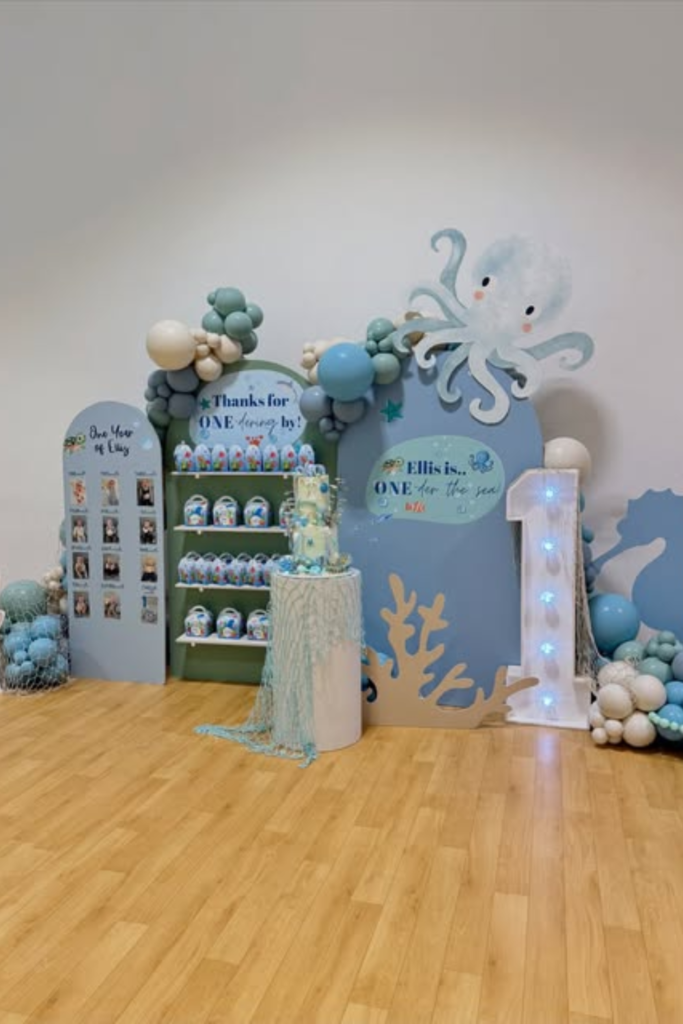
Memory Display Wall
Turn one side of your party into a meaningful display by combining photos, favors, and simple decor into a single clean section.
Use a flat backdrop to pin milestone pictures, then place a small shelf or stand next to it for return gifts, keeping everything organized in one zone.
Keep balloon clusters minimal and placed only at the edges. Soft LED lights work best here to highlight details.
Coral Color Pop
Break away from soft pastels and use bold coral and blue tones to create a vibrant ocean setup that instantly stands out.
Frame your backdrop with thick balloon clusters on both sides, keeping colors grouped so it still looks controlled.
Add a printed floor mat with reef patterns to extend the theme from wall to ground. Place the cake on a simple stand in the center.
Warm ceiling lights combined with natural window light will keep the colors bright and lively without looking harsh.
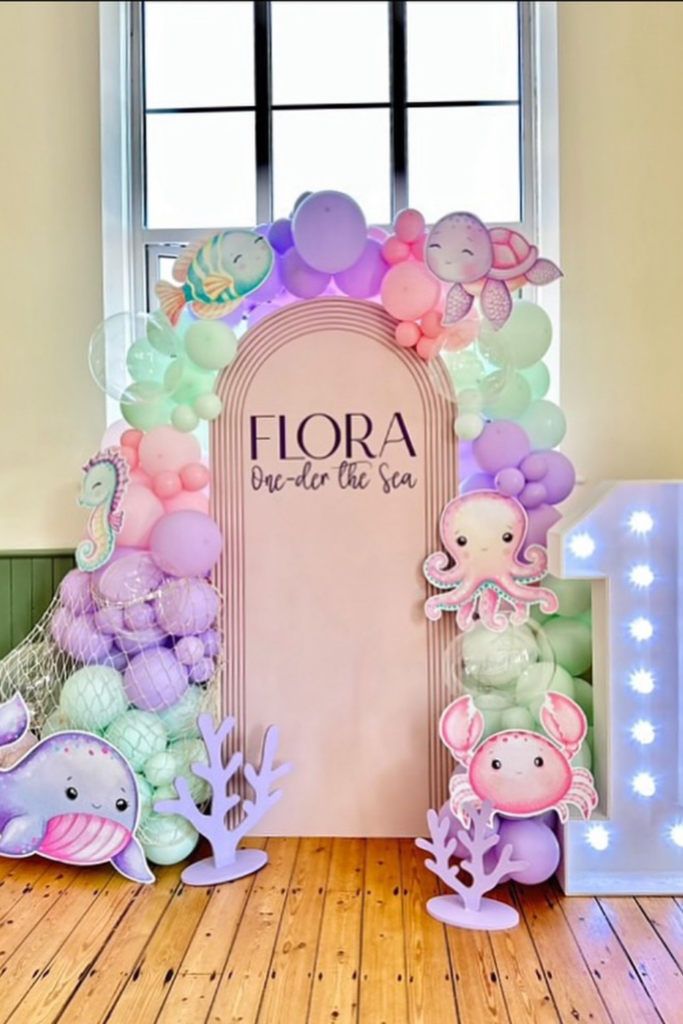
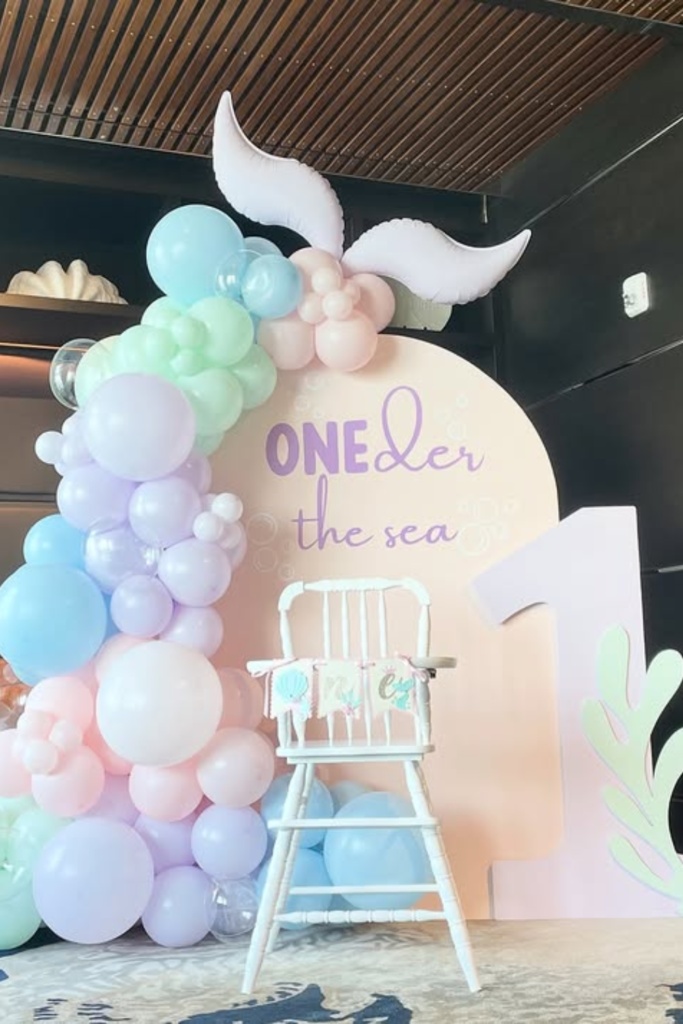
Pastel Photo Spot
Set up a clean photo area right in front of a window so natural light does most of the work. Build a soft balloon arch in pastel shades.
Wrap it tightly around a simple panel to keep everything structured. Add a light-up number on one side to bring height and glow.
Place a few sea character cutouts at the base to finish the look. Daylight gives this setup a soft, dreamy finish, while the LED number adds a gentle highlight for photos.
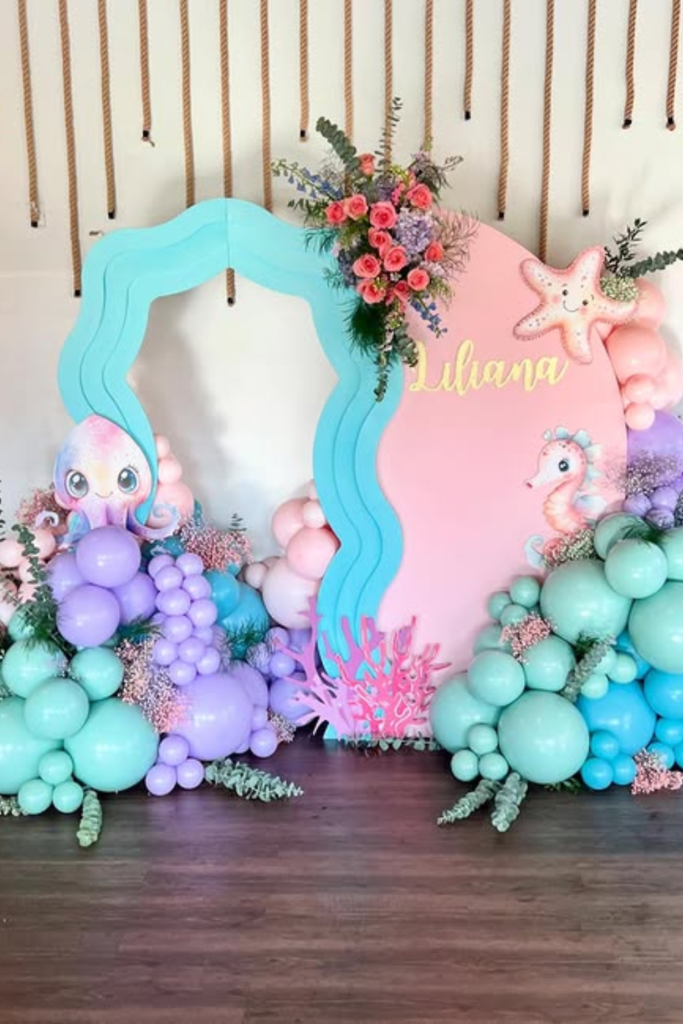
Floral Ocean Blend
Mix soft florals with ocean elements to create a setup that feels styled but not heavy. Place two main panels side by side.
Keep balloon clusters low and wide to keep the space balanced. Add fresh or artificial flowers on top and between balloons to break the solid look.
Natural light works best here to highlight both the pastel tones and floral textures, keeping everything soft and elegant.
Soft Balloon Frame
Frame your backdrop with balloons on only one side and the base, so the setup feels open rather than crowded.
Use soft pink, blue, and white tones to keep everything calm and cohesive. Add a few clear bubble balloons and small starfish details to bring that ocean feel.
Place this near a window so natural light passes through the balloons, creating a soft glow. Keep the center panel clean with just a name or shell detail.
Balloon Side Stack
Keep your setup clean by stacking all the balloons on one side. Build the cluster from floor to top using soft pastel tones to create height.
Place a simple round backdrop behind, and keep the center area open for a chair or cake to keep it balanced.
Add one statement element, such as a tail or a themed cutout, at the top to finish the look. Warm indoor lighting helps soften the colors.
Shimmer Center Focus
Make your backdrop stand out by placing a shimmer panel right in the center and building everything around it.
Use bright pastel tones like pink, purple, and mint to create that playful ocean feel. Place the cake and props directly in front of the shimmer.
They reflect light and draw attention naturally. Daylight works best here, but overhead lighting will enhance the sparkle and keep the setup lively.
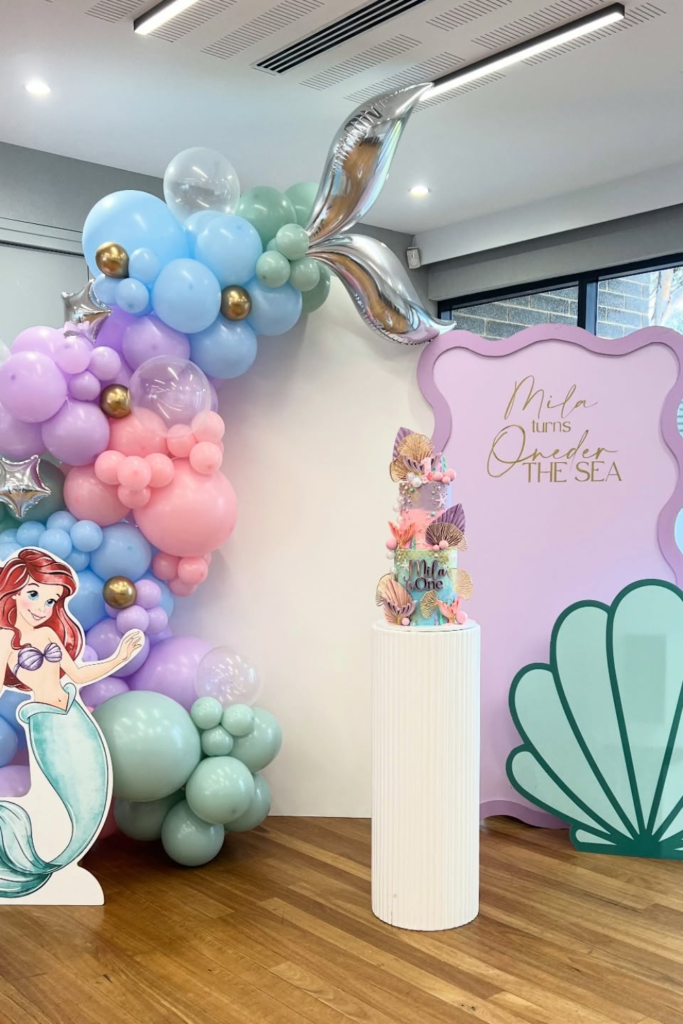
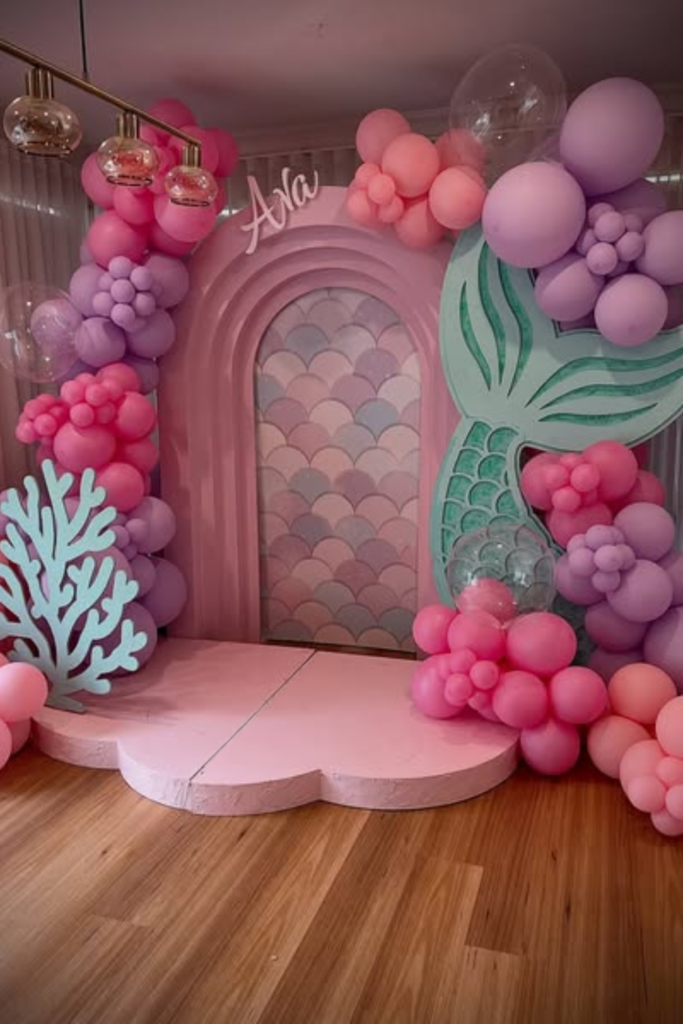
Mermaid Stage Setup
Turn your backdrop into a mini stage by adding a raised base so the whole setup feels more defined and special.
Add one large mermaid tail or themed prop to anchor the design and keep the rest simple. Use layered arches behind to create depth.
Warm indoor lighting with soft-hanging bulbs works perfectly here to highlight textures and create a cozy underwater glow.
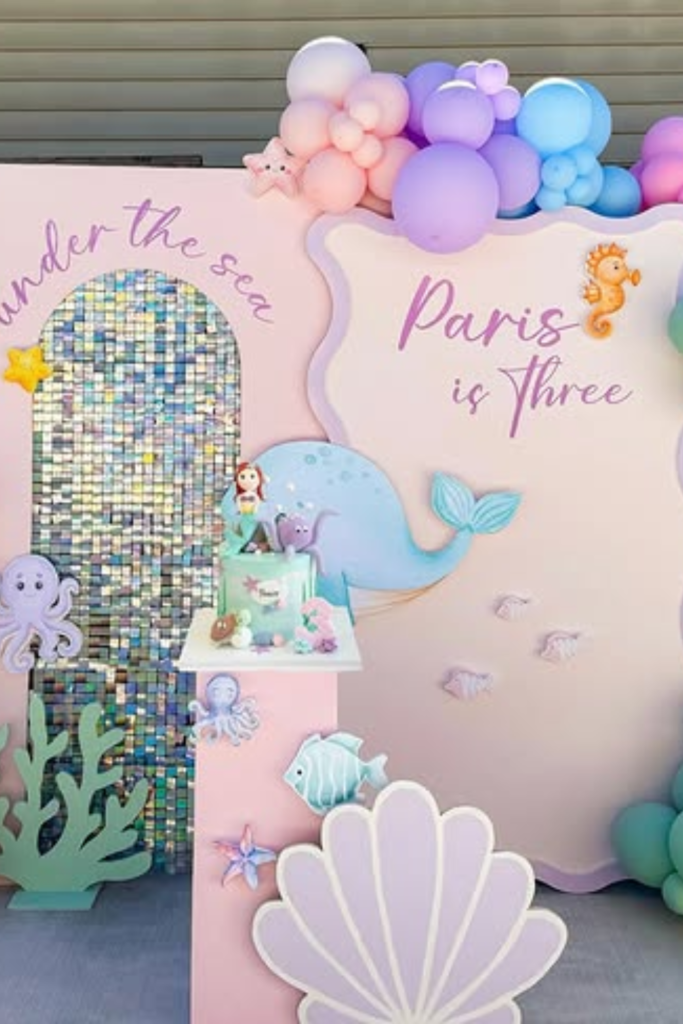
Dual Panel Setup
Split your backdrop into two panels to add more detail without making it feel crowded. Use one side for shimmer or texture.
The other for the name or message to keep everything organized. Build balloon clusters along both edges to frame the setup.
Add small sea props like coral, shells, or characters near the base to complete the look. Outdoor daylight works best here.
Poolside Ocean Setup
Take your theme outdoors and use the pool area as part of the design. Place your backdrop right at the edge.
Build balloon clusters in deep blues and sandy tones to match the water. Keep the cake on a clear stand so it blends into the setup.
Add a printed floor or let the pool reflection create that ocean effect naturally. Daylight and water reflections will give you the best lighting.
Layered Ocean Stage
Create a full-stage look by layering multiple panels in different shapes and heights, so the setup feels rich without adding random pieces.
Build balloon clusters along the top edges to frame the entire scene. Place the cake in the center on a raised platform so it stands out naturally.
Outdoor daylight works best here, while soft evening lights can highlight the layers and give a deeper ocean effect.
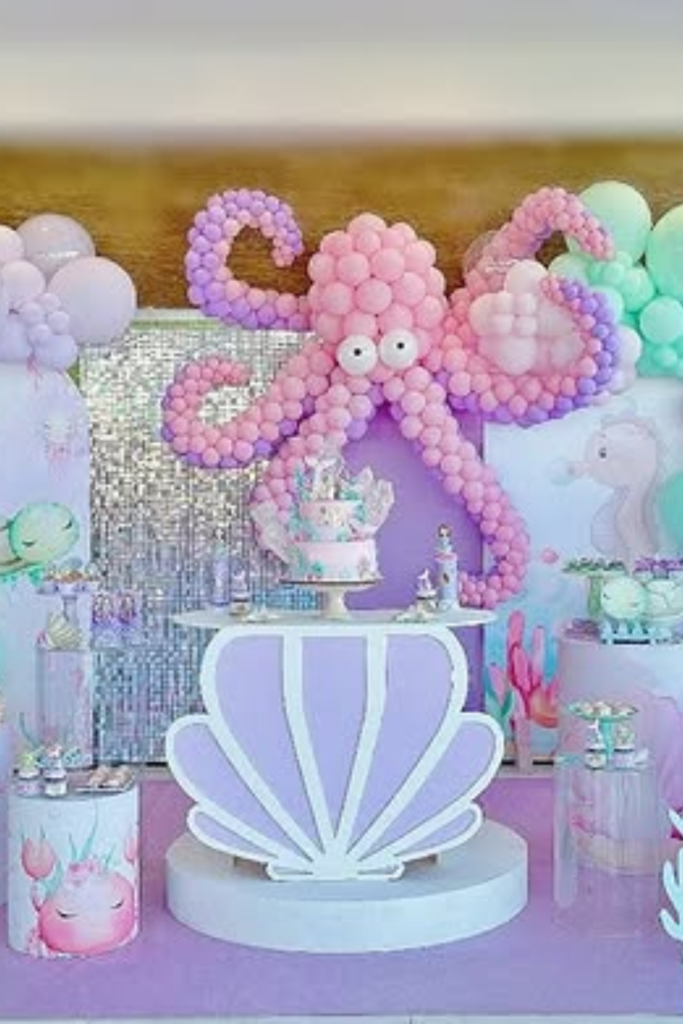
Dessert Table Display
Turn your dessert area into the main attraction by building everything around the table instead of separating elements.
Use a large statement prop, like a shell stand, in the center, then place smaller stands on both sides to maintain balance.
Build a balloon arch behind the table and add one bold feature, like a large octopus, to create focus without clutter.
Use overhead indoor lighting combined with reflective back panels to make the desserts and details stand out naturally.
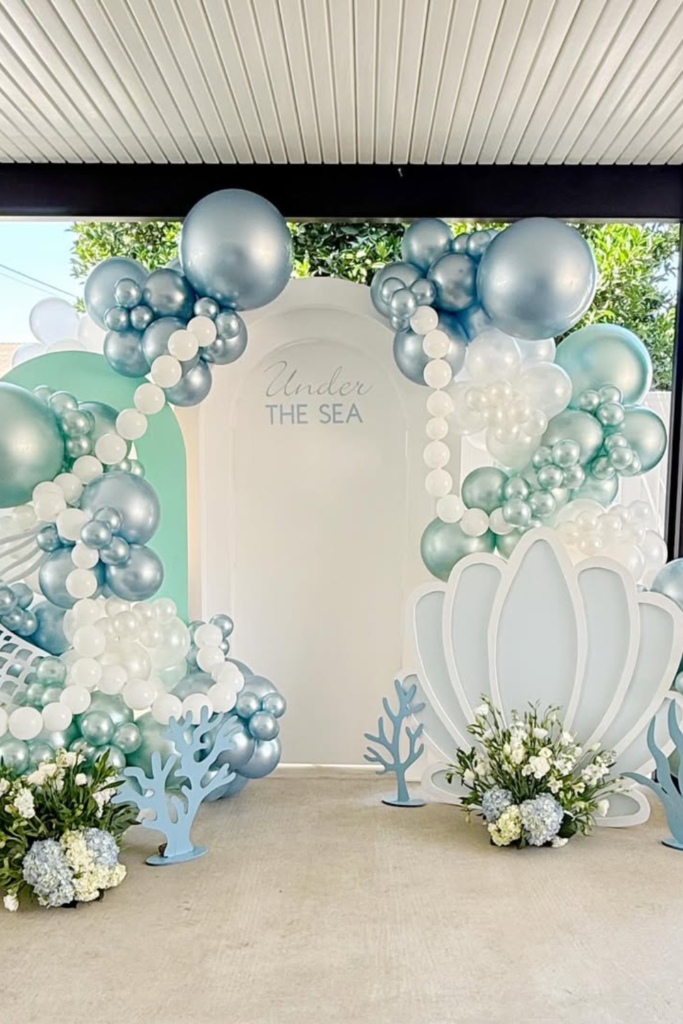
Elegant Ocean Entrance
Create a clean entrance setup by keeping your colors limited to soft blues, whites, and a hint of mint so everything looks calm and polished.
Frame the backdrop with balloon clusters on both sides and use pearl-style balloon strands to add a subtle underwater detail.
Place floral arrangements at the base to soften the look and break the balloon-heavy feel. Keep the center open so it works as a photo spot.
Natural daylight works best here, especially in covered outdoor spaces, giving everything a soft, airy glow.
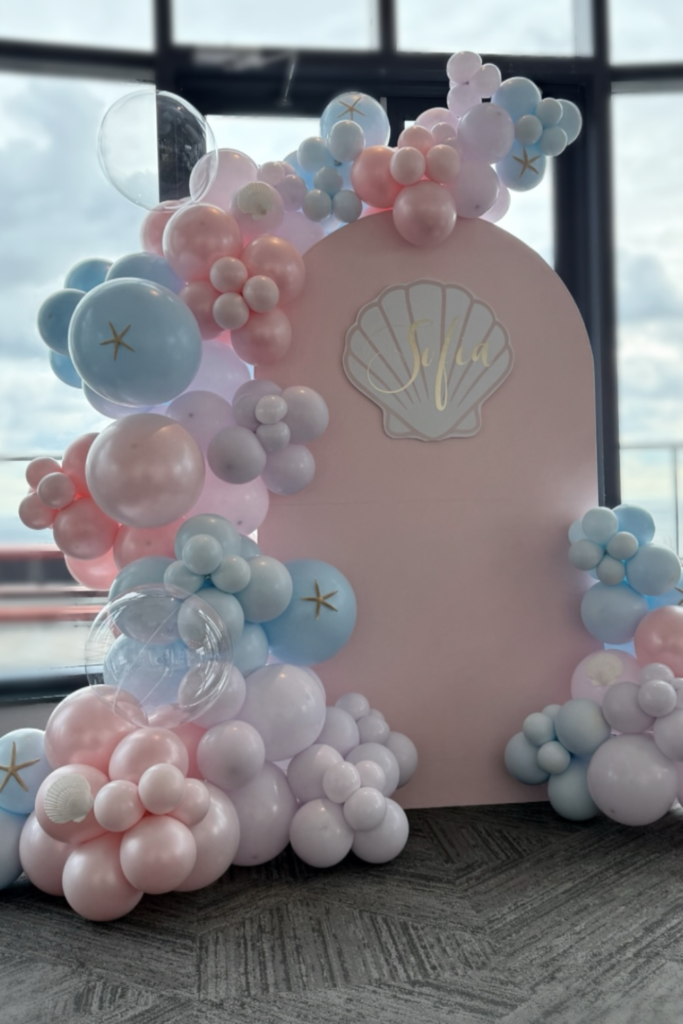
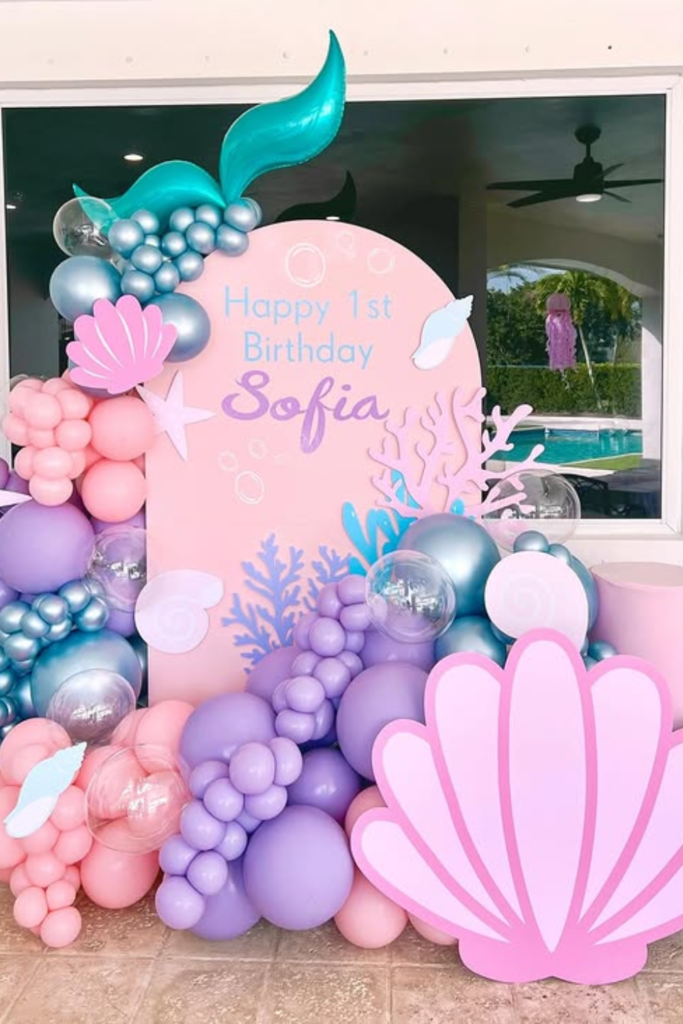
Pastel Shell Corner
Create a soft focal corner by combining pastel balloons with one oversized shell prop to anchor the whole setup.
Stack balloons low and wide around the base. Add a tall backdrop panel behind to keep everything structured and give space for the name or message.
Place this near a wall or window so natural light highlights the glossy balloons and metallic accents, keep lighting soft.
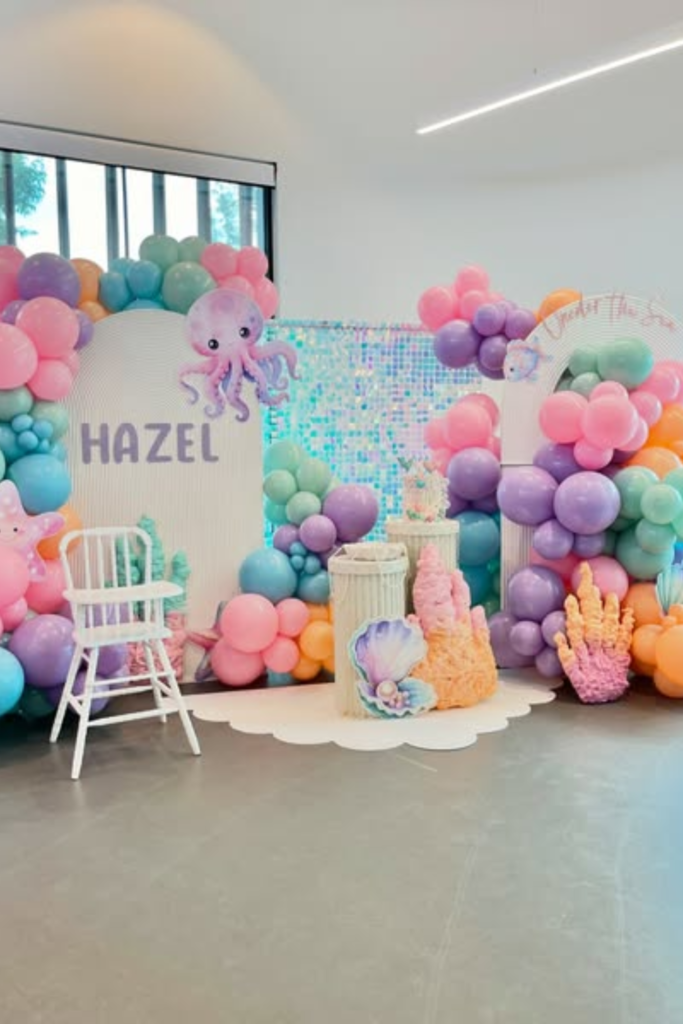
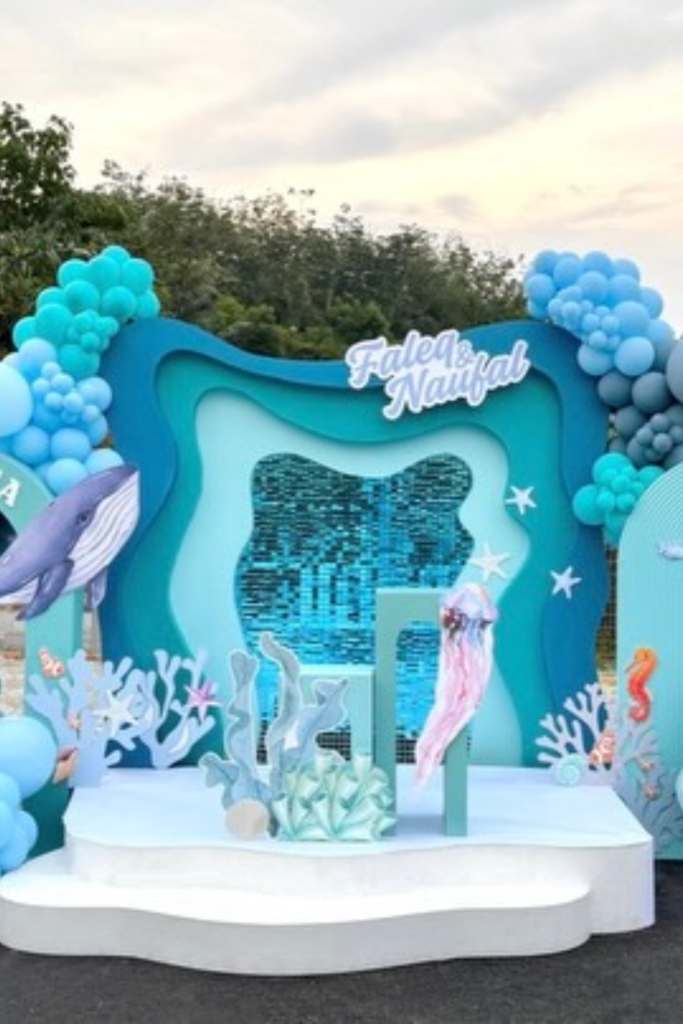
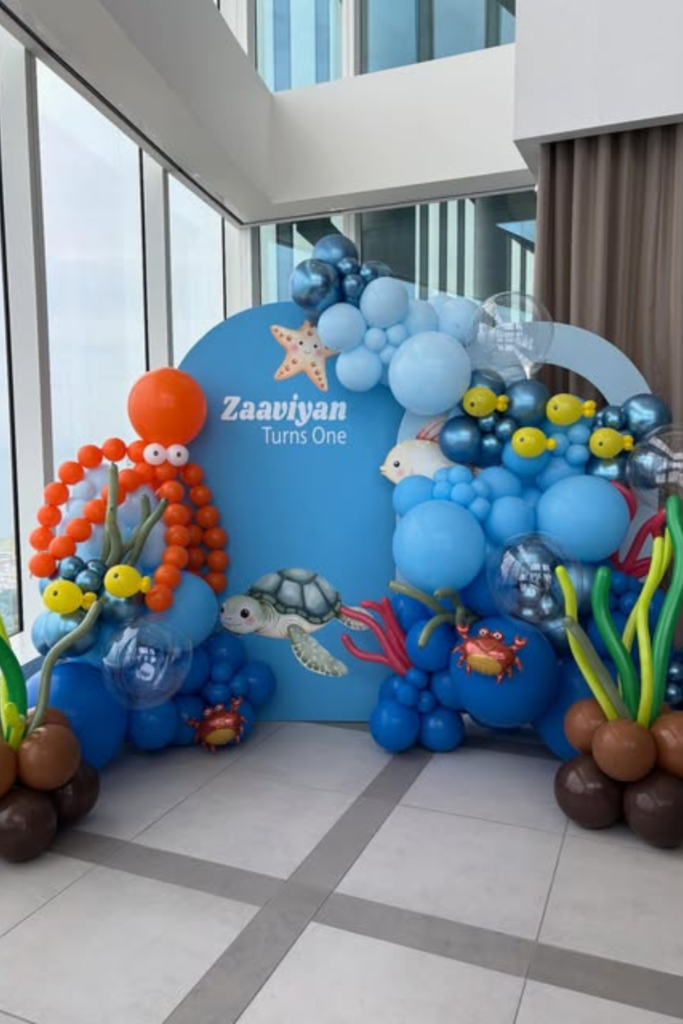
Underwater Scene Build
Turn your backdrop into a full underwater world by adding sea creatures and plants around the base, rather than keeping it flat.
Build balloon clusters in different shades of blue to create depth, then mix in props like octopus arms, turtles, and seaweed for movement.
Place these elements along the sides so the center stays clean for photos. Use clear balloons to mimic bubbles and keep the look light.
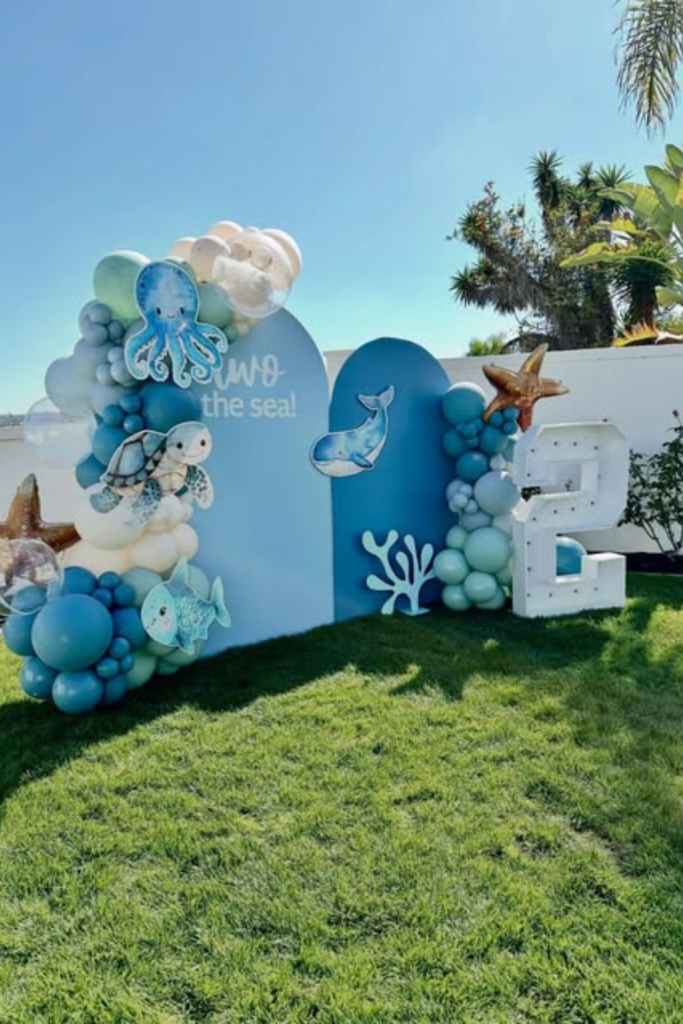
Outdoor Ocean Setup
Use an open lawn or garden to create a relaxed ocean setup that feels spacious and natural. Place your backdrop panels slightly apart.
Build balloon clusters only on one side of each panel to keep everything balanced without overfilling the space.
Natural sunlight does most of the work here, making colors pop while soft shadows add depth without needing extra lighting.
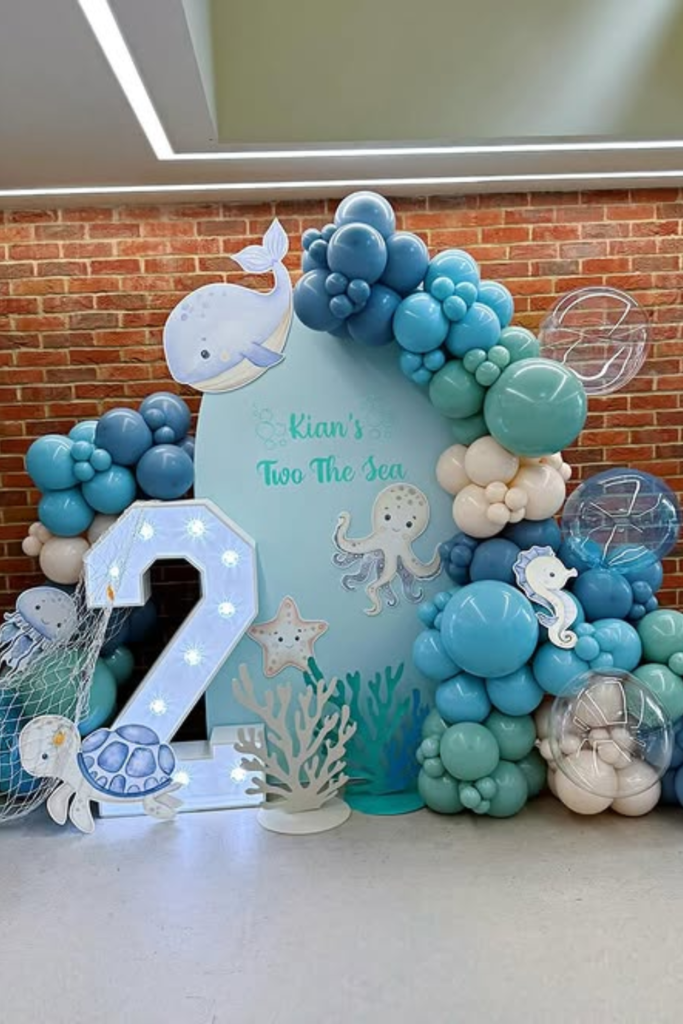
Blue Tone Balance
Keep everything cohesive by sticking to layered shades of blue and white so the setup feels calm and organized.
Build your balloon cluster on one side and let it flow down naturally, rather than spreading it across the whole backdrop.
Place sea cutouts around the base to complete the look. Indoor ceiling lights combined with wall reflection help keep the colors rich and evenly lit.
FAQs
How many decorations do I actually need for an under the sea party?
You do not need a lot; you just need the right ones placed correctly. Focus on one main backdrop, one balloon setup, and a few themed props around the base.
When you try to decorate every corner, the setup starts looking messy. Keep everything centered in one area and let that be your main attraction.
Should I mix many colors or stick to a few?
Stick to 2 to 4 colors and build everything around them. When you mix too many colors, the setup starts looking random and unplanned.
Pick a palette like blues and whites or soft pastels, then repeat those shades in balloons, backdrops, and props.
This keeps everything connected and gives you that clean ocean look without needing extra decorations.
You may like to read!
- 22 Farm Themed Birthday Party
- 24 Zoo Birthday Party Themes
- 21 Monkey Birthday Party Ideas
- 20 Safari Birthday Party Ideas
- 21 Animal Birthday Party Theme

Fasial is the founder of the Fizzy Flare. He has been a passionate blogger since 2021. He ran three different websites in the past few years. Now he is focusing on Fizzy Flare to build an audience and help them organize their life.