20 Camping Gear Storage Ideas for 2026
This post may contain affiliate links: full affiliate disclosure.
When you’re out in the woods, camping gear is fun, but when you get home, it’s a whole different story.
There are tents spilling out of suitcases, folding chairs leaning against the wall, and sleeping bags taking up half the closet.
Before you know it, your garage or storage space is a big mess, and to find something, you have to sift through everything.
You’re not the only one who feels this way. If you don’t have a clever method, it’s hard to keep big camping goods.
In this article, we’ll explore 20 innovative Camping Gear storage ideas for a clutter-free home.
Let’s jump in!
Contents
- 1 Which Smart Storage Solutions Work Best for Bulky Camping Gear?
- 1.1 Gear Wall
- 1.2 Closet Station
- 1.3 Gear Shelving
- 1.4 Camp Pantry
- 1.5 Gear Hub
- 1.6 Gear Closet
- 1.7 Climb Rack
- 1.8 Grid Panels
- 1.9 Pegboard Display
- 1.10 Utility Rack
- 1.11 Gear Board
- 1.12 Rope Wall
- 1.13 Shed Shelves
- 1.14 Gear Studio
- 1.15 Labeled Bins
- 1.16 Gear Wardrobe
- 1.17 Camp Wall
- 1.18 Gear Corner
- 1.19 Camp Workshop
- 1.20 Cabin Shelves
- 2 FAQs
Which Smart Storage Solutions Work Best for Bulky Camping Gear?
When all of your big camping gear gets up in one pile, it might be a problem. Tents, folding chairs, sleeping bags, and coolers take up a lot of space rapidly.
And if you don’t store them properly, your garage or closet will get dirty fast. The only way to remedy this is to give big gear its own place to store it.
Use big, stackable bins to store soft things like blankets and sleeping bags so they stay clean and simple to get to.
Instead than allowing folding chairs, backpacks, and lanterns sit on the floor, place them on wall hooks or racks.
Overhead garage racks are also good for storing seasonal items that you don’t require every week. Packing for your next trip is considerably faster when everything has a place.
Save this article for later! 👇👇
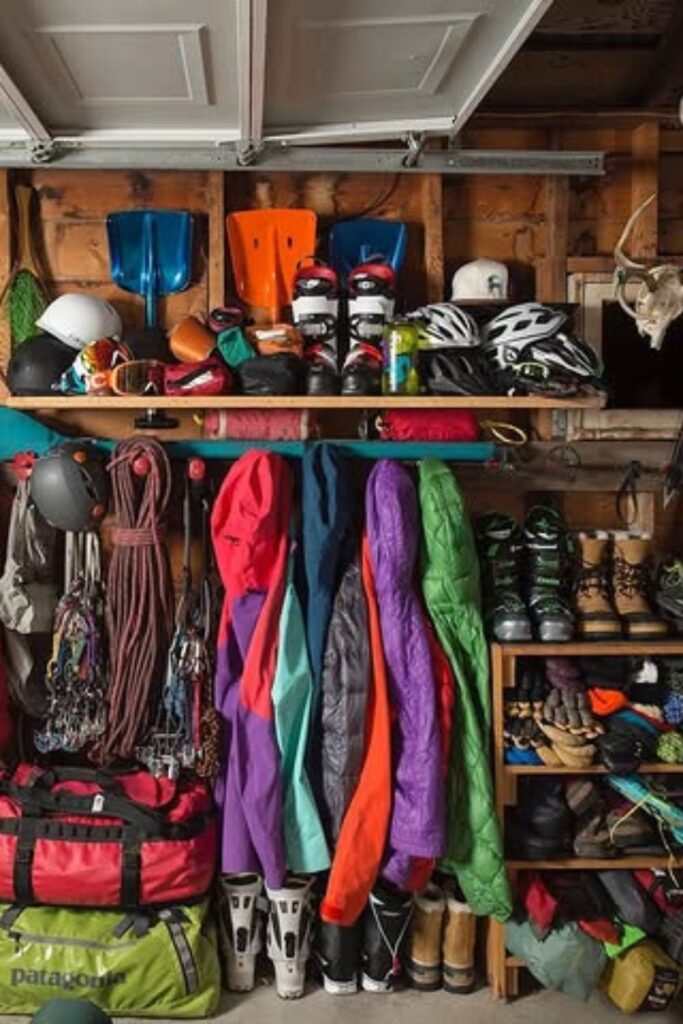
Gear Wall
Garage chaos disappears once every bulky item earns a dedicated spot on the wall. Jackets, climbing ropes, helmets, and backpacks stay easy to grab.
When hooks and open shelves do the heavy work. Put up a solid wall-mounted rack or a simple wooden rail with hooks to start.
Instead of putting jackets and soft clothing in bags, hang them up so they can breathe. Above the hooks, shelves are great for helmets, small tools, or camping equipment.
That you need to get to quickly. Boots, shoes, and rolled-up sleeping mats can fit on the lower shelf.
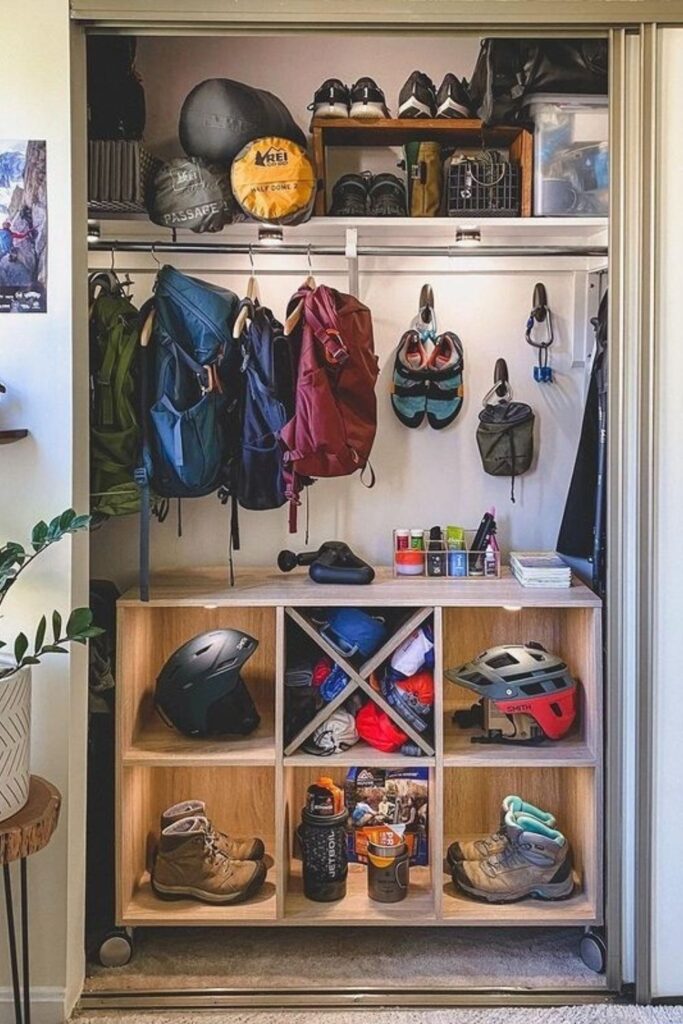
Closet Station
Outdoor gear feels easier to manage once a simple closet turns into a dedicated basecamp. Backpacks, jackets, and hydration packs stay ready.
when the hanging rail has strong hooks on it. Put a tiny shelf above the rod for tents, sleeping mats, or packed gear bags so that big things don’t get in the way.
The cubby shelves below are great for keeping boots, helmets, and water bottles together by kind.
You only need a few closet organizers, wall hooks, and a cube shelf unit to set this up again. This design works best in entryway closets, spare rooms, or storage areas in hallways.
Getting ready for a morning trip is easy because everything, from shoes to packs, has a defined place to go and nothing is hiding in unexpected corners.
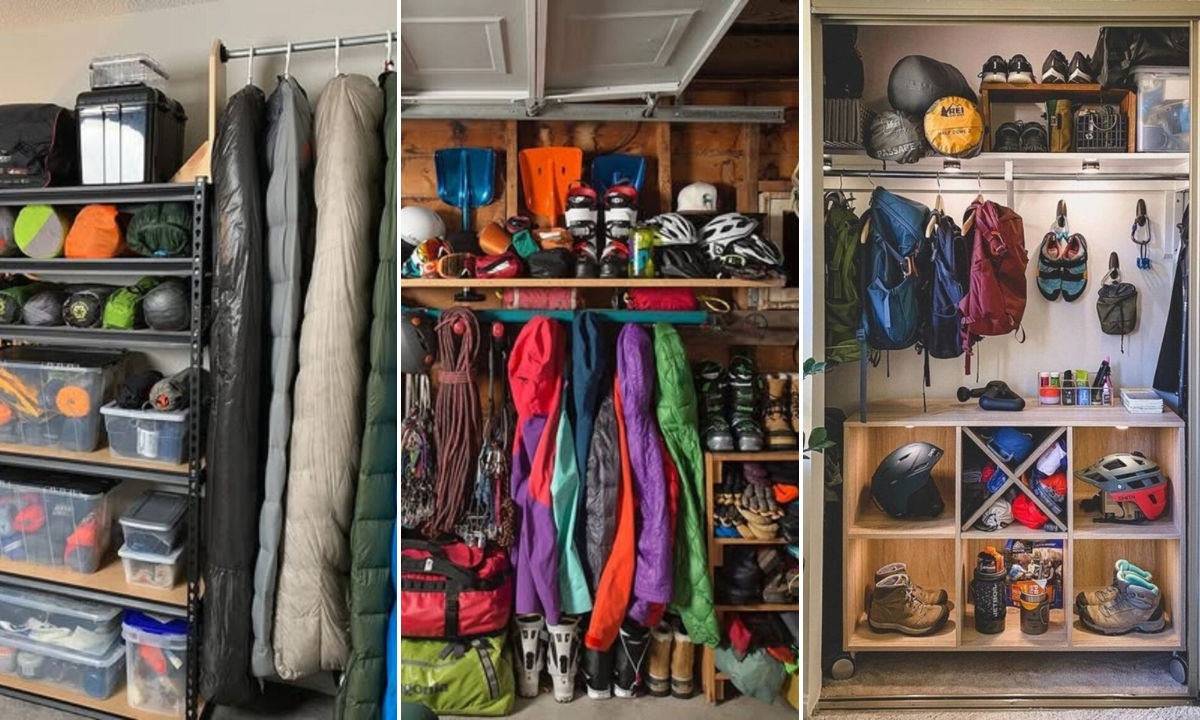
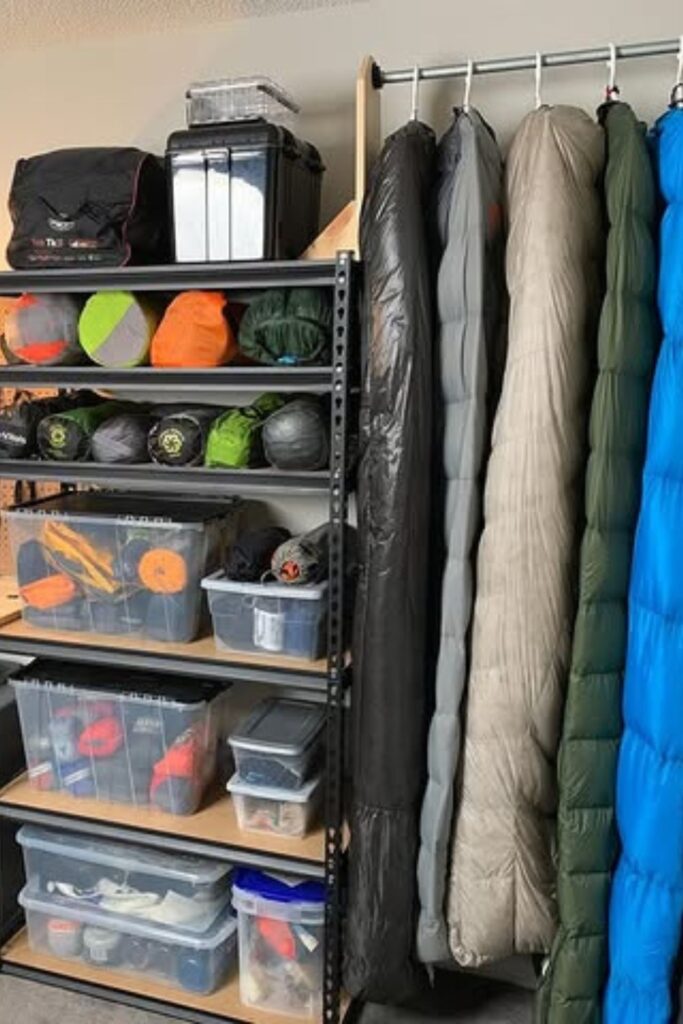
Gear Shelving
Order starts to appear once bulky camping gear moves onto open metal shelves instead of hiding in random corners.
Big plastic boxes store smaller items like cooking tools, headlamps, and repair kits together so nothing gets lost before a journey.
Sleeping pads, dry bags, and packed tents fit neatly on middle shelves where they stay visible but protected.
Tall hanging rods next to the shelves are the best place for sleeping bags and insulated coats. They may hang freely, which preserves the insulation from losing its loft.
Use strong garage shelves, clear storage containers, and a basic clothing rack or pipe rod to set this up again.
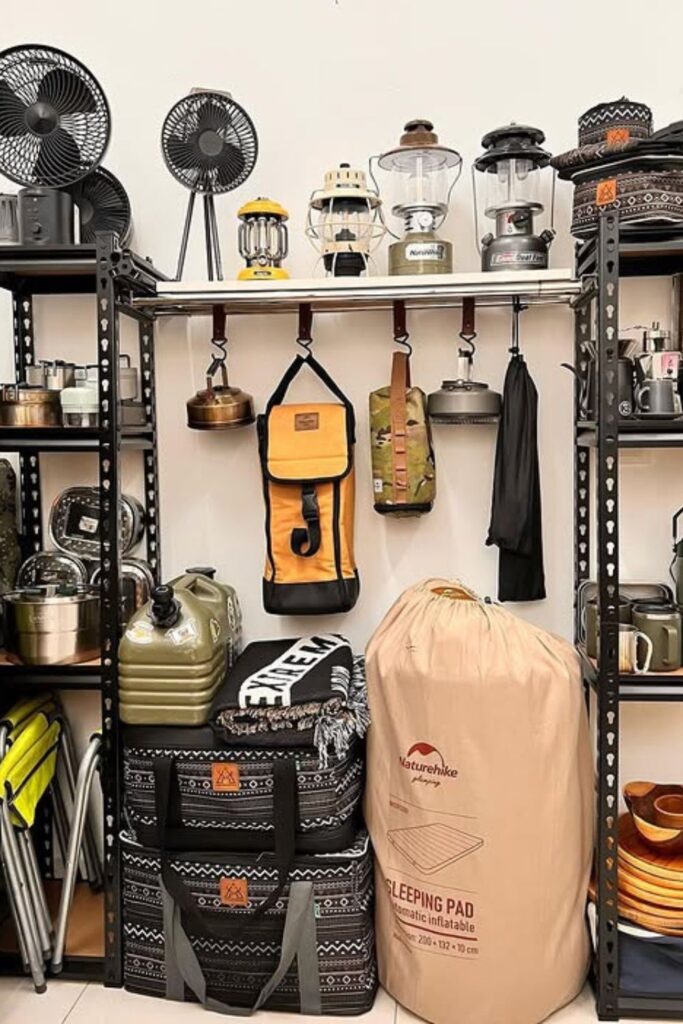
Camp Pantry
Cooking gear becomes much easier to manage once it lives together in one organized station. Metal shelves handle the heavier items like cookware, stoves, kettles, and lanterns.
The central rail with hooks, on the other hand, keeps smaller pieces close at hand. Hanging mugs, utensils, and small kitchen items keeps them from becoming lost in boxes.
Shelves on both sides are great for stacking dishes, mugs, fuel canisters, and small cooking kits so that everything stays organized by use.
You can add hanging storage by setting up two strong shelving racks with a horizontal bar between them.
This kind of setup works great in a garage, storage room, or utility space. Because everything is already together in the kitchen, meal prep at camp is easier and can be done in a matter.
Gear Hub
Bulk camping gear stops feeling overwhelming once everything moves into one organized wall system.
Big cubby shelves make it easy to find sleeping bags, wrapped sleeping mats, backpacks, and storage bins so that nothing gets lost in a pile.
A pegboard piece in the middle is great for hanging up kitchen tools, headlamps, cups, and other small things that usually get lost in boxes.
The top shelves hold coolers and big containers that only come out when you’re getting ready for a vacation. This keeps heavy things out of the way of people walking around.
This design works best in garages, basements, or spare gear rooms where you can use a whole wall for storage.

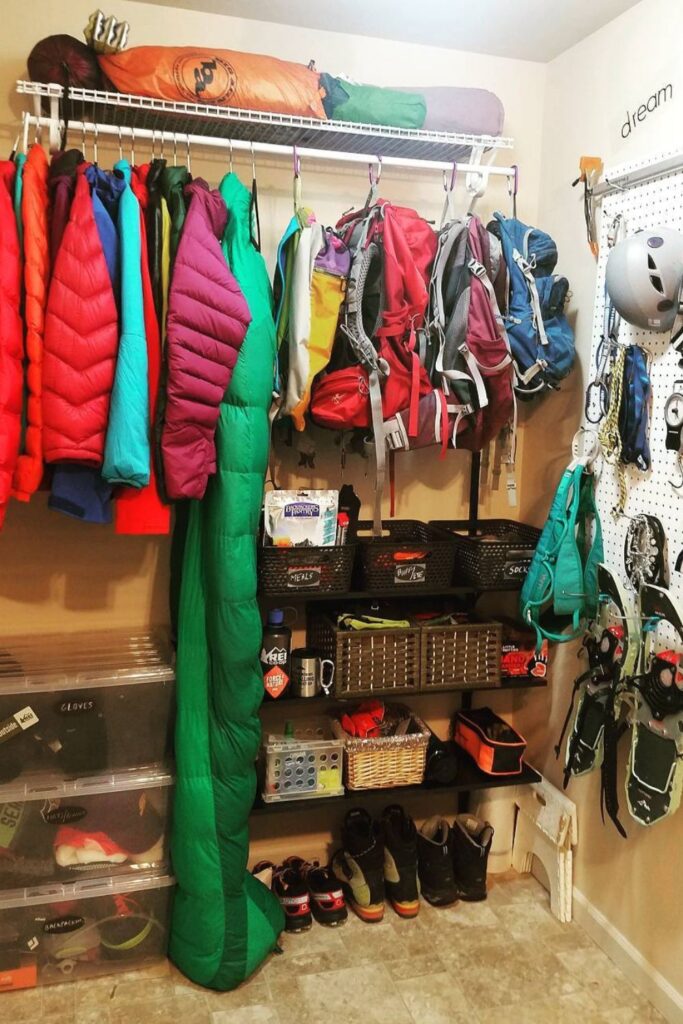
Gear Closet
Camping gear quickly takes over a room unless every category has its own place. Jackets and sleeping bags stay in better condition.
When they hang freely on a sturdy garment rack instead of being crammed into small bags. There are backpacks lined up neatly next to them, ready to be picked up before a trip.
Use clear storage boxes under the workbench to keep tiny things like gloves, culinary tools, and repair kits from becoming lost.
Baskets with labels can be put on open shelves to separate food kits, socks, or first aid materials.
A pegboard on the opposite wall makes it easy to see and get to climbing gear, carabiners, and helmets.
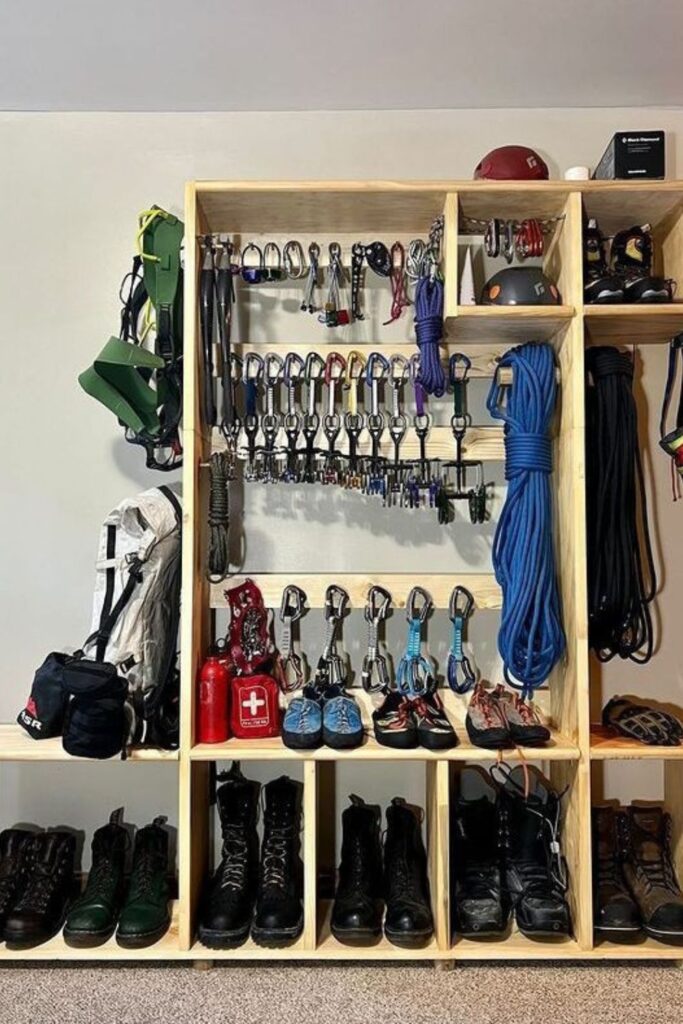
Climb Rack
Climbing and camping gear stays easier to manage once every piece hangs where you can see it. Carabiners, belay devices, quickdraws, and ropes line up neatly on horizontal bars.
Making it easy to get everything you need before you go. The wooden cubby frame maintains everything in its place by category: hardware in the middle, ropes on the sides.
And helmets or other gear on the top shelves. The bottom cubbies hold boots and approach shoes, which keeps muddy gear in one place.
You can easily make this layout again with a basic wooden cubby box and some mounted rods or hooks to hang your things on.
This kind of solution is great for garage walls, gear rooms, or basement spaces since it keeps technical gear dry, visible, and ready for the next camping or climbing trip.
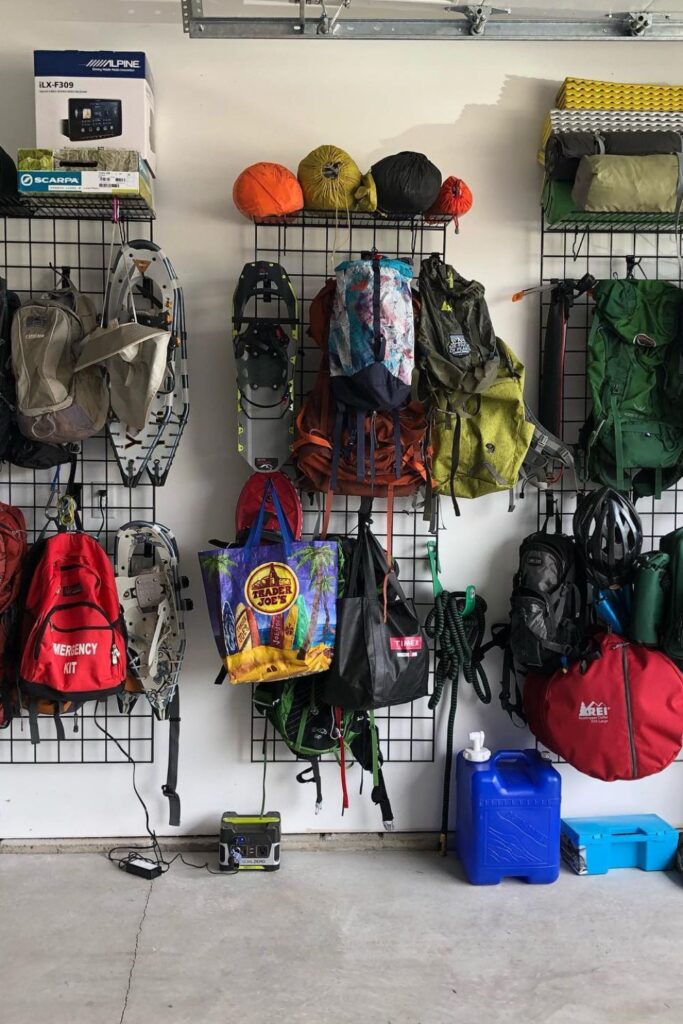
Grid Panels
Wall space turns into serious storage once metal grid panels go up. Backpacks, snowshoes, helmets, and gear bags hang neatly from simple hooks.
Keeping big things off the floor and easier to find. The top shelves hold sleeping pads, packed tents, and extra containers that you don’t need to get to every day.
Grid panels are great because the hooks can shift around as your gear changes. Without having to rebuild the whole thing.
You may add more hooks for climbing gear, lights, or hydration packs. You only need a few steel grid panels, sturdy wall anchors, and a set of S-hooks to make this pattern again.
This idea works best on garage walls because they have a lot of vertical space that isn’t used very often.
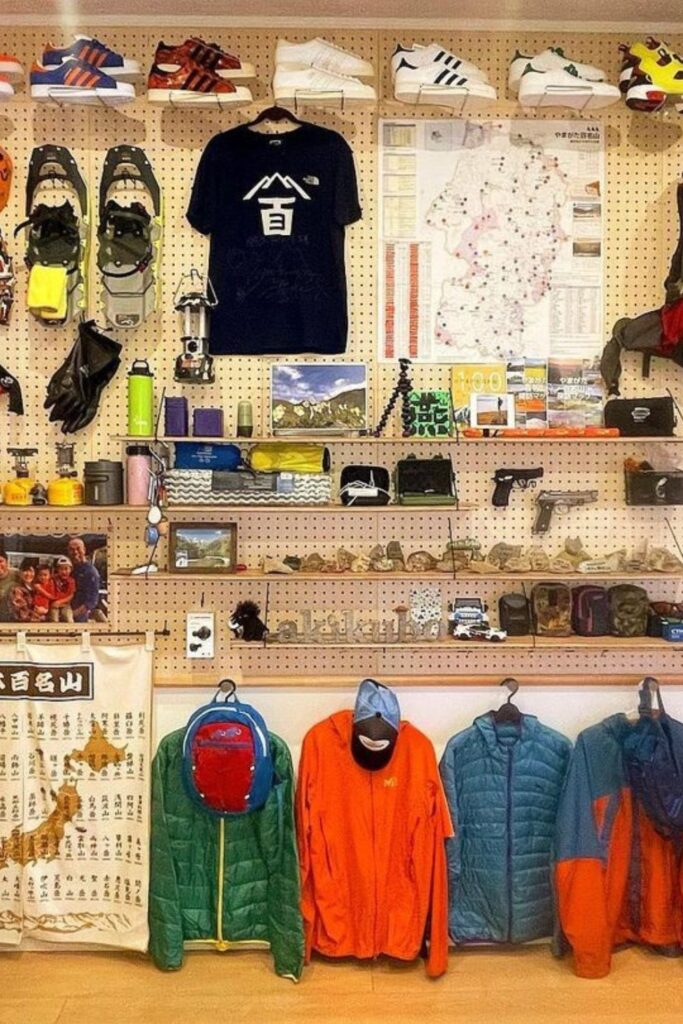
Pegboard Display
Outdoor gear feels easier to manage once a single wall turns into an organized pegboard system. Jackets, trekking poles, helmets, backpacks, and tools hang neatly.
Where everything is always visible and ready for the next trip. Pegboards are great since you can move the hooks, shelves, and brackets around as your gear collection grows.
Small items like headlamps, knives, or culinary tools fit wonderfully on narrow pegboard shelves, so they won’t get lost in containers.
You can put shoes or seasonal items on the top ledge to keep things you don’t use very often out of reach.
To set this up again, all you need is a big pegboard panel, some wall anchors, and some metal hooks.
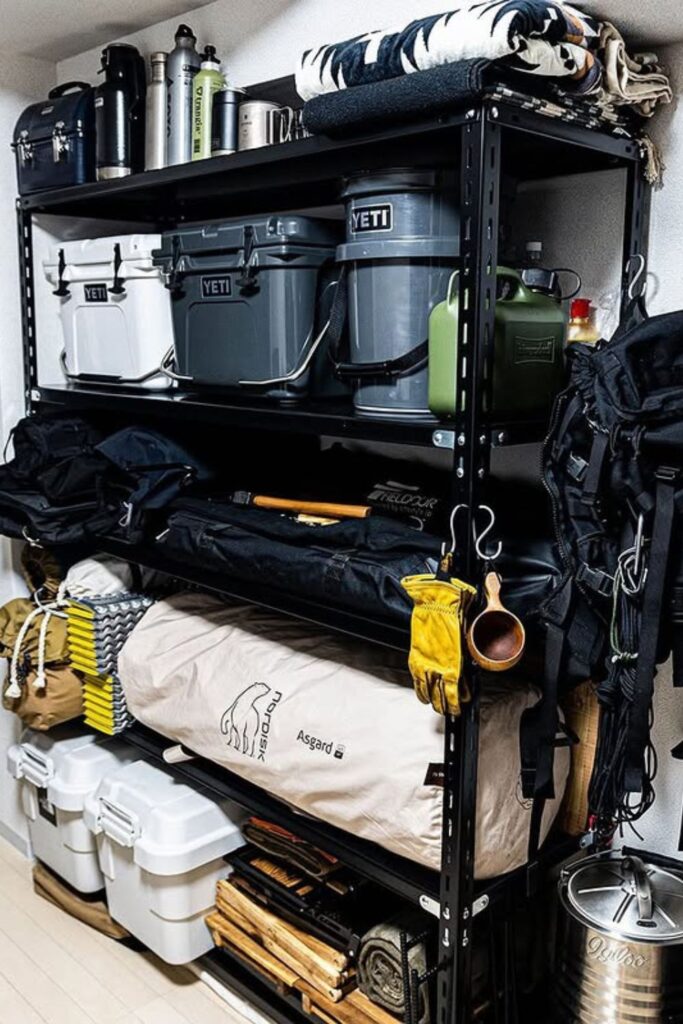
Utility Rack
Heavy camping gear needs a strong home, and a solid metal rack handles the job without wasting space.
There are coolers, water containers, and cooking kits on the top shelf, where they are simple to reach and keep tidy.
Tents, sleeping pads, and folded gear packs that would ordinarily be on the floor fit well on the middle shelves.
You can put storage boxes, firewood bundles, or big equipment that doesn’t move much between journeys on the lower floors.
To set this up again, all you need is a strong garage-style shelf rack and some storage boxes to keep the smaller things separate.
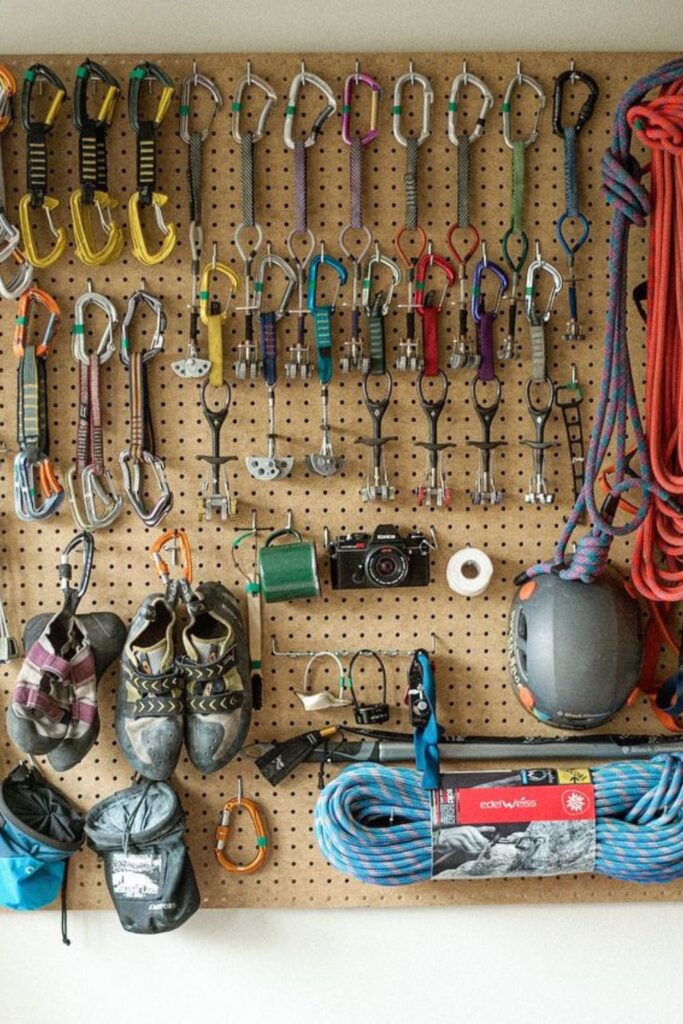
Gear Board
Climbing and camping equipment stays easier to manage once small gear moves onto a dedicated pegboard.
Metal hooks hold carabiners, belay devices, cams, and quickdraws in a clean line so that each piece is easy to see instead of getting tangled up in a gear bag.
A big climbing rope wraps over the side, and helmets, shoes, and chalk packs hang below for easy access.
Pegboards are great since the hooks may move around when you modify the way you set up your gear.
A few of small shelves can also help keep cameras, headlamps, or small tools that usually get lost in storage containers.
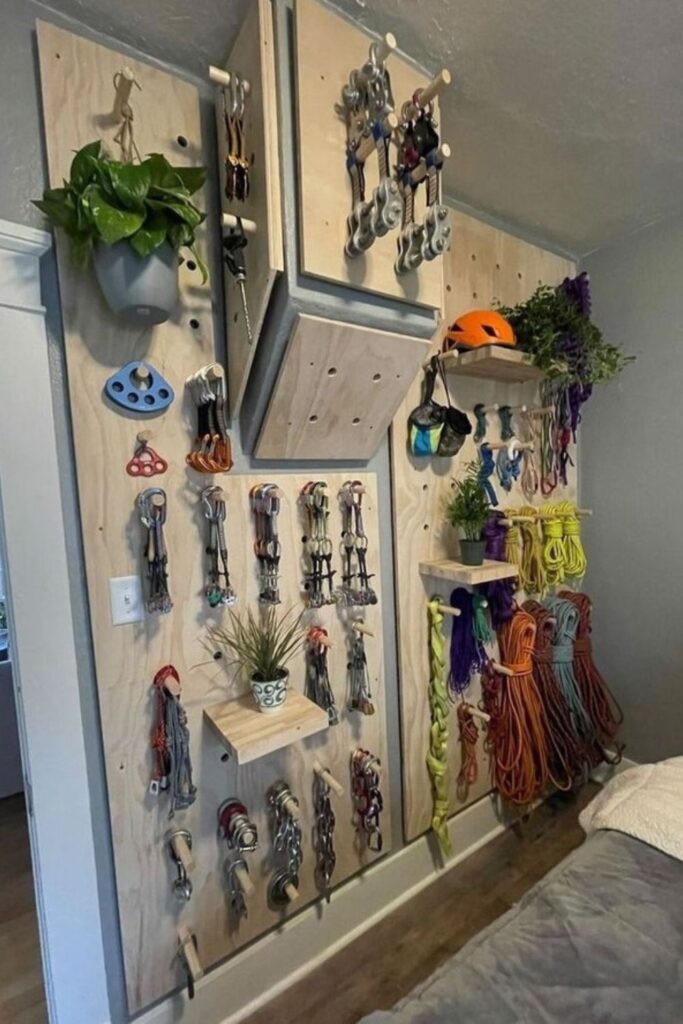
Rope Wall
Climbing ropes and technical gear quickly become tangled messes when they stay stuffed inside bags.
A dedicated rope wall keeps all the lines visible, untangled, and ready for the next journey. Thick wooden panels with simple dowels or hooks let ropes hang in neat loops.
So they dry properly and stay arranged by length or use. Carabiners, belay devices, and anchors are all lined up next to them.
Which makes it easy to inspect your gear before you go for a climb or camping trip. Small floating shelves provide you more room for helmets or other things.
Without taking up too much space on the wall. To build this up again, all you need are plywood panels, strong wall anchors, and a few wooden pegs or hooks.
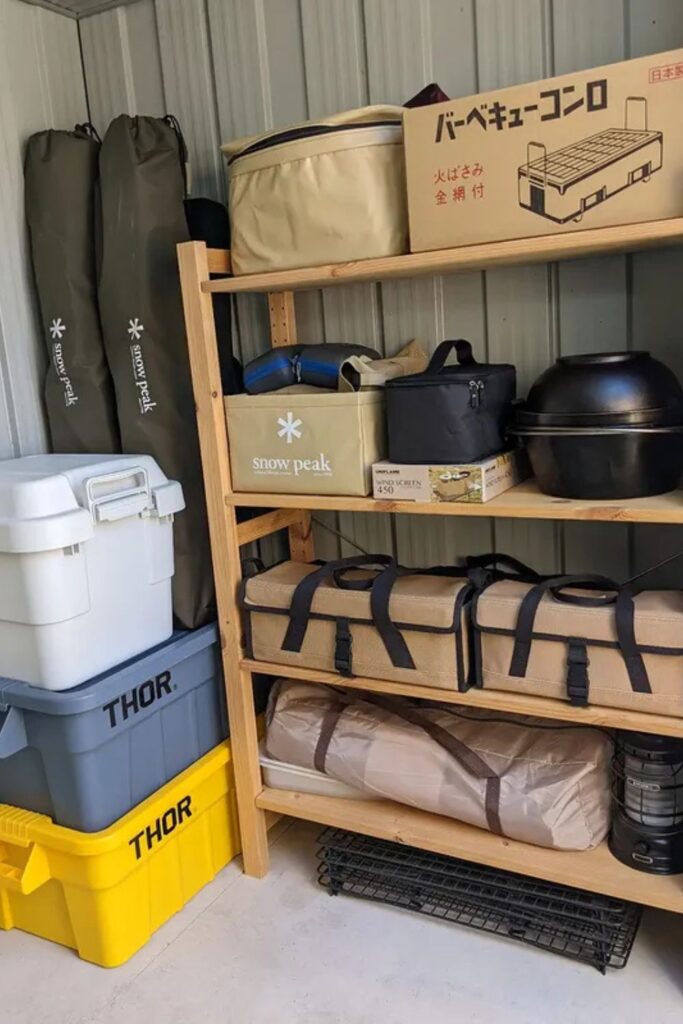
Shed Shelves
Outdoor storage becomes far more useful once camping gear moves onto simple wooden shelving inside a shed.
Instead of piling up on the floor, big things like tents, folding tables, and camp barbecues lay neatly on open shelves.
Heavy-duty bins sit next to the rack and hold smaller items like kitchenware, lanterns, and other accessories.
Vertical space is really useful here: the upper shelves hold light gear bags and the lower shelves hold heavy storage containers.
This idea works best in garden sheds, outdoor storage spaces, or garage corners since they store all of your camping gear in one place.
Gear Studio
Outdoor equipment blends perfectly into a workspace once a full wall becomes a pegboard gear station.
Backpacks hang high so they don’t get in the way, and kitchenware, lanterns, and small equipment are neatly lined up on hooks below.
Hanging mugs, utensils, and small stoves keeps camping culinary equipment ready without having to look through boxes.
Heavier stuff, such power stations, water containers, and packed kits, goes on the lower shelf and in the storage cases.
To make this layout again, you need a big pegboard panel and a mix of hooks, baskets, and little shelves.
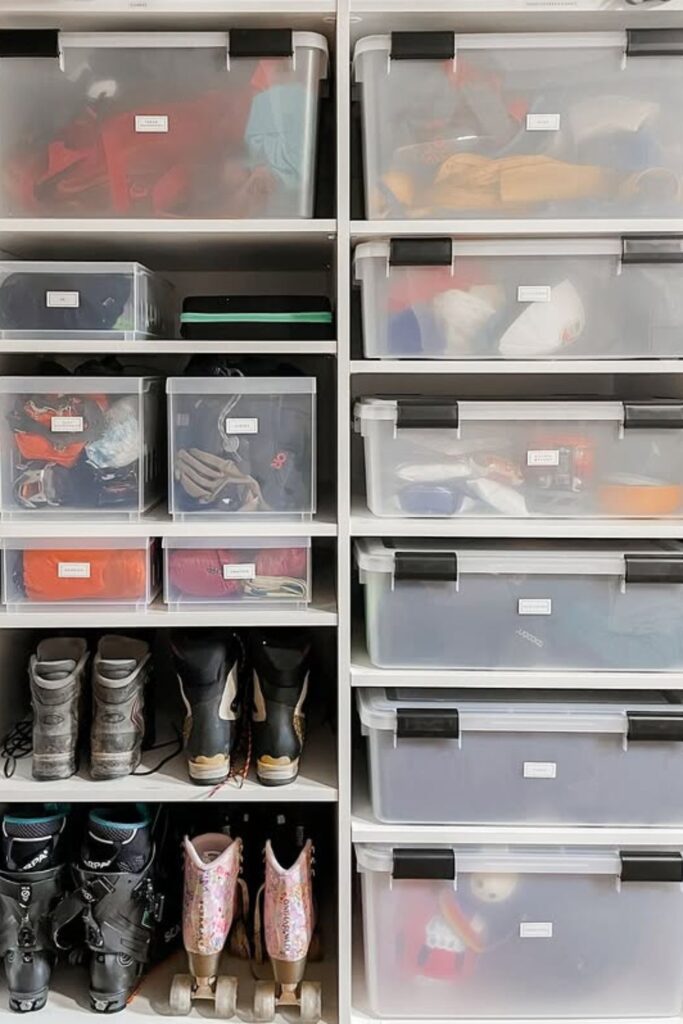
Labeled Bins
Clear storage bins solve one of the biggest camping problems losing small gear inside random bags.
Each container has a certain type of item in it, such as cooking supplies, lighting gear, repair kits, or clothing layers.
It’s easy to grab the right bin because the labels are on the front. You don’t have to search through everything before a trip.
Clear plastic is also helpful because you can see what’s inside right away without having to open all the lids.
A simple shelving device keeps the containers stacked neatly and leaves room below for boots or other heavy equipment.
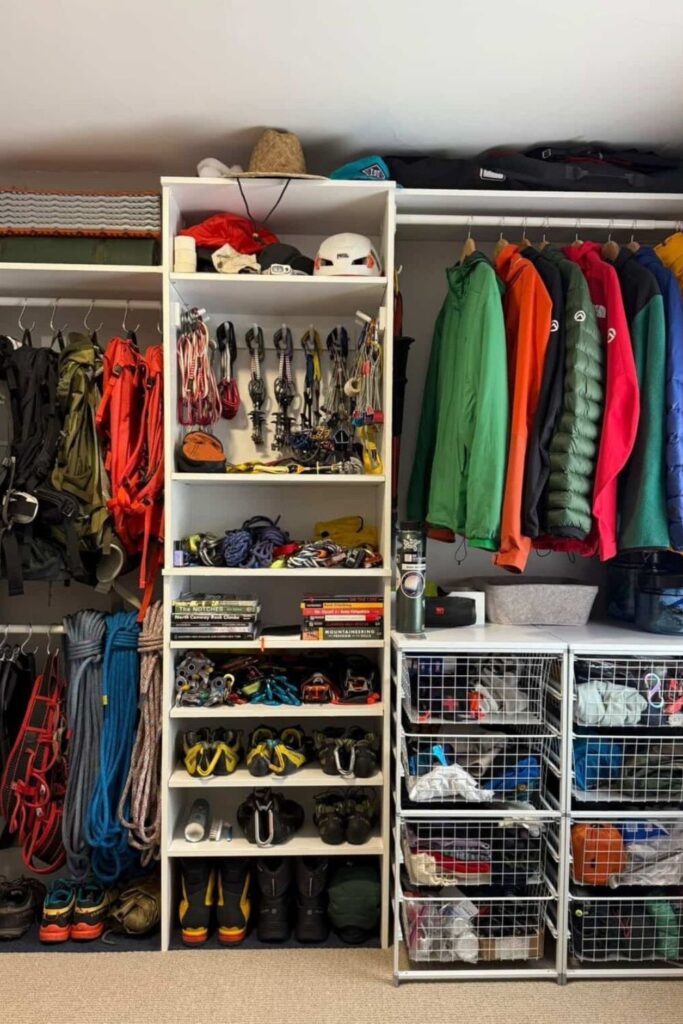
Gear Wardrobe
Camping gear starts to feel manageable once a regular closet turns into a full outdoor wardrobe. Backpacks hang on one side where they stay ready for the next trip.
Instead of piling up on the floor, climbing ropes and harnesses are neatly lined up below. The open shelves in the middle make a great space for carabiners, climbing gear.
And tiny items that usually get lost in bags. There is a separate rail for jackets so that the insulation stays fluffy and ready for cold evenings outside.
On the other side, wire drawers keep gloves, caps, and small items organized without getting everything mixed up.
Spare closets are great because they turn empty storage space into a clean and tidy place to store your things.
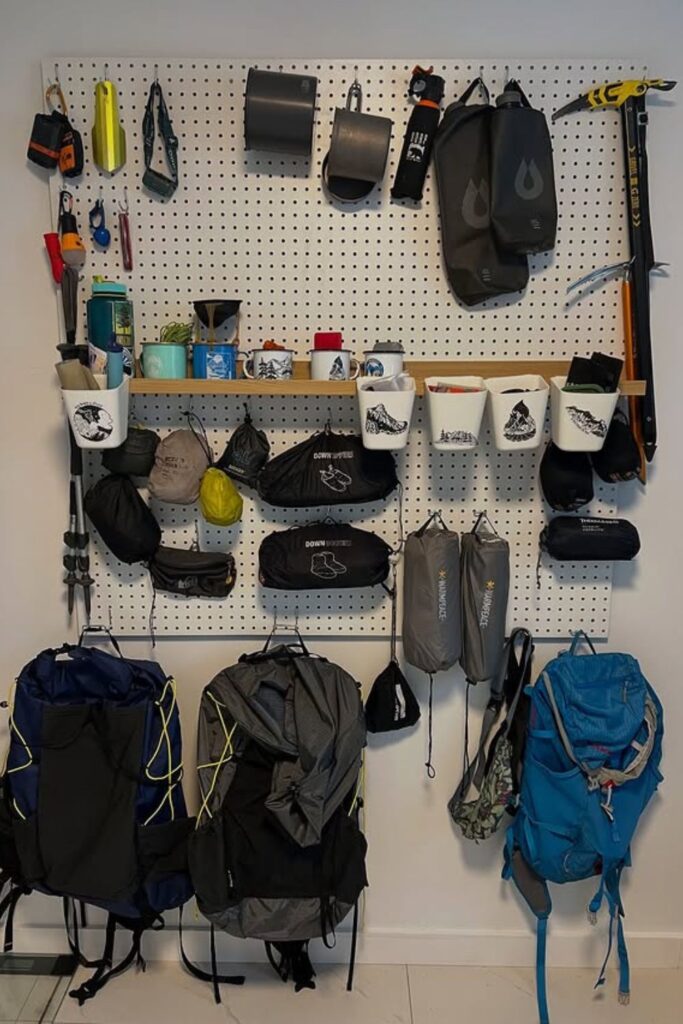
Camp Wall
Small camping gear becomes much easier to manage once a pegboard wall handles the organization.
On hooks, you may hang cooking cups, small stoves, headlamps, and small equipment. This way, nothing gets lost in bags.
Lightweight bags and fabric pouches hang on the lower hooks, where they are simple to see and grab.
A narrow shelf across the board is a good place to stack mugs, coffee gear, or tiny cooking tools that you use a lot at camp.
Backpacks are hung up on the bottom row so they are always ready for the next trip and don’t get in the way on the floor.
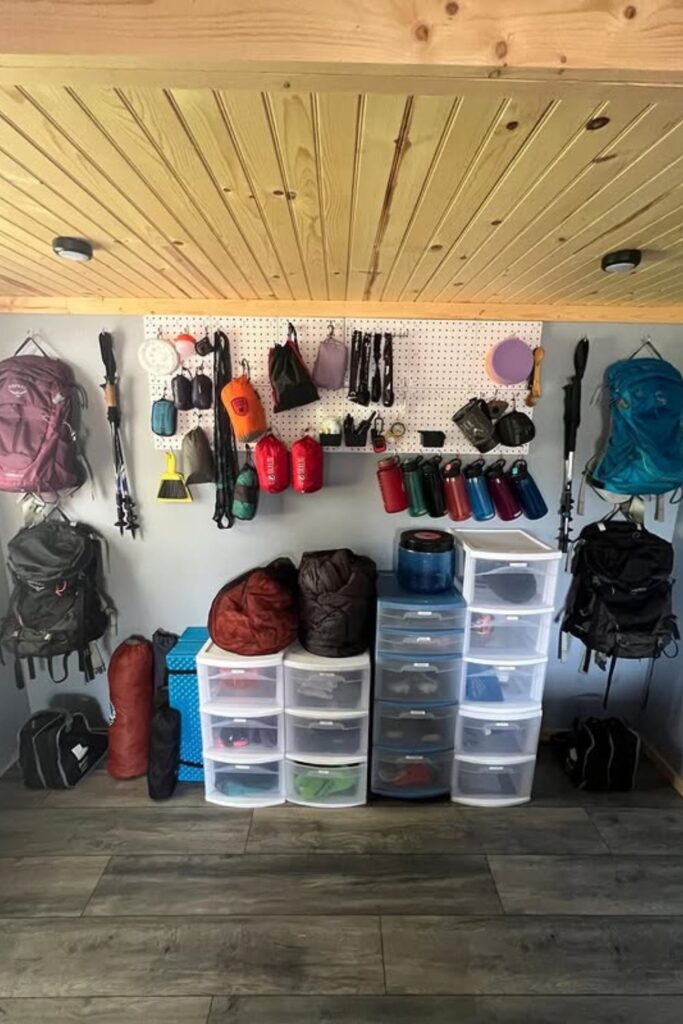
Gear Corner
A small corner can hold an entire camping setup once vertical storage does most of the work. Pegboards keep headlamps, cookware, water bottles, and small tools visible.
So nothing gets lost in drawers. On the side walls, backpacks hang so they may air out and be ready to grab before a trip.
Clear drawer towers hold clothes layers, accessories, and little gear that usually gets spread out all over the room.
Soft things like sleeping bags or tents that are already packed sit on top, where they are easiest to get to.
You only need a pegboard panel, some wall hooks, and stackable drawer units to make this configuration again.
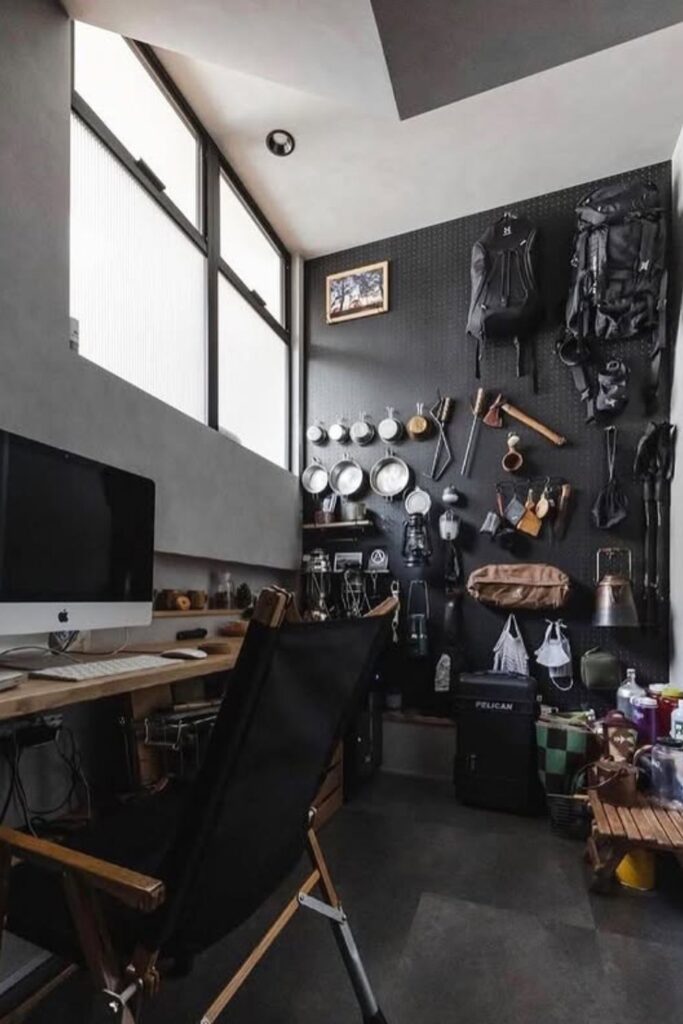
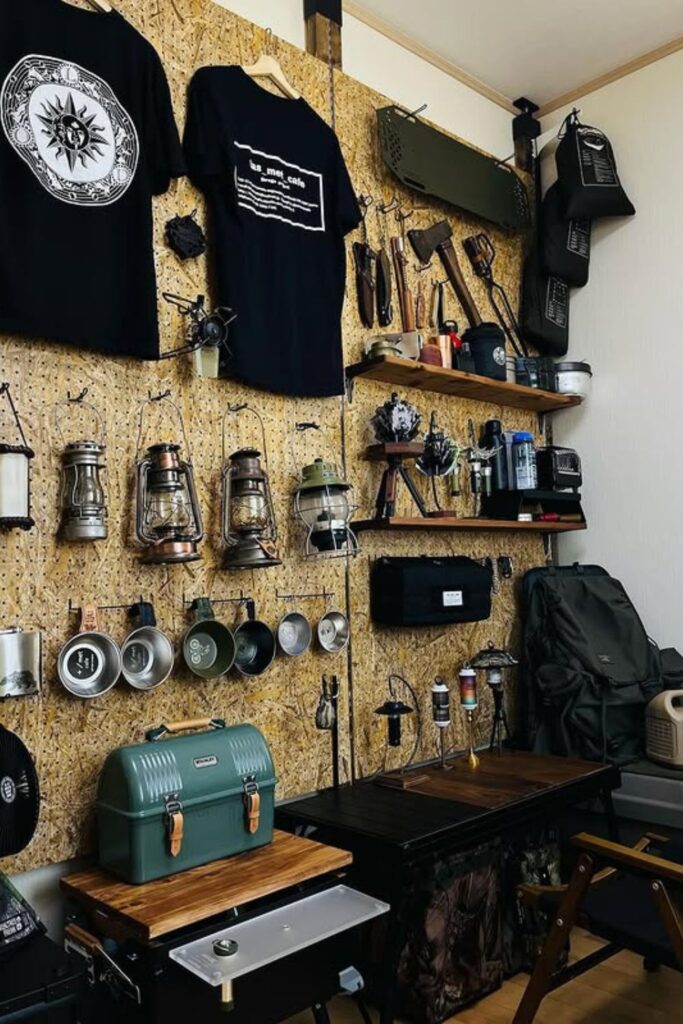
Camp Workshop
A single wall can double as both a workspace and a camping gear station when sturdy boards and hooks handle the organization.
Lanterns, mugs, pots and pans, and small tools are all hanging neatly so that nothing gets lost in the boxes.
There is room for small gear like camp stoves, lamps, and cooking kits that you use a lot on trips on the floating shelves above.
Bigger things, like power stations and backpacks, stay tucked away on the edges where they are easy to get to but not in the way.
To set this up again, you only need a sturdy pegboard or plywood panel, some wooden shelves, and strong hooks to hang your goods on.
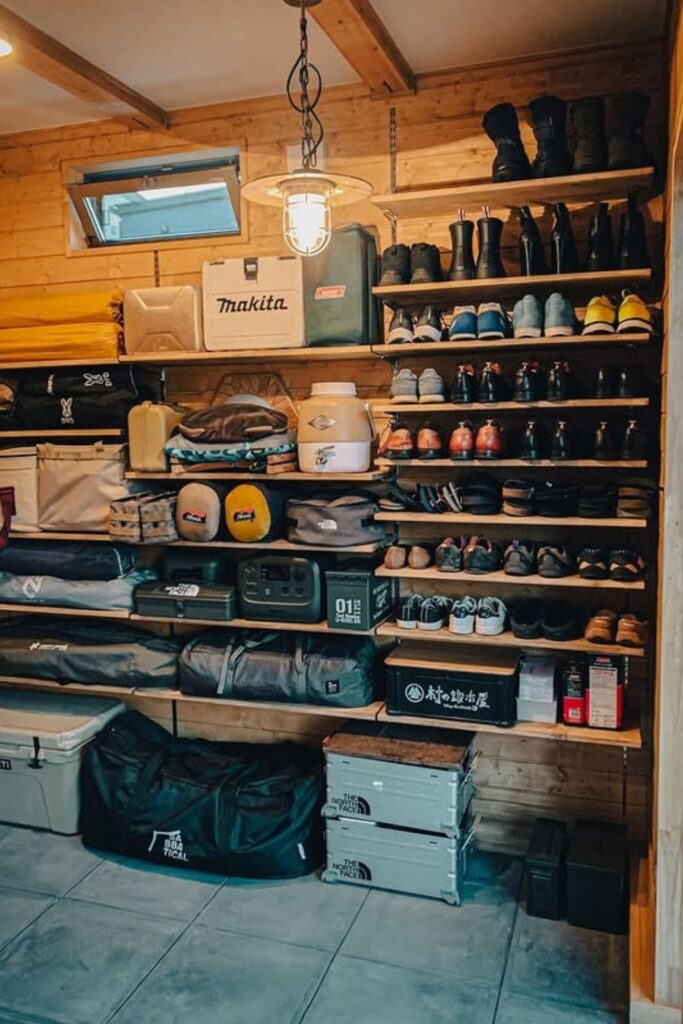
Cabin Shelves
Bulk camping gear finally stops taking over the floor once sturdy wooden shelves handle the storage.
Wide open shelves make it easy to see where tents, folding chairs, and packed camp tables go instead of letting them stack up in untidy mounds.
Smaller shelves on the side are great for keeping hiking shoes, boots, and trail runners organized so that you can grab any pair before you go.
Storage boxes and gear bags are lined up along the bottom, where they keep heavier things safe but easy to get to.
This solution works well with basic wooden shelves that hang on the wall or a whole shelving structure made of plywood.
FAQs
How do you store bulky camping gear without taking up too much space?
When you use vertical space instead of the floor, it becomes easier to handle large camping goods.
You can stack or hang big things like backpacks, sleeping bags, and folding chairs on wall racks, pegboards, and tall shelf units.
Packing for excursions is significantly faster when each sort of gear has its own area, like sleeping gear, cooking gear, and tools.
What is the best way to organize camping gear for quick trip preparation?
Put your stuff into groups based on what you do with it to make an easy grab-and-go method. Put all of your cooking tools in one bin, all of your sleeping gear in another.
And all of your hiking gear on hooks or pegboards. Backpacks and jackets that are hanging out are easy to grab, and labeled containers make it easy.
To find smaller things like headlamps or repair kits. This technique saves you time because everything is already packed and ready to go for your next trip.
You may like to read!

Fasial is the founder of the Fizzy Flare. He has been a passionate blogger since 2021. He ran three different websites in the past few years. Now he is focusing on Fizzy Flare to build an audience and help them organize their life.