18 Storage Bin Rack DIY Ideas for 2026
This post may contain affiliate links: full affiliate disclosure.
If you’ve ever stacked heavy storage bins in your garage, you know the struggle. You need something from the bottom, so you end up pulling down three other totes first.
Lids crack, bins bow in the middle, and the whole pile feels like it could tip over at any second. Most DIY plans don’t tell you how to make them strong enough for real weight.
In this article, you’ll learn exactly how to build a heavy-duty storage bin rack 18 DIY storage bin rack ideas.
Let’s jump in!
Contents
- 1 How Do I Build a DIY Storage Bin Rack That Can Hold Heavy Loads?
- 1.1 Rolling Grid Tower
- 1.2 Heavy Shelf Frame
- 1.3 Compact Rail System
- 1.4 Double Row Units
- 1.5 Full Wall Storage
- 1.6 Workbench Base Storage
- 1.7 Wire Shelf Upgrade
- 1.8 Vertical Corner Stack
- 1.9 Mobile Work Island
- 1.10 Ceiling Height Wall
- 1.11 Slim Wall Columns
- 1.12 Raised Platform Rack
- 1.13 Angled Slide Frame
- 1.14 Open Rail Frame
- 1.15 Reinforced Cubby Frame
- 1.16 Outdoor Concealment Cabinet
- 1.17 Fence Line Storage
- 1.18 Roofed Utility Station
- 2 FAQS
How Do I Build a DIY Storage Bin Rack That Can Hold Heavy Loads?
If you want your storage bin rack to hold real weight, you have to build it like a structure, not just a shelf. Start with solid 2×4 lumber for the frame.
Thin boards will sag over time, especially if your bins are full of tools, books, or holiday decor. Measure your bin’s top lip carefully.
Leave just enough clearance so it slides in without forcing it. Install strong horizontal rails or cleats to support the bin edges.
Secure them with structural screws, not cheap drywall screws. Add a back panel or diagonal bracing to stop side-to-side wobble.
If the rack is tall, anchor it into wall studs so it can’t tip forward. The goal is simple: distribute weight evenly, prevent sagging.
Eliminate movement. If you build the base strongly and lock everything in place, your rack will hold heavy loads without bending or shifting.
Save this article for later! 👇👇

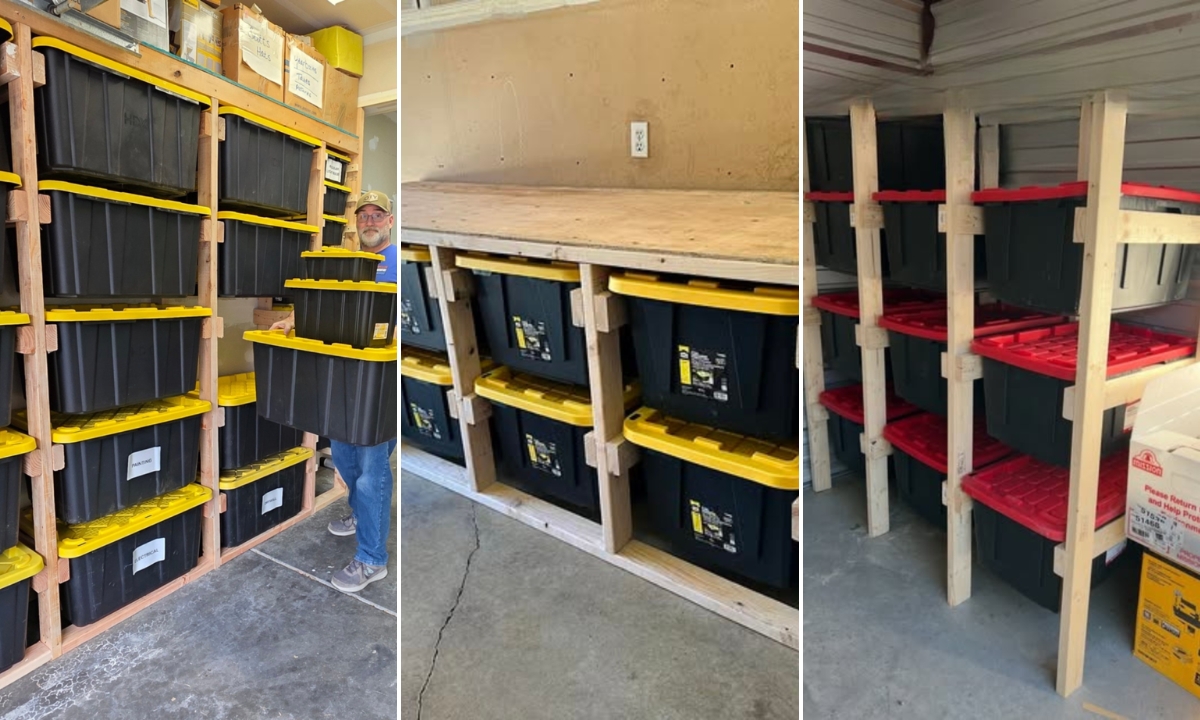
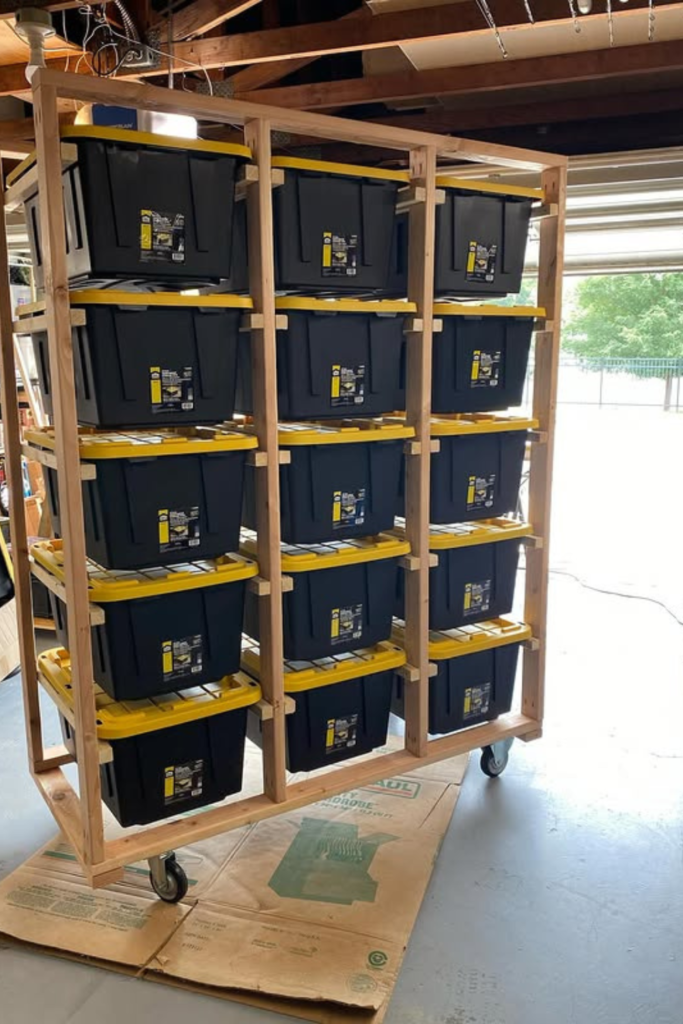
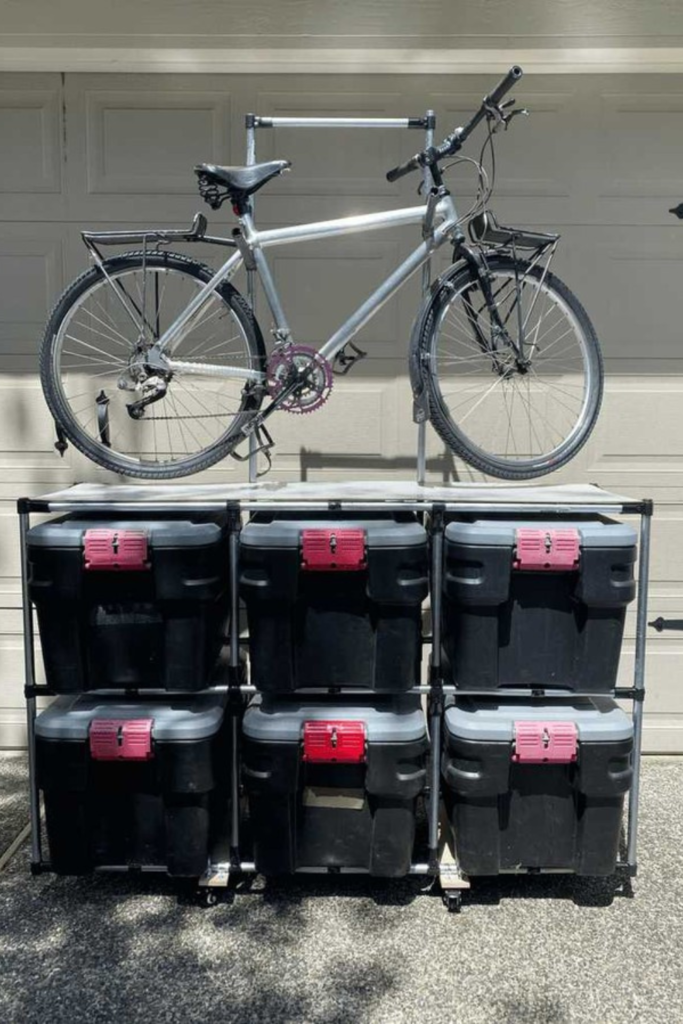
Rolling Grid Tower
Garage floors fill up fast, so putting your storage on wheels changes everything. Open sides allow airflow and easy labeling.
This tall rolling rack holds multiple heavy-duty bins in a tight grid layout, which makes it perfect for large garages or workshops.
You need serious capacity. Build a full 2×4 frame and create individual cubbies so each bin slides in and out smoothly.
Locking heavy-duty casters at the bottom let you move the entire unit when needed. Keep the base wide and balanced.
Bright overhead shop lights work best here, especially in garages with limited natural light, so you can see labels clearly.
Heavy Shelf Frame
Sometimes, sliding rails aren’t necessary. Perfect for sheds or unfinished garages where flexibility matters more than tight spacing.
Wide-open shelves like this work best when your bins vary in size or when you plan to swap containers over time.
Build a thick 2×4 frame and support each shelf with cross braces beneath to evenly distribute the weight.
Placing it against a solid wall adds stability, anchoring it into studs keeps everything secure. Natural light from a garage door works well here.
Add a simple overhead LED strip above the unit helps you read labels quickly without having to pull the bins forward.
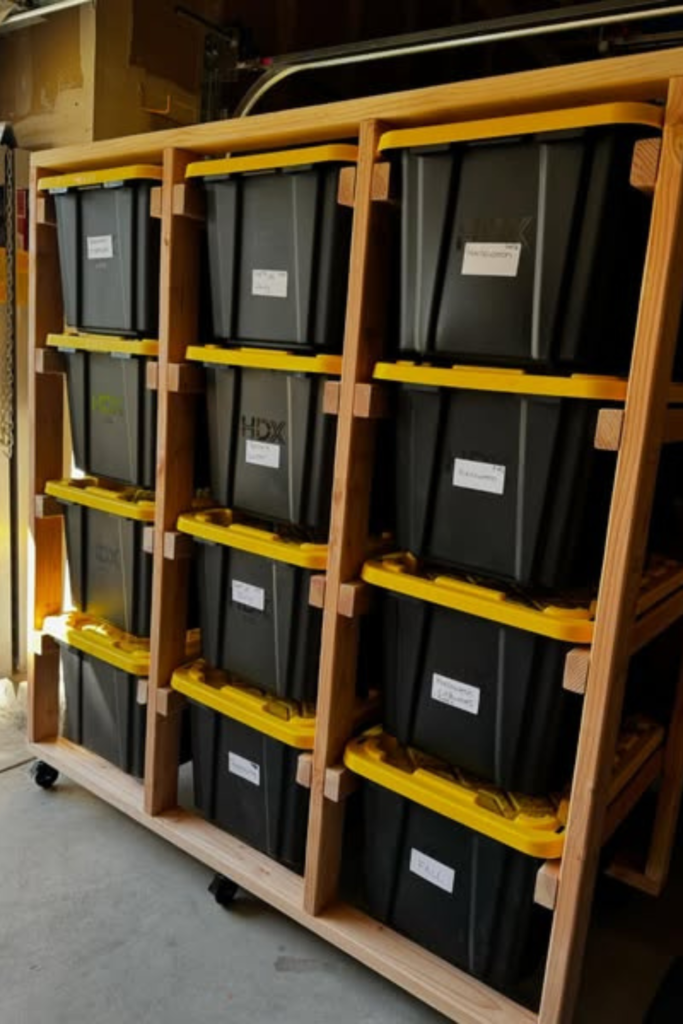
Compact Rail System
Tight spaces demand a slimmer build. Securing the back legs to the wall prevents forward tipping, especially when the top bins are full.
Narrow rail-style racks like this slide-in bin rack waste zero depth, making them ideal for storage units, small sheds, or narrow garage walls.
Cut 2×4 uprights and attach horizontal cleats that match the lip of your bins. Leave about half an inch of side clearance.
Prevent bins from binding when loaded. Stack the rails evenly and keep the spacing consistent, weight stays balanced.
Strong side lighting or a simple clamp light mounted above the rack helps brighten darker storage units where natural light barely reaches.
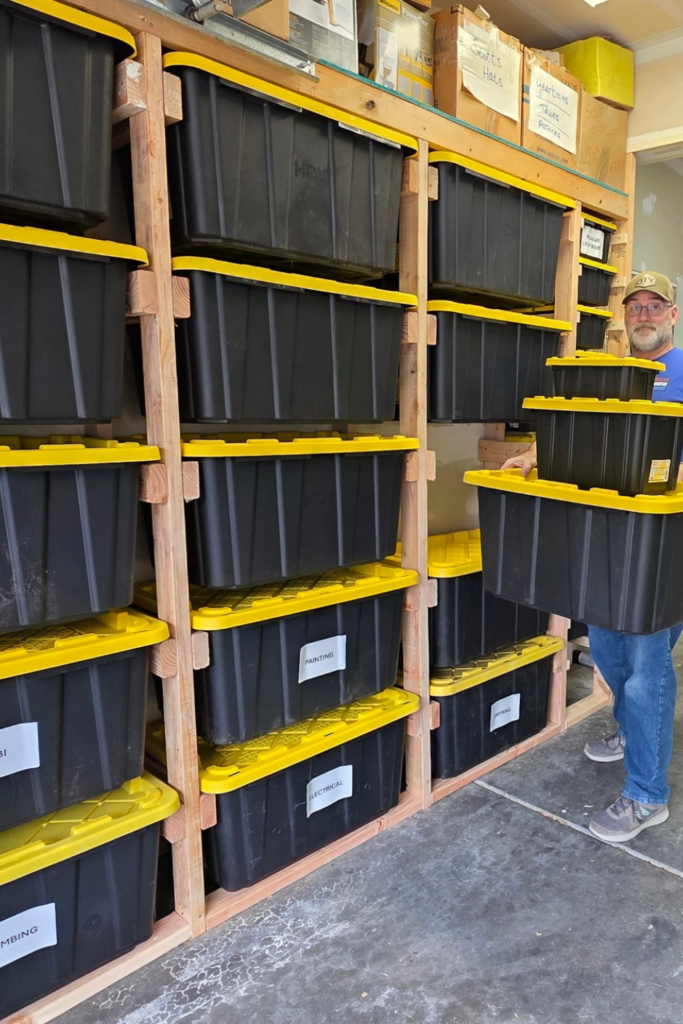
Double Row Units
Big families or serious decorators need more than one rack. Keeping the design consistent makes the space look intentional.
Matching double-row units like these turn an empty wall into a clean, organized storage zone, Secure both units into wall studs.
Build each frame separately using sturdy 2×4 uprights and thick rail supports, then position them side by side with a small gap for airflow.
Placing them in finished basements or carpeted storage rooms works well since the footprint stays compact.
Soft overhead lighting or recessed ceiling lights brighten the area evenly and help you read labels without pulling bins out.
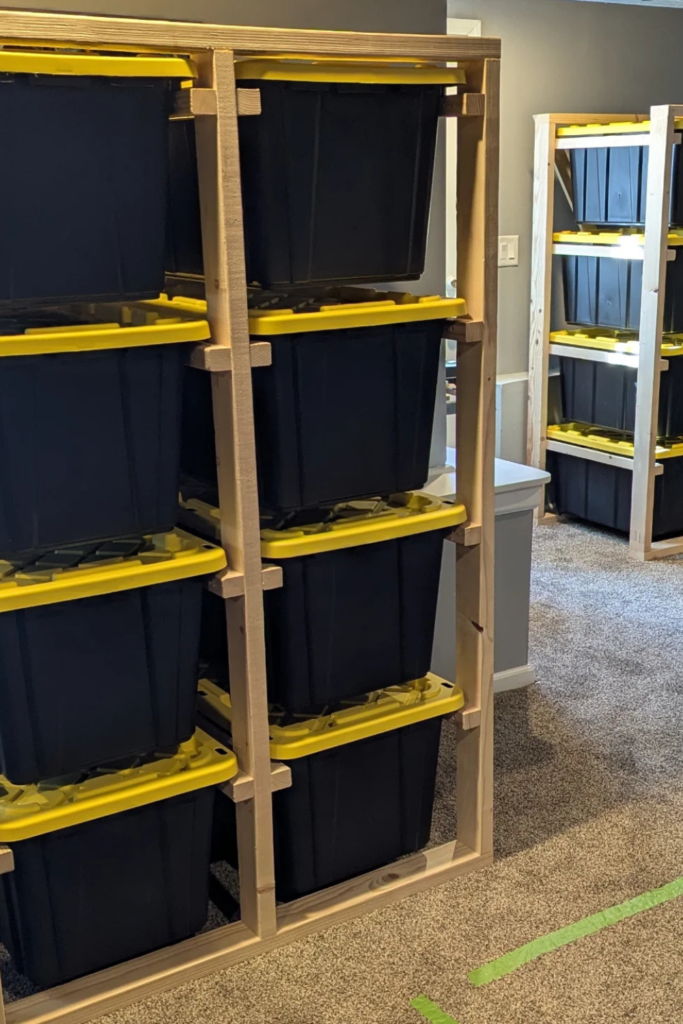
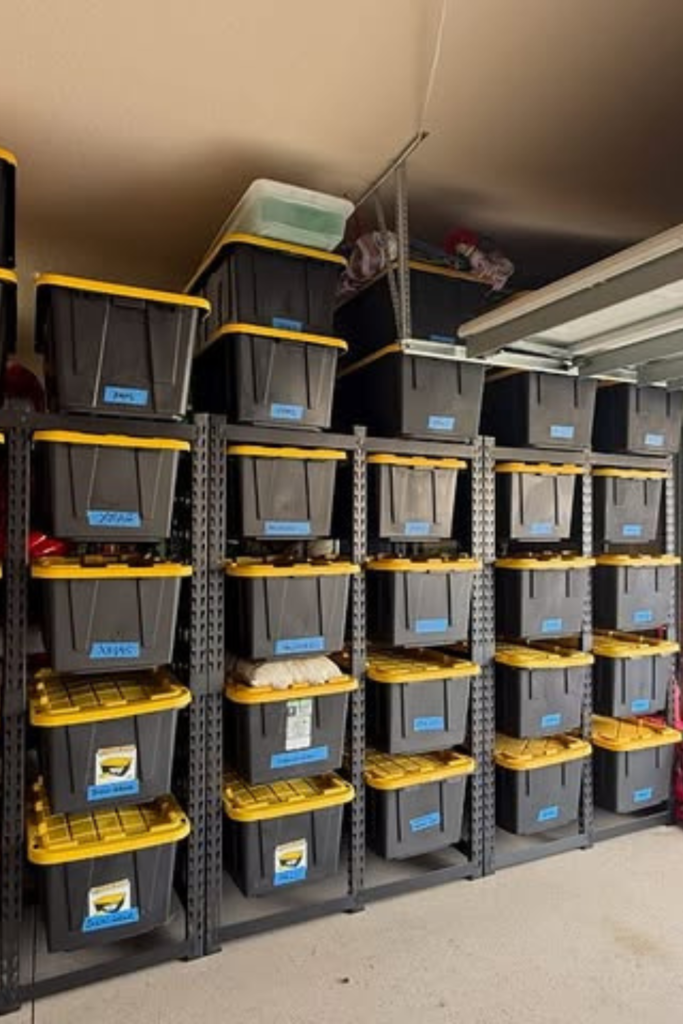
Full Wall Storage
Floor space disappears fast when bins start piling up. Frame it directly against a garage wall using strong 2×4 uprights anchored into studs.
Run horizontal rails across the width so every bin rests on its lip, not its lid. Keeping rows evenly spaced prevents stress points.
Makes the load feel balanced from bottom to top. Lower rows should carry the heaviest bins to keep the center of gravity stable.
Garages with overhead lighting work well, adding a bright shop light above, helps eliminate shadows and keeps labels easy to read.
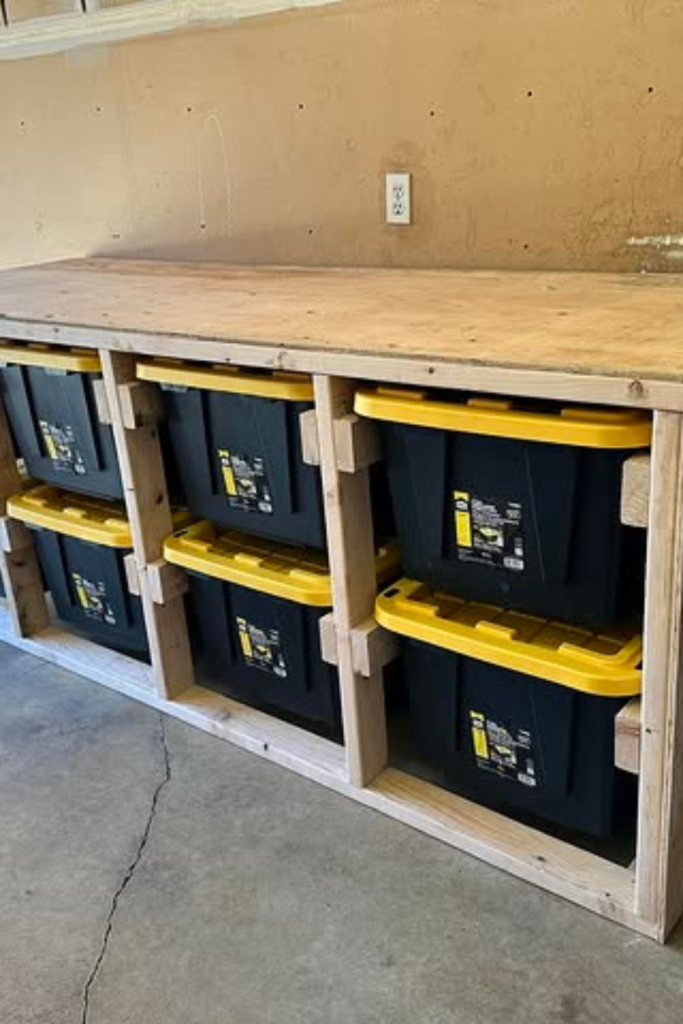
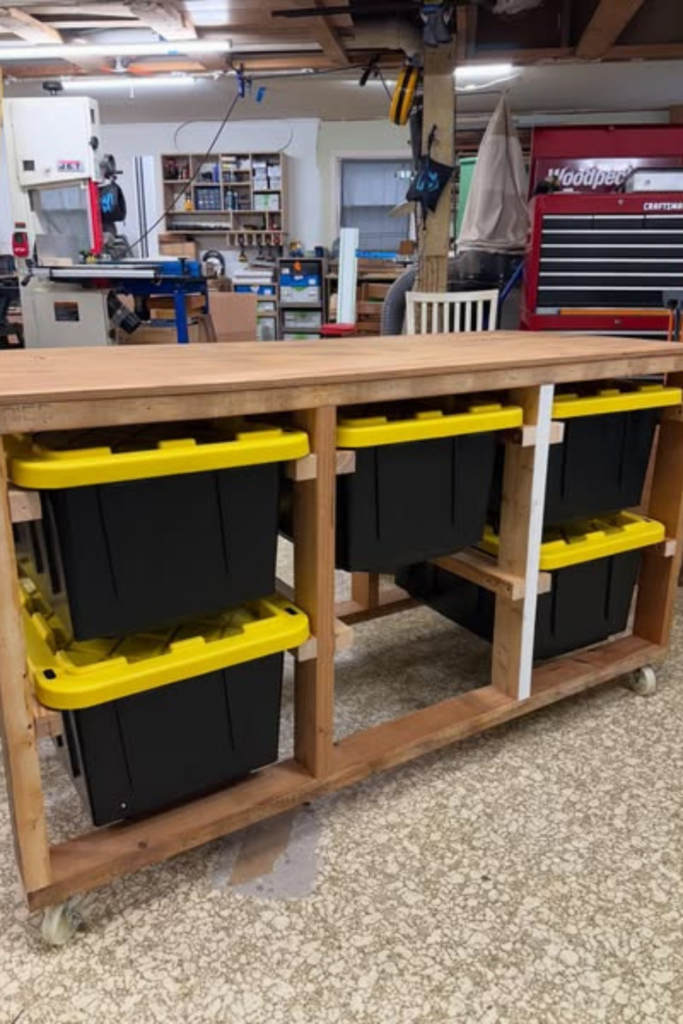
Workbench Base Storage
Turning the base into a bin rack gives you heavy-duty organization without adding another bulky unit to the garage.
Frame a strong box structure with 2×4 supports and divide it into equal cubbies sized to your bin width.
Secure rails inside each opening so totes slide in smoothly and stay lifted off the floor, thick plywood top doubles as a solid work surface
Providing storage and workspace in one build. Keeping everything low makes it perfect for heavier bins like tools or hardware.
Bright task lighting above the bench keeps the surface usable while still lighting the bins below, this works well.
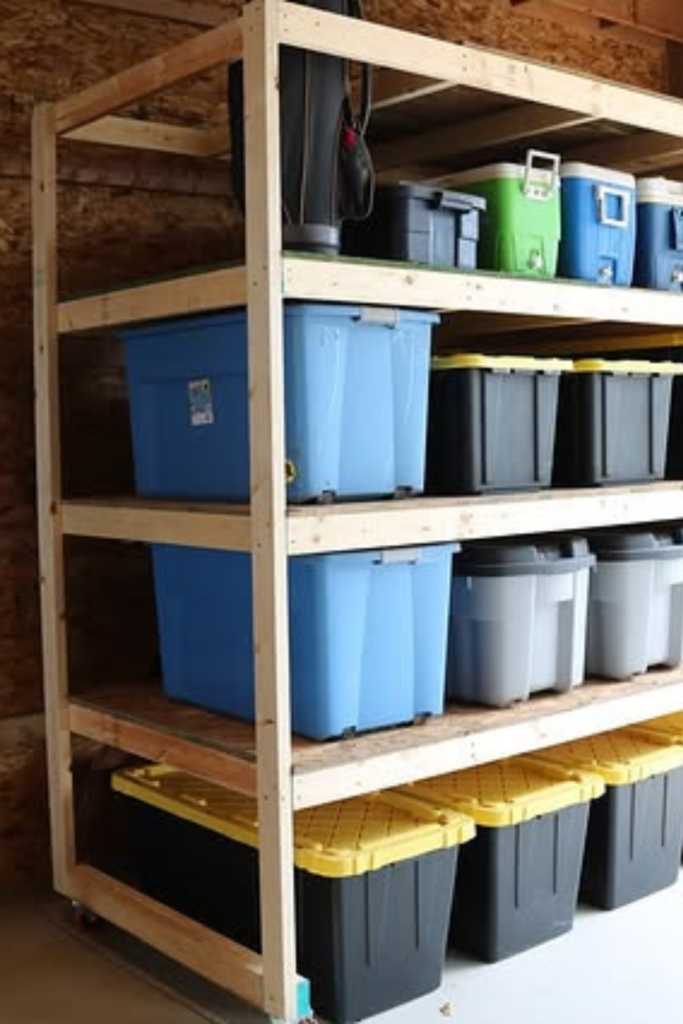
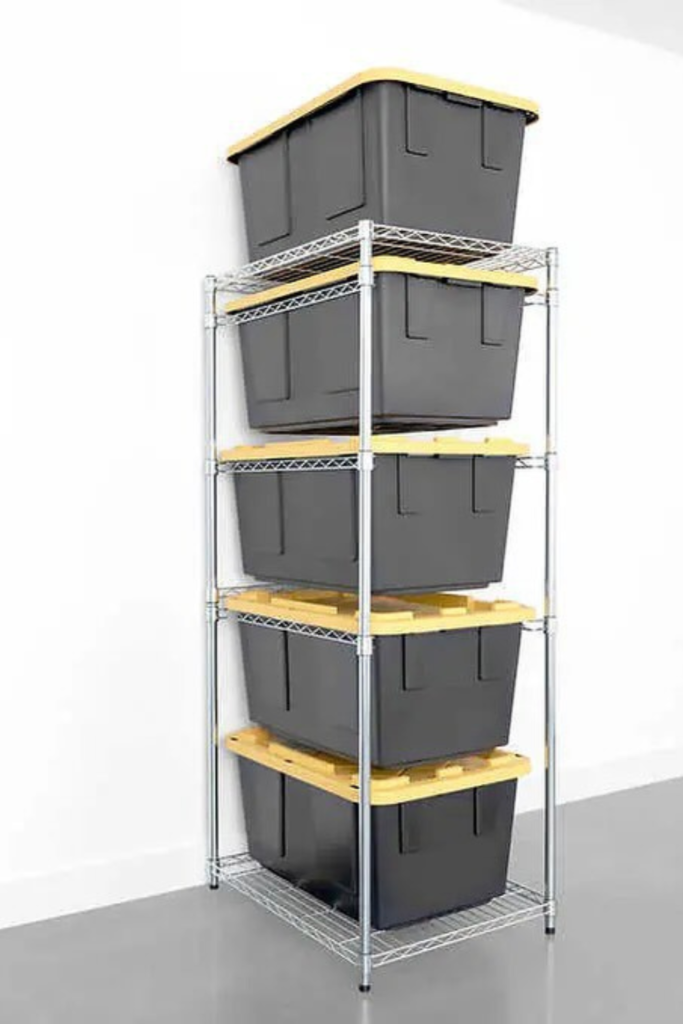
Wire Shelf Upgrade
Metal wire shelving feels convenient, but heavy bins can bow the wires over time. Cut plywood panels to match each shelf size.
Lay them flat over the wire grids. Reinforcing each level with plywood instantly turns a light-duty rack into something much stronger.
That spreads the weight evenly. Keep heavier bins on the lower shelves to prevent wobble. Tighten all corner posts.
Firmly lock the leveling feet against the floor. Placing this setup in basements or utility rooms works best since it keeps the footprint narrow.
Soft overhead LED lighting reflects well off light-colored walls, making labels easier to spot without digging through stacks.
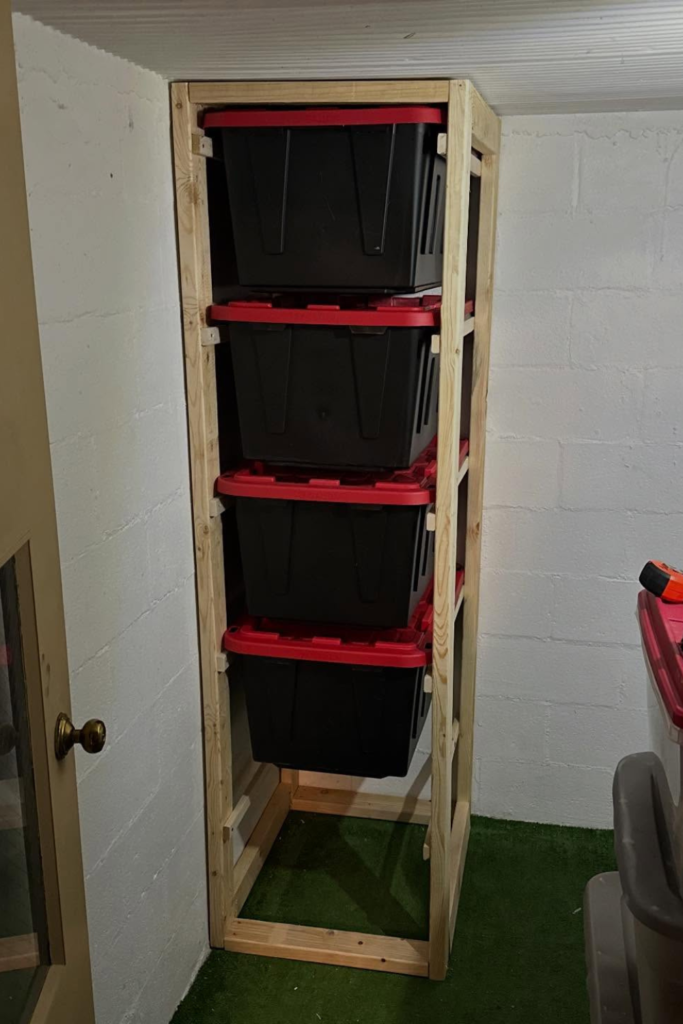
Vertical Corner Stack
Awkward corners often go unused, yet they’re perfect for tall, narrow racks like this one. Placing heavier bins at the bottom.
Keeps everything balanced. Slim vertical builds work great in small utility rooms, closets, or basement corners.
Construct a compact 2×4 frame with evenly spaced rail supports that match your bin lip width, keeping the footprint tight.
Anchor the back posts into studs or masonry to prevent tipping, especially since the height adds leverage.
Small enclosed spaces benefit from a simple wall-mounted LED light above, so shadows don’t hide labels or make access more difficult.
Mobile Work Island
Garages and workshops change constantly, fixed storage can get in the way. Rolling island like this keeps heavy bins accessible.
Build a wide 2×4 base with strong cross supports beneath to support the weight from both the bins and the countertop.
Divide the lower frame into cubbies sized for your totes, and mount smooth rails so they slide in without scraping.
Keeping the top thick and reinforced lets it function as a cutting. Install heavy-duty locking casters to keep the unit stable.
Bright overhead shop lights work best here, since you’ll use the surface for both active projects and storage.
Ceiling Height Wall
Clutter spreads fast when you only use half of your wall. Leaving a small gap near the ceiling prevents scraping during removal.
Going all the way up to the ceiling transforms a single garage wall into serious long-term storage without eating floor space.
Frame tall uprights anchored directly into wall studs, run horizontal rails across each level. Keeping rows evenly spaced.
Makes access easier and improves weight distribution. Place the heaviest totes on the lower levels and lighter seasonal bins higher up.
Bright overhead garage lighting works well here, but adding a strip light above the top row eliminates shadows in the upper corners.
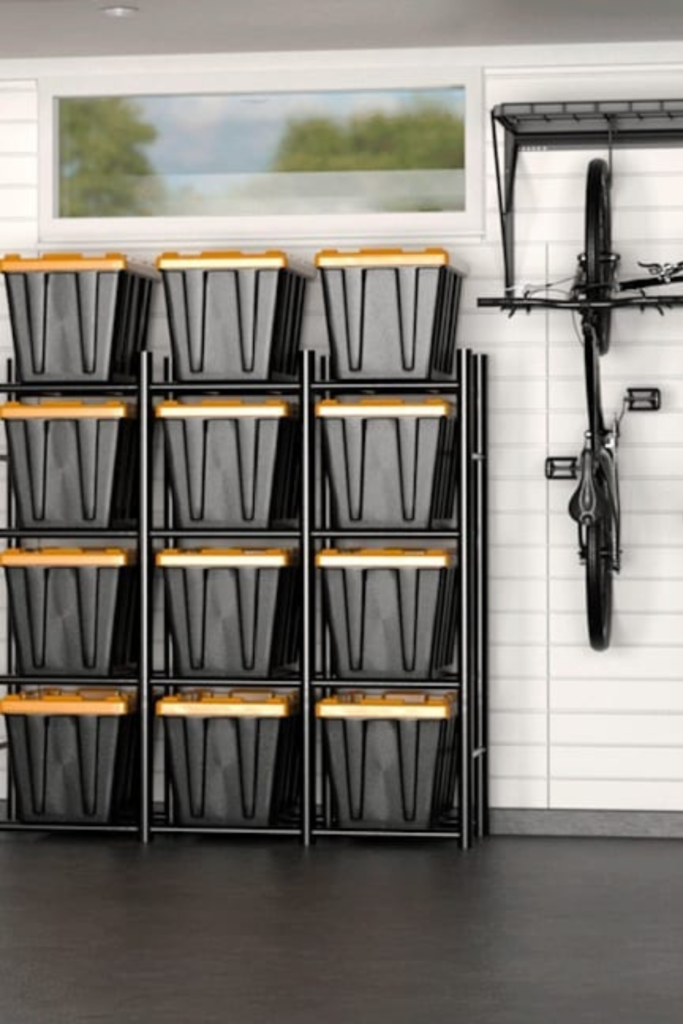
Slim Wall Columns
Not every garage needs bulky wood framing. Lighter-colored walls reflect natural daylight well, so labels stay visible.
Steel column-style racks like these work well along finished walls, providing a cleaner look without sacrificing strength.
Choose heavy-duty metal shelving units that allow bins to slide in on their lips. Keeping the footprint narrow.
Lets you line up multiple columns side by side. Secure each unit to the wall for added stability, especially in garages with smooth floors.
For darker garages, mounting a simple LED strip above the row keeps everything bright without cluttering the ceiling.
Raised Platform Rack
Storage doesn’t have to stop at the bins. Reinforce the corners and center span so the top can handle real weight.
Adding a solid platform on top turns your rack into a dual-purpose station, especially in garages where vertical space is at a premium.
Build a strong lower frame that holds bins on rails or reinforced shelves, secure a thick plywood top across the entire surface.
Keeping the rack against a garage door wall works well for bikes or bulky gear that normally eats floor space.
Outdoor daylight provides plenty of visibility, but mounting a motion sensor light above the area keeps access easy after dark.
Angled Slide Frame
Straight racks work, but a slight forward angle makes bin access even smoother. Tilting the frame just a few degrees lets gravity help you.
Build the side uprights slightly taller at the back and attach rails that slope gently toward the front. Keep the angle subtle.
Solid 2×4 framing keeps the structure rigid, and locking casters underneath add mobility. Placing this design in a garage corner.
Warm overhead shop lights highlight labels clearly, especially in darker garages where shadows usually hide bin contents.
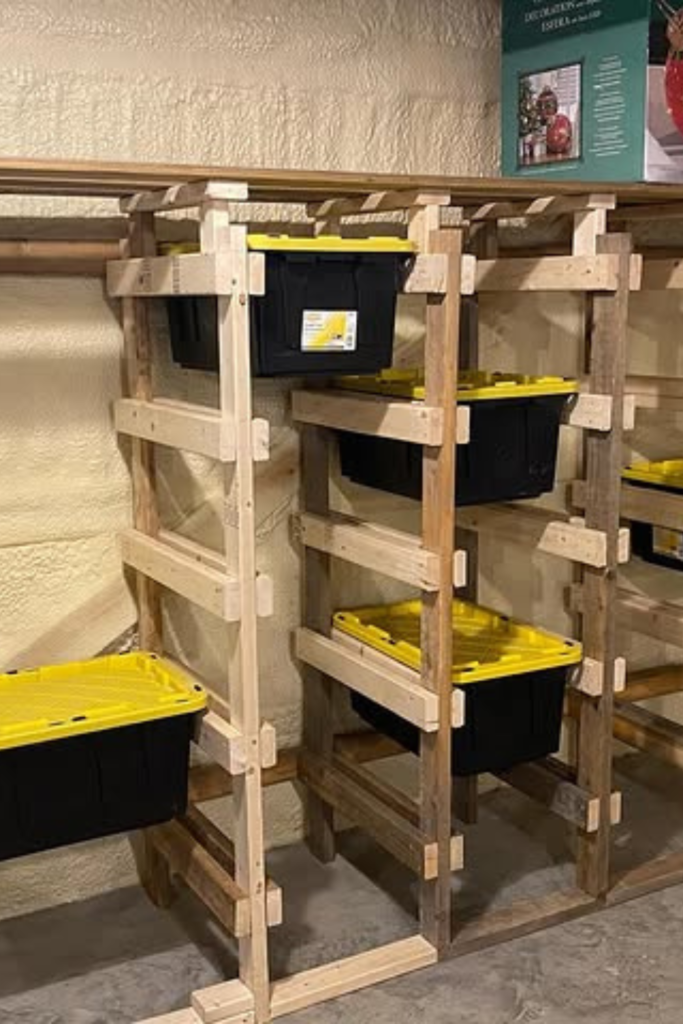
Open Rail Frame
Closed cubbies aren’t always necessary. Keeping the base wide prevents sway, especially in unfinished basements with uneven floors.
An open rail frame like this keeps the structure light while still supporting heavy bins securely on their lips.
Leaving the center open reduces material costs and makes adjustments easier if you later change bin sizes.
Heavier bins should sit lower to stabilize the rack. Placing it against a masonry wall adds natural support.
Simple overhead bulb brightens the open layout without casting deep shadows inside tight compartments.
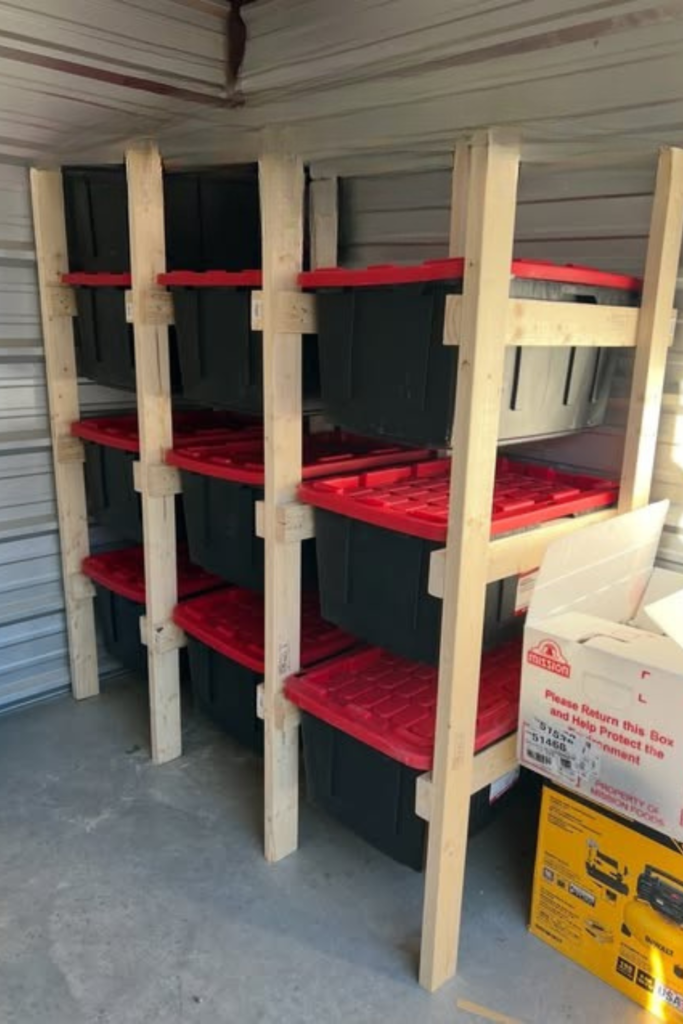
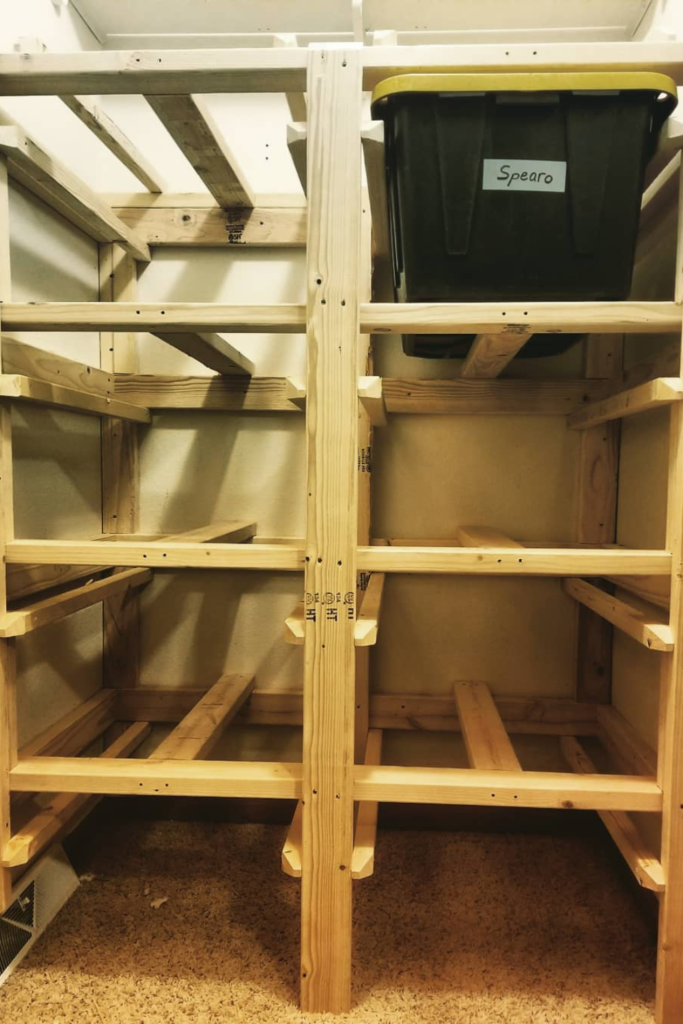
Reinforced Cubby Frame
Strength shows in the details. Thick vertical posts paired with deep horizontal supports like these handle serious weight.
Build each section as a rigid box, then secure the sections together so the full unit acts as a single solid structure.
Add double rails under each bin lip for extra support. Keeping spacing consistent across rows prevents twisting.
Indoor spaces with softer lighting benefit from a bright overhead fixture centered above the rack to eliminate shadows inside deeper cubbies.
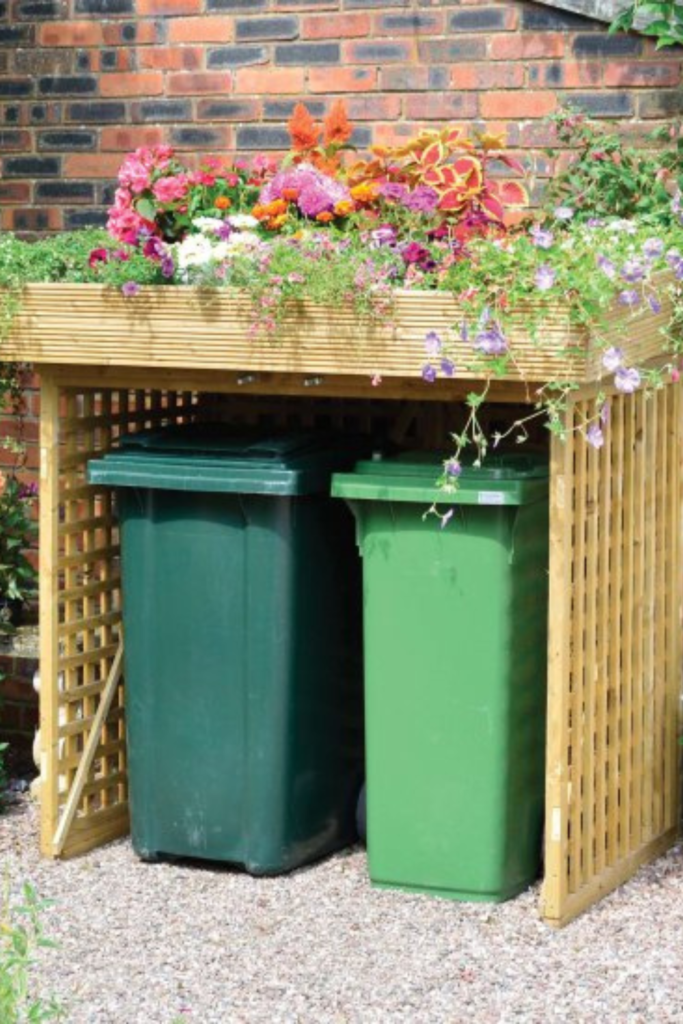
Outdoor Concealment Cabinet
Storage doesn’t always belong inside the garage. An outdoor cabinet like this hides bulky bins while blending into your yard.
Build a simple pressure-treated wood frame with slatted sides to allow airflow and prevent moisture buildup.
Add a solid top that doubles as a planter box or decorative surface, helping the unit avoid looking purely functional.
Keeping the base slightly elevated protects bins from ground moisture and rain splash. Placing it against a brick adds stability.
Natural daylight handles visibility here, but low garden path lights nearby make access easy in the evening without overpowering the space.
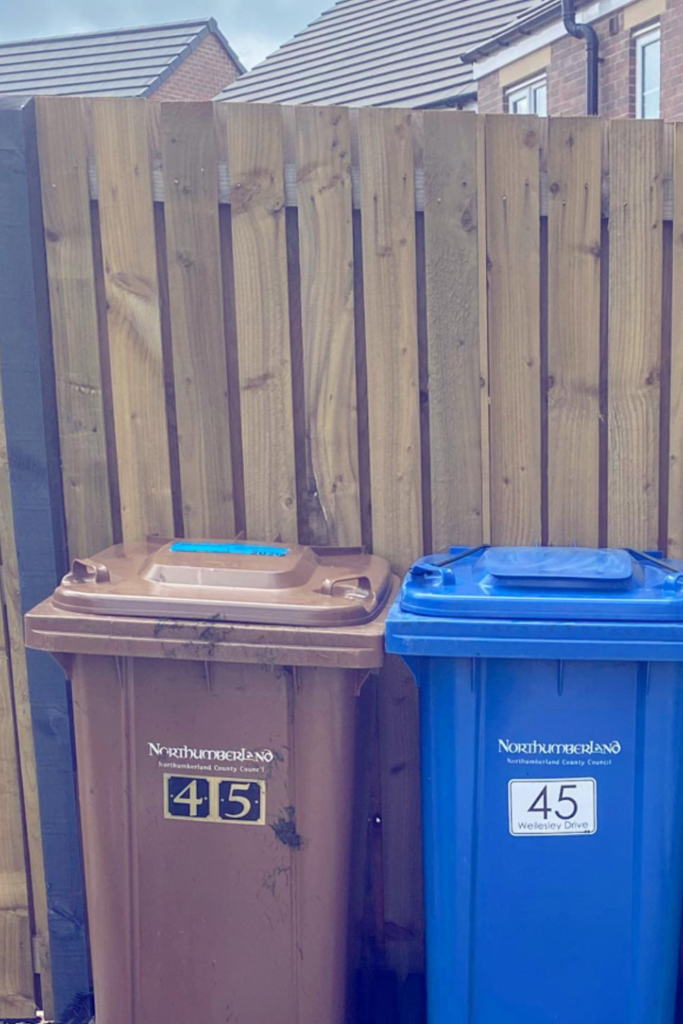
Fence Line Storage
Yard bins don’t need to sit scattered across the driveway. Installing simple ground brackets keeps them from tipping during strong winds.
Lining them neatly along a fence instantly creates a clean, organized look without building a full enclosure.
Choose a straight fence section with solid posts, position the bins, leaving small gaps between them for airflow and easy lid access.
Keeping the area level prevents wheels from rolling out of place. Natural daylight handles daytime visibility.
Adding a motion-activated wall light nearby keeps the area functional at night without illuminating the entire yard.
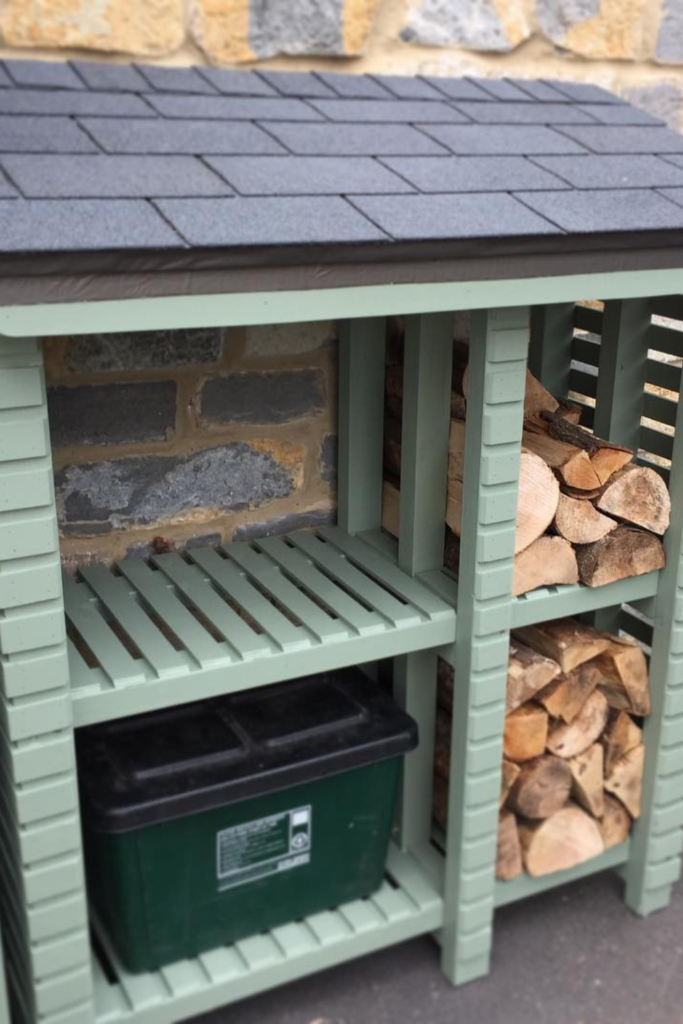
Roofed Utility Station
Rain ruins more than you think. Placing it against a stone or brick wall adds stability and wind protection.
Small roofed station like this protects bins and stacked firewood while keeping everything ventilated and off the ground.
Build a compact frame from treated lumber or durable outdoor panels, then add slatted shelves so air can flow underneath.
Installing a pitched, shingled roof directs water away from the structure and helps it blend naturally with outdoor spaces.
Soft garden lighting or a nearby porch light gives enough visibility at night without overpowering the cozy outdoor setup.
FAQS
How Much Weight Can a DIY Bin Rack Hold?
Load capacity depends on lumber size, span length, and the method of supporting the rails. A properly built 2×4 frame with short spans.
Strong cross bracing can easily handle heavy storage totes filled with tools or books. Keep rails fully supported on both ends, avoid wide gaps between vertical posts.
Place the heaviest bins on the lower rows. Anchoring the rack into wall studs adds extra stability and prevents tipping under uneven loads.
Should I Anchor My Storage Rack to the Wall?
Tall racks should always be anchored, especially if they hold heavy bins near the top.
Securing the back posts into the wall studs prevents forward tipping when you pull out a loaded tote.
Even rolling units benefit from wall anchors when parked long-term. Anchoring keeps the structure stable, reduces wobble, and protects both your storage and your safety.
You may like to read!

Fasial is the founder of the Fizzy Flare. He has been a passionate blogger since 2021. He ran three different websites in the past few years. Now he is focusing on Fizzy Flare to build an audience and help them organize their life.