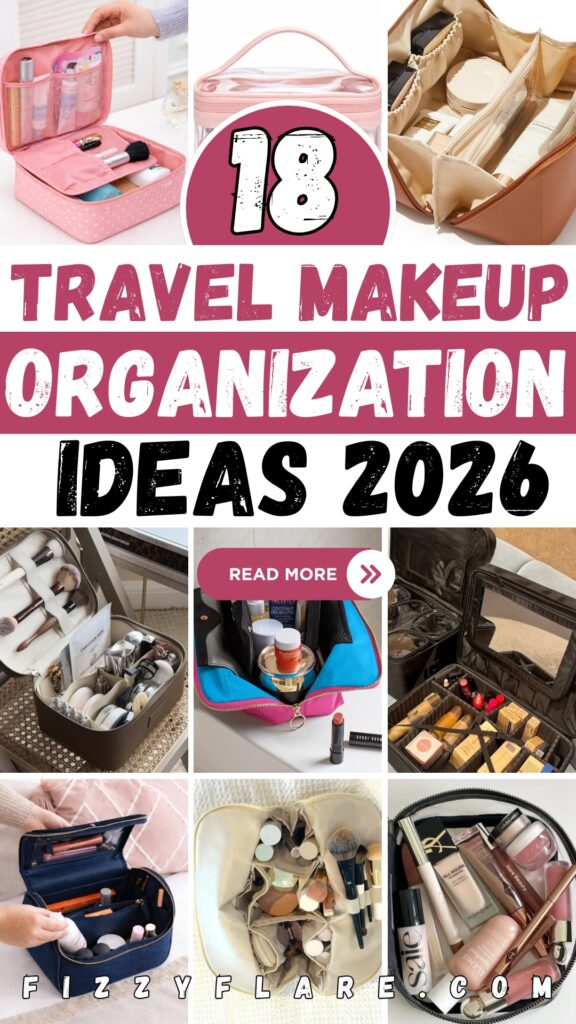
18 Travel Makeup Organization Ideas for 2026
This post may contain affiliate links: full affiliate disclosure.
If you’ve ever opened your makeup bag while traveling and had to dig through everything just to find one product, you know how annoying that feels.
Your brushes are mixed with lipsticks, powders are sliding around, liquids are packed wherever they fit. You zip it up at home, but once you’re on the move, it turns into chaos.
In this article, you’ll learn exactly how to arrange your makeup so you can find everything quickly, and 18 travel makeup organization ideas.
Let’s jump in!
Contents
- 1 Is There a System to Arrange Makeup So I Can Find Everything Quickly While Traveling?
- 1.1 Layered Zip Case
- 1.2 Clear Double Pouch
- 1.3 Structured Divider Bag
- 1.4 Hanging Compartment System
- 1.5 Custom Grid Layout
- 1.6 Upright Open Access
- 1.7 Brush Lid Storage
- 1.8 Category Cluster Packing
- 1.9 Elastic Slot Layout
- 1.10 Lid Pocket Setup
- 1.11 Dual Bag Split
- 1.12 Triple Zip Visibility
- 1.13 Center Divider Balance
- 1.14 Sectioned Luxury Layout
- 1.15 Raised Center Row
- 1.16 Stackable Clear Layers
- 1.17 Pre-Sort Before Packing
- 1.18 Tool Wall Layout
- 2 FAQs
Is There a System to Arrange Makeup So I Can Find Everything Quickly While Traveling?
Yes, there is, and it has nothing to do with buying a bigger bag. The real problem starts when you pack everything together without a clear structure.
When liquids, powders, and tools are all mixed in one space, you end up digging through layers just to find one product.
Divide your makeup into simple categories and give each one its own place. Keep liquids and creams together in a sealed pouch.
Add a cotton pad to the inside of compacts to prevent cracking during movement. Keep brushes, sponges, and pencils in their own holders.
Keep them clean and retain their shape. Then arrange your bag so the items you use every day are the easiest to reach, not buried at the bottom.
When every product has a fixed spot, you stop searching and start grabbing. You open your bag, see everything clearly, and get ready faster.
Save this article for later! 👇👇
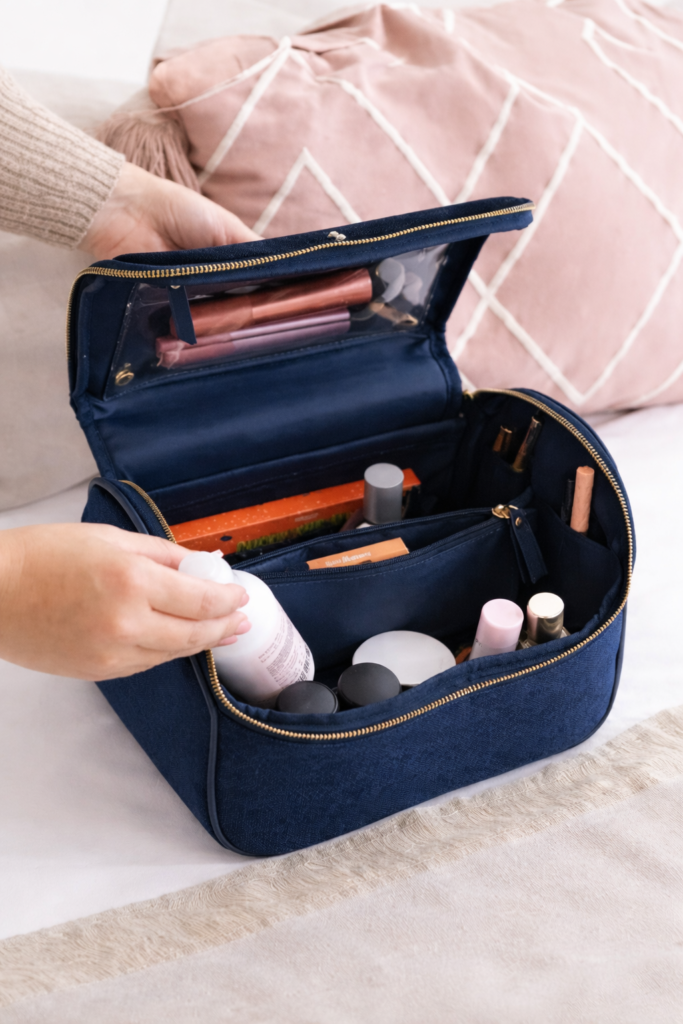
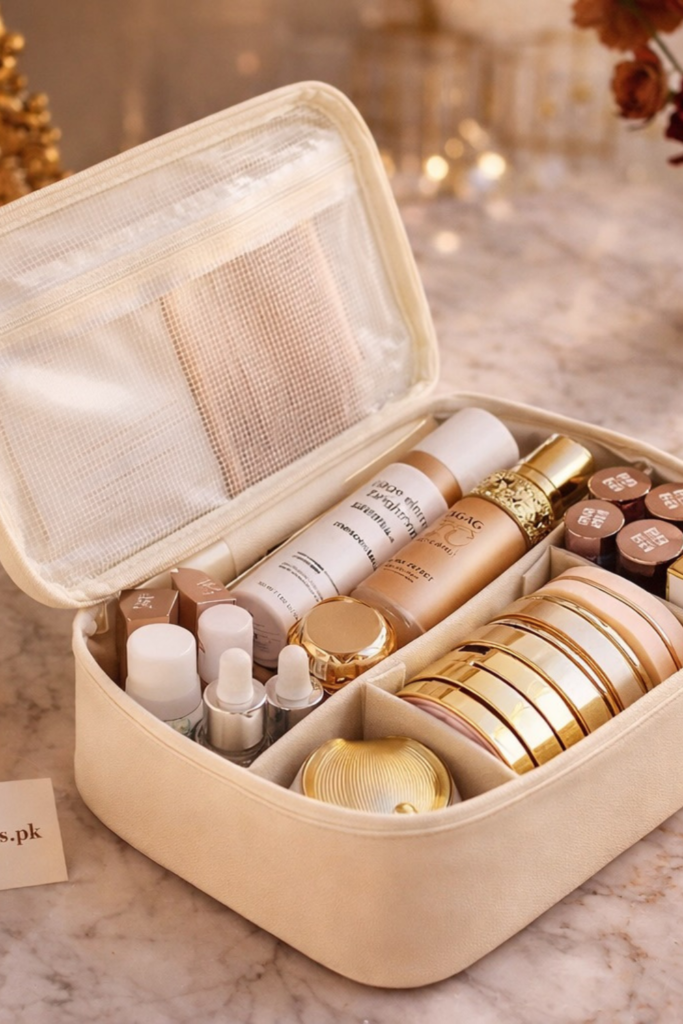
Layered Zip Case
Layered zip case fixes that instantly. The top flap works as your vertical zone slide for foundations, tubes, and tall bottles.
You can see labels at a glance. The base layer stores palettes and compacts flat so they don’t shift during travel.
The middle divider holds daily essentials like mascara and brushes, keeping them from mixing with bulkier items below.
Use this setup for weekend trips or carry-ons when space is limited but structure matters. Place the tallest item on top.
Daily tools in the middle, and heavier items at the bottom. Open it once, and everything is visible in sections, no digging, no mess.

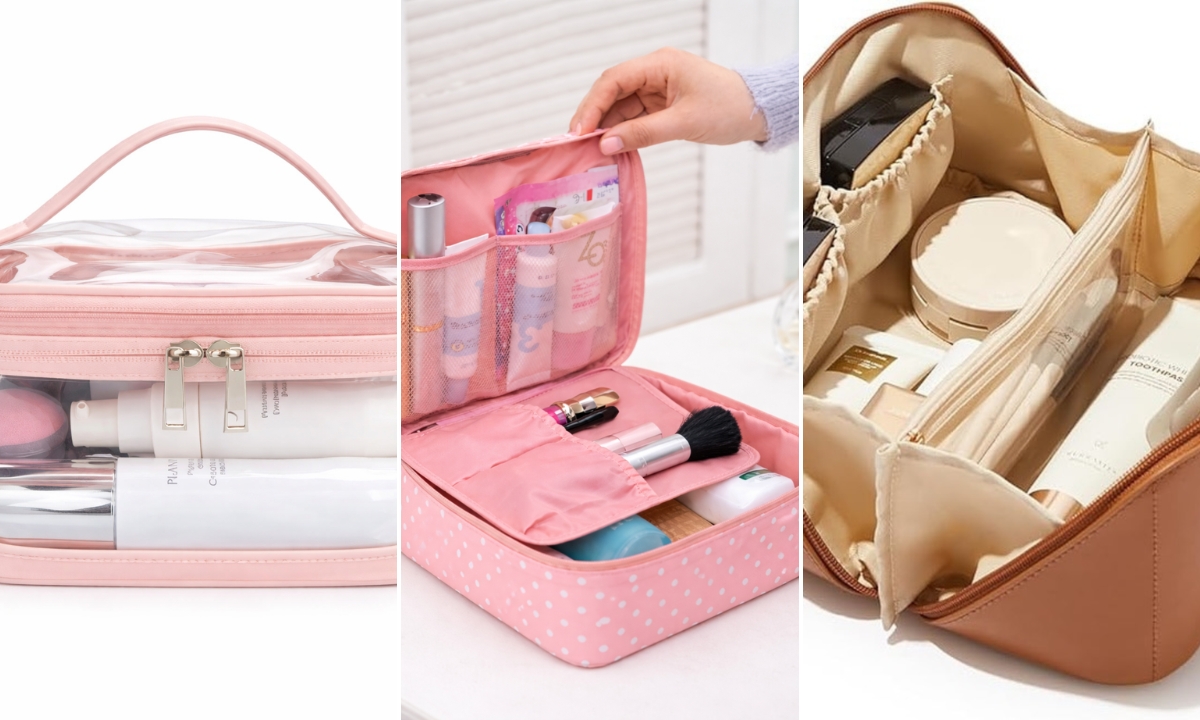
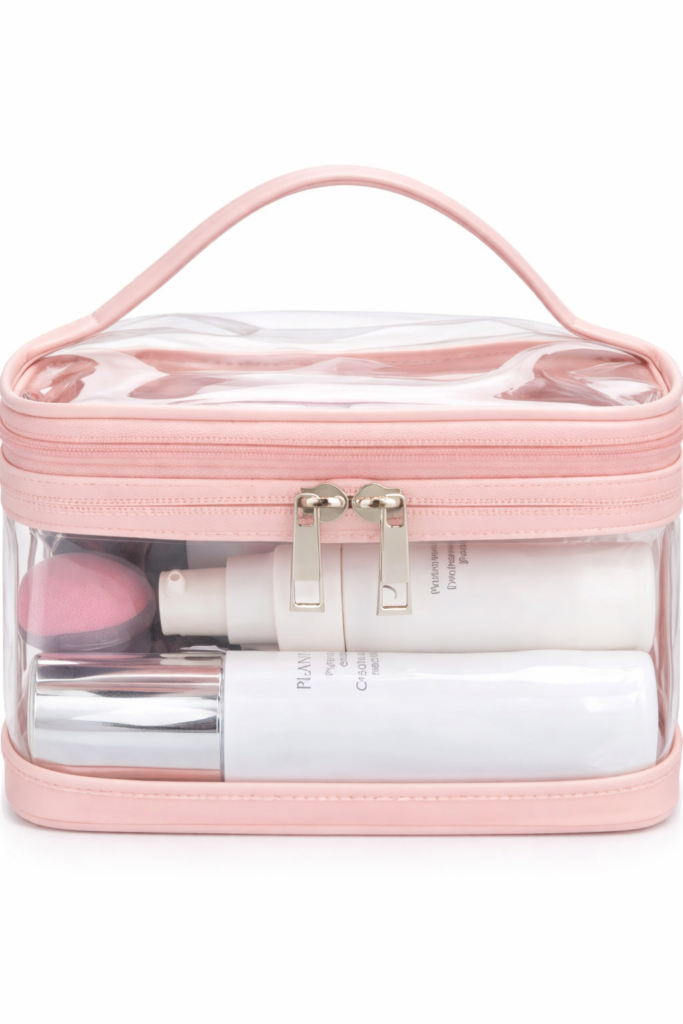
Clear Double Pouch
Nothing slows you down like guessing what’s inside your bag. Keep daily essentials toward the front so they’re the first thing you grab.
Clear double pouch solves that in seconds, letting you see everything. Use the top transparent layer for liquid foundation.
You can quickly check for leaks and keep them separate from powders. The bottom section works best for flat items.
Palettes and compacts, layered side by side, so nothing stacks too high. This setup works perfectly for carry-on travel.
Keeps liquids visible and easy to remove at security. Visibility becomes your system, you won’t waste time searching for it.
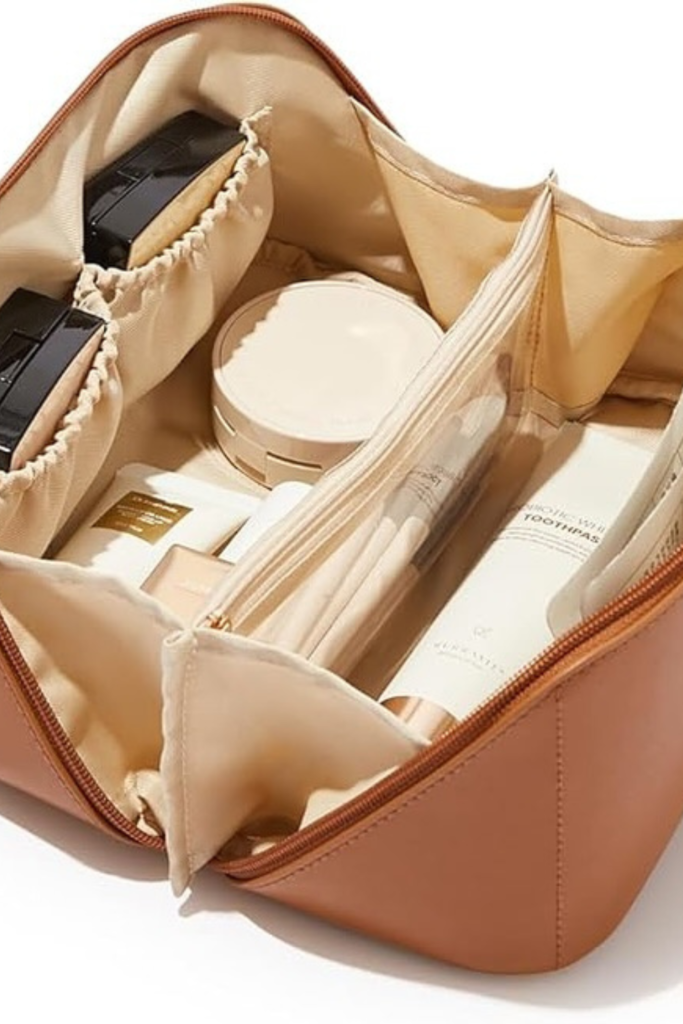
Structured Divider Bag
Digging through one big empty pouch wastes more time than you think. A structured divider bag solves that.
Providing each product with a boundary. Side elastic pockets hold small compacts upright so they don’t slide around.
The center zip section works best for brushes and pencils, keeping bristles clean and separated from creams.
Larger base space underneath fits foundations and skincare bottles laid flat, keeping weight balanced.
Use this setup for longer trips when you’re carrying a full routine. Pack by function: face products on one side, tools in the middle
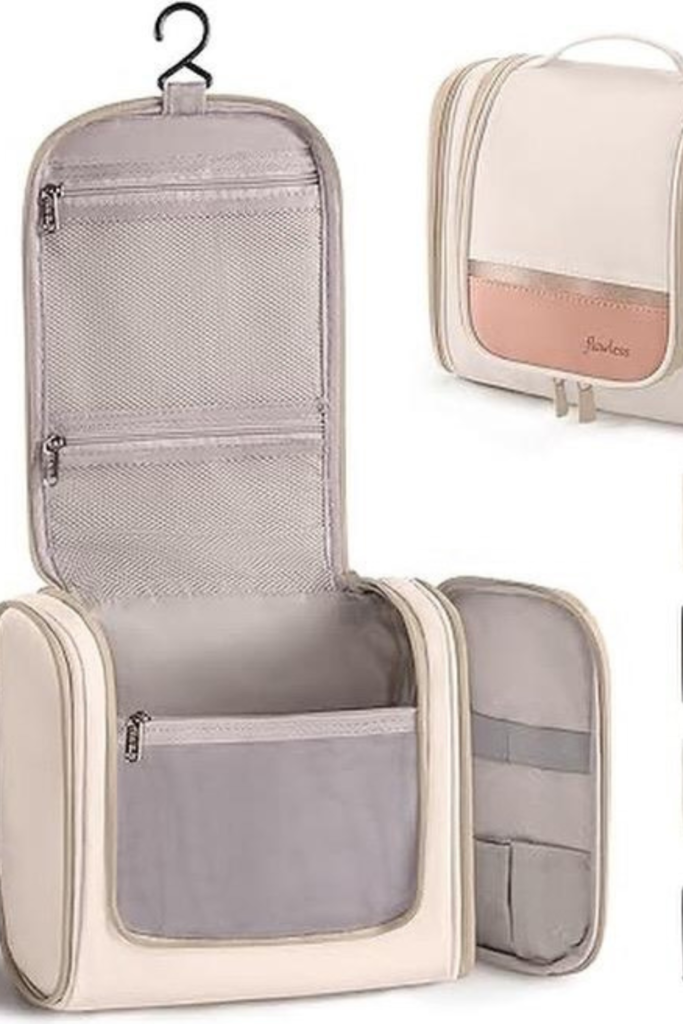
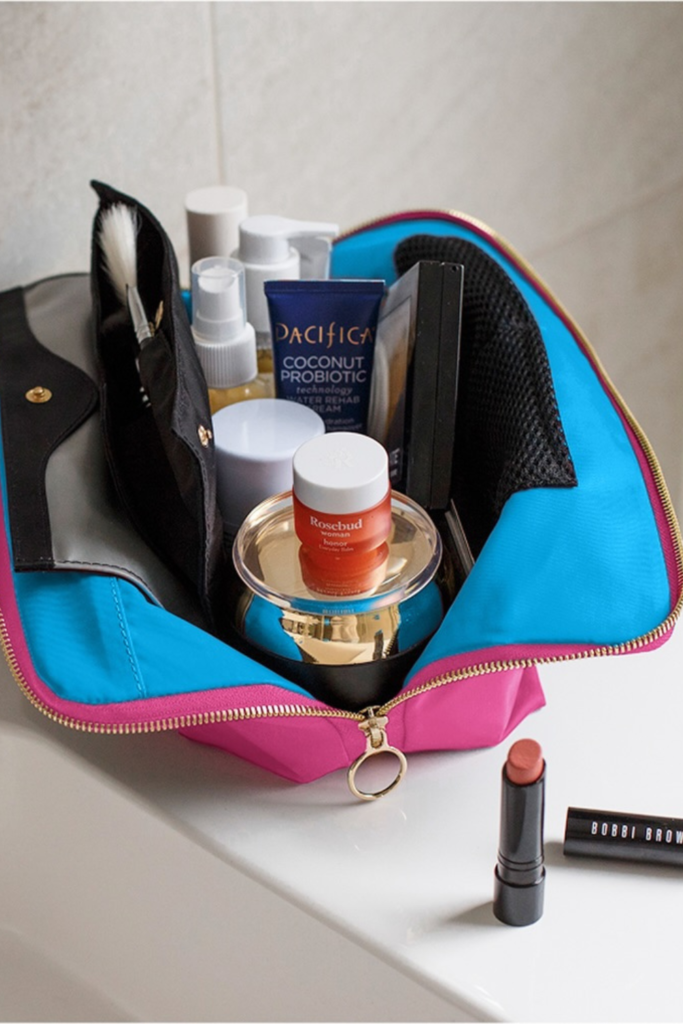
Hanging Compartment System
Small hotel counters create instant clutter. Hanging compartment system solves that by turning vertical space into storage.
Mesh zip pockets on top work best for daily items like mascara and brow pencils, so you can see them clearly.
Side panels with elastic slots hold brushes upright and separated. The main center section fits bottles and palettes.
Use the top layer for lightweight items, the middle for face essentials, and the bottom for heavier products.
Morning routine becomes faster because everything stays visible at eye level instead of being buried in a single pouch.
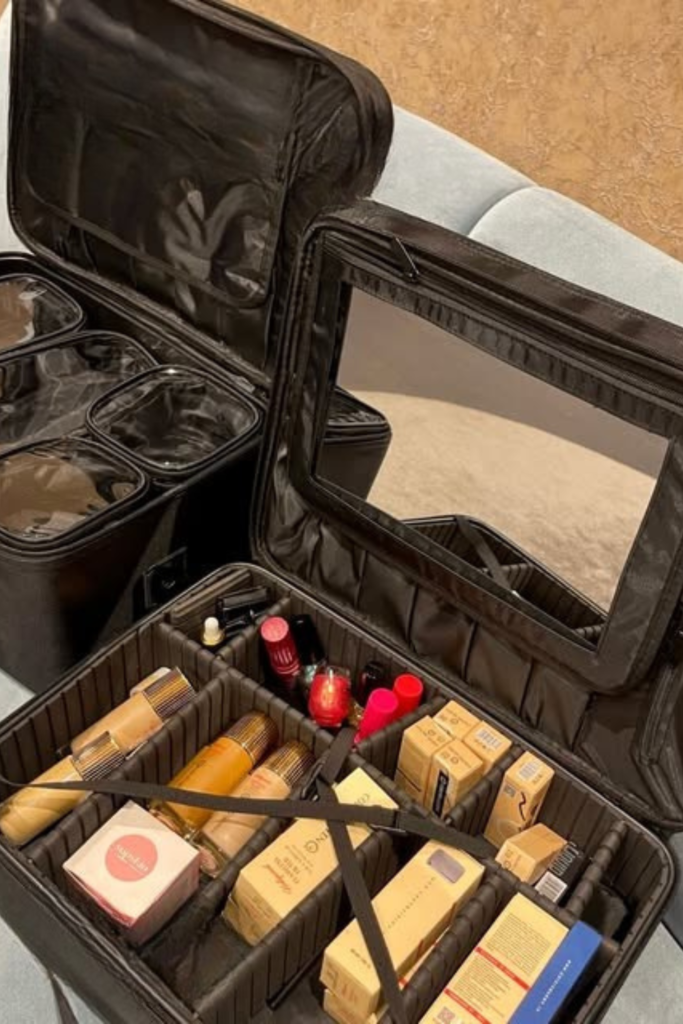
Custom Grid Layout
Full-glam trips demand more than one open pouch. A custom grid layout gives every product its own slot, so nothing shifts during travel.
Adjustable dividers create small boxes for foundations, lipsticks, and skincare bottles, keeping them upright and easy to grab.
Use tighter sections for smaller items like concealers and wider spaces for palettes or setting sprays.
Place heavier products along the outer edges to keep the bag balanced, and keep everyday items toward the center for faster access.
This setup works best for longer vacations or professional travel when you’re carrying a complete routine.
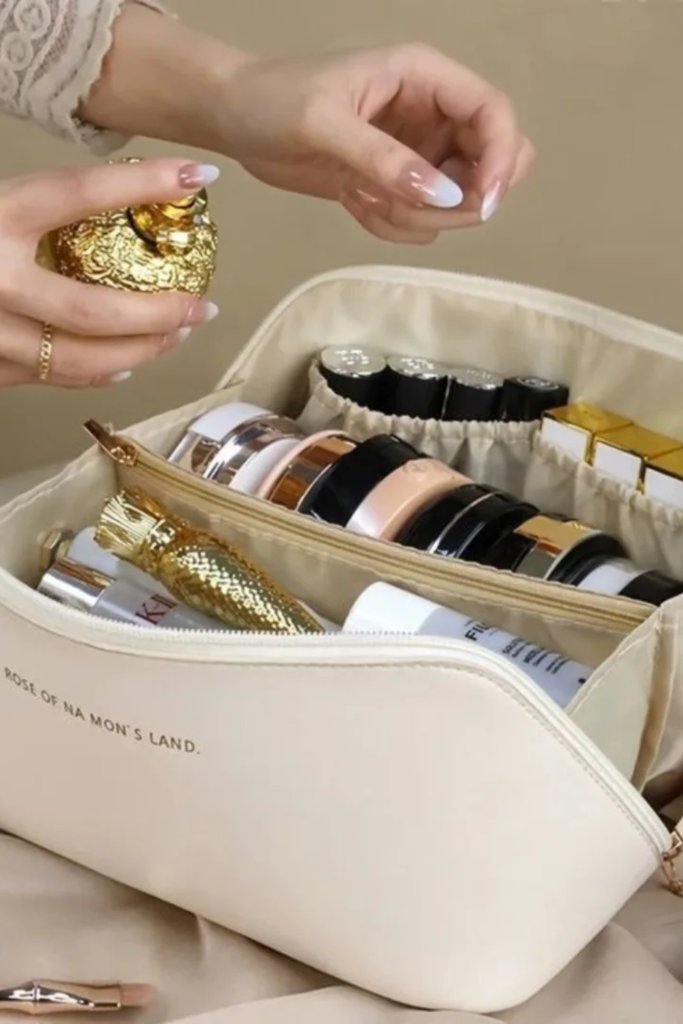
Upright Open Access
Morning rush becomes easier when products are displayed rather than stacked. Slim brush sleeve along the side.
Keeps tools separated so bristles don’t touch creams. An upright open-access bag holds bottles vertically.
Tall items like setting spray and moisturizer go at the back, medium tubes in the center, and small jars toward the front.
Use this setup for short trips or gym travel where you want quick access. Pack by height from back to front.
Keep daily essentials closest to the zipper. One glance inside shows exactly what you have, so getting ready feels organized.
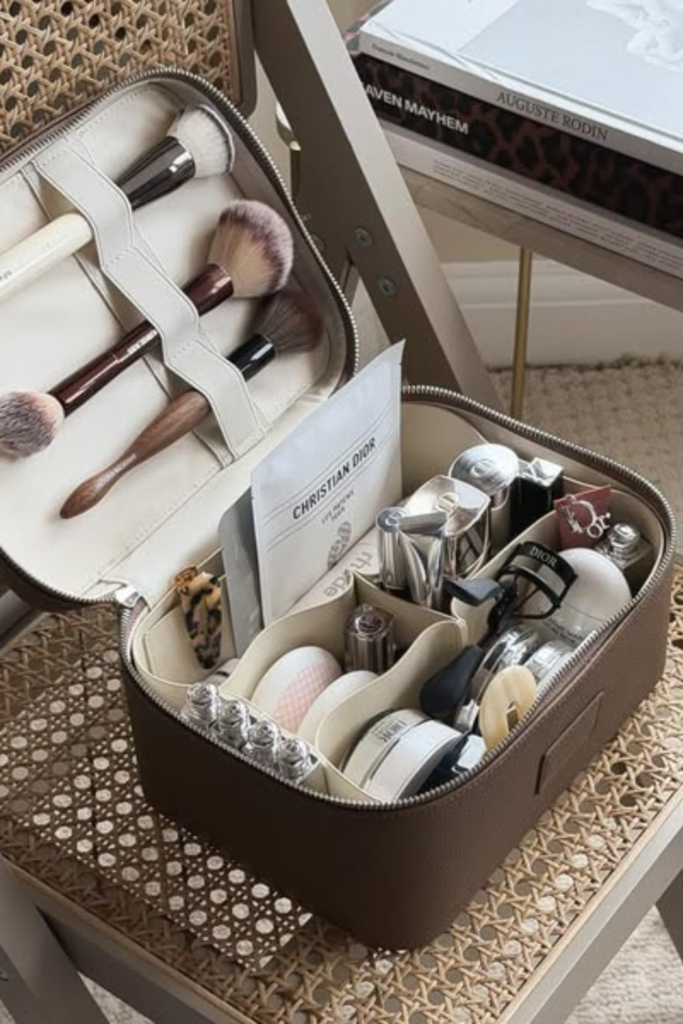
Brush Lid Storage
Clean brushes speed up your getting-ready time. Tools stay on top, products stay below, and your routine stays simple.
Case with brush slots built into the lid keeps tools separate from creams and powders, so nothing rubs together during travel.
Slide larger face brushes into wider elastic bands and keep smaller eye brushes grouped beside them.
Zip or flap closure over the brush panel adds another layer, works for bottles and compacts, arranged upright.
Use this setup for longer stays when you carry multiple brushes and want them protected but visible.
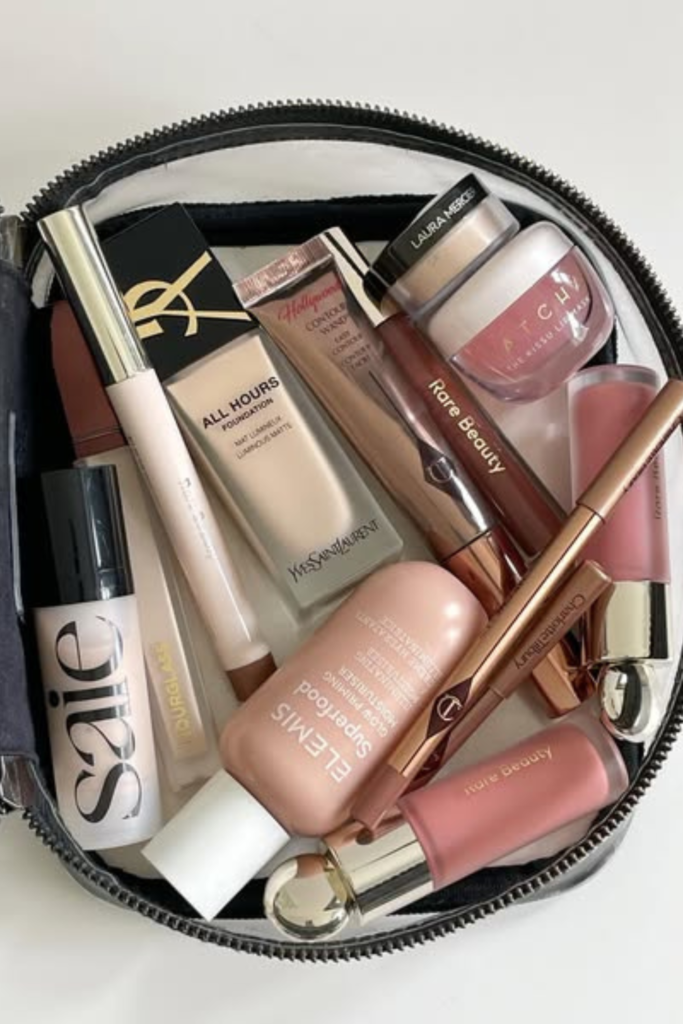
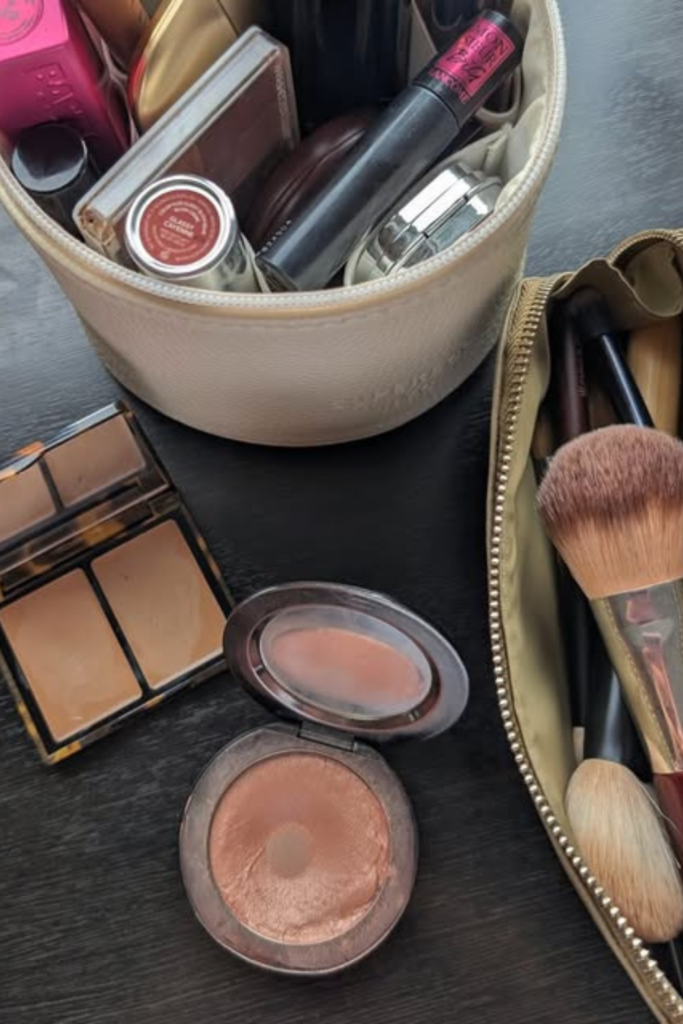
Category Cluster Packing
Mixing everything together slows you down fast. Grouping products by category inside one compact pouch.
Keeps your routine smooth. Keep all base products, foundation, primer, and concealer on one side of the bag.
Place cream blush, bronzer, and highlighter together. Lip products can sit along the edge for quick touch-ups.
Arrange taller tubes around the outer wall and smaller items in the center so nothing tips over. Use this method for short trips.
You don’t need heavy dividers but still want structure. Categories become your map, your hand goes straight to the right section.
Elastic Slot Layout
Loose products sliding into corners create instant chaos. Elastic slot layouts stop that by giving each item a snug space.
Slide foundations and tubes into upright fabric pockets to prevent tipping. Use smaller elastic sections for lipsticks.
Mini jars to keep them separated, mesh zip pocket in the center works well for small tools or extras you don’t use daily.
Brush loops along the side hold handles tightly so bristles stay protected. Arrange tall items by size in deeper slots.
Shorter ones in compact sections. This setup works best for medium-length trips when you want structure.
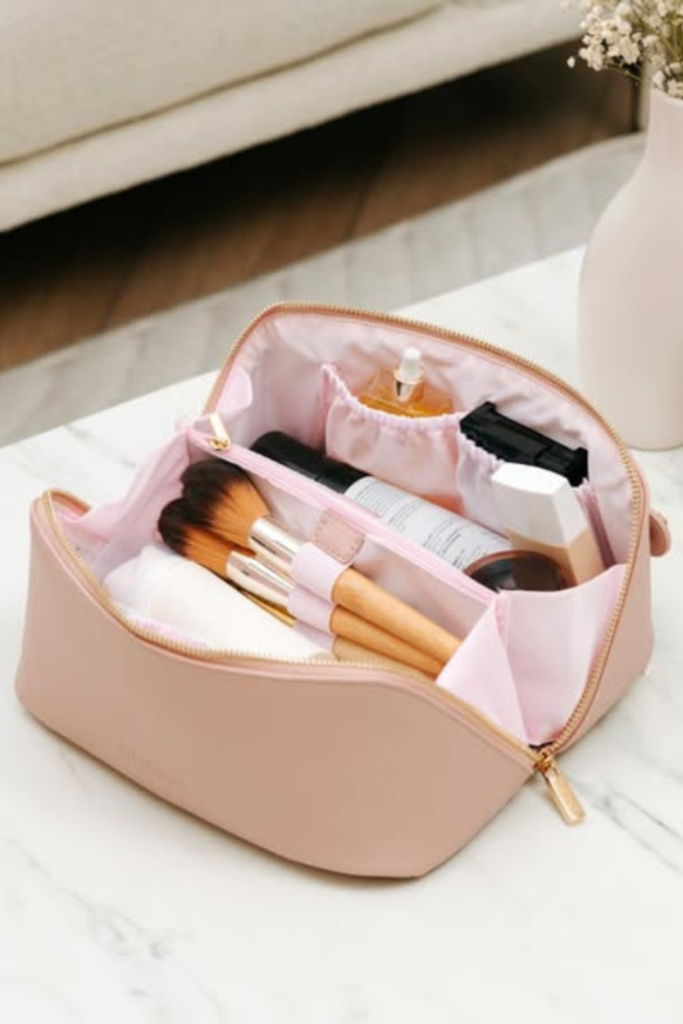
Lid Pocket Setup
Fast mornings start with smart placement. A lid pocket setup keeps slim items visible the second you unzip.
Slide lip liners, mascaras, and pencils into the clear upper compartment. Use the main base for bottles and jars.
Placing taller items along the back wall and shorter ones in front. Center divider works well for palettes or flat compacts.
Keep daily-use products closest to the zipper so they’re easy to grab. Ideal for weekend trips or short stays.
The upper layer handles quick-access tools, the bottom layer supports heavier essentials, and nothing gets lost at the bottom.
Dual Bag Split
Overcrowding one pouch slows everything down. Splitting your routine into two smaller bags keeps things clean and easy to manage.
Use one round pouch for base products: foundation, concealer, blush, compact, arranged upright around the edges.
Labels stay visible, keep brushes and tools in a separate zip case so bristles don’t rub against powders or creams.
Lay flat palettes and bronzers on top, rather than stacking them under bottles. This method works best for short trips.
One bag handles products, the other handles tools. Separation reduces clutter and speeds up your setup wherever you travel.
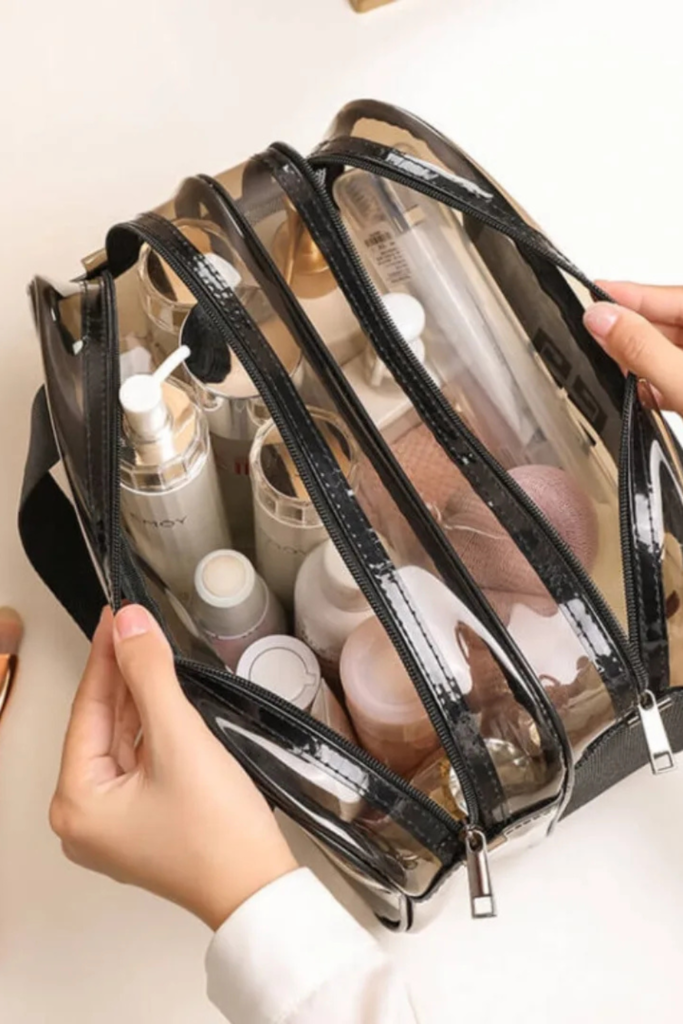
Triple Zip Visibility
Airport mornings move fast, your bag should open just as fast. Triple zip clear case keeps everything separated but still visible.
Use one section only for liquids like foundation, toner, and setting spray so you can pull it out quickly at security.
Keep creams and jars in the middle compartment, arranged upright so they don’t press against each other.
Reserve the last section for sponges or smaller tools so they stay dry and clean. Pack by type, not by size.
Clear panels let you spot what you need. Best for carry-on travel when organization and quick access both matter.
Center Divider Balance
One big open space always turns into a pile. Center divider changes that by splitting your routine into two clear zones.
Keep brushes and tools on one side, bristles stay away from creams and powders. Use the opposite section for bottles.
Place large items at the back, and smaller ones toward the front. A soft inner pocket works well for perfumes or minis.
Pack heavier products near the base to keep the bag from sagging. Great for weekend trips when you want structure.
Sectioned Luxury Layout
Heavy glass bottles and stacked compacts need more than one open space. Stack powders side by side in square sections.
Fully sectioned layout keeps each product locked into its own slot. Small dropper bottles and minis belong in narrow front.
Tall foundations and setting sprays fit best along the long back divider, standing upright for balance.
Mesh lid pocket works for flat palettes or blotting papers to keep the base uncluttered. Ideal for longer stays or full routines.
You’re carrying both skincare and makeup. Clear boundaries keep expensive products protected and easy to reach.
Raised Center Row
Digging through stacked products wastes time fast. Raised center row fixes that by creating a clear middle lane for daily essentials.
Line up compacts and jars upright in the center, you can see every shade at once. Side elastic pockets work best for lipsticks.
Keeping them from rolling around. Place longer bottles flat along the base to keep the bag balanced.
Use this setup for trips where you carry both skincare and makeup but still want quick access, center lane holds your main routine.
Side walls support smaller items, and the base layer anchors heavier products. One open glance shows exactly what you need.
Stackable Clear Layers
Long trips need separation without losing visibility. Stackable clear layers let you divide your routine by purpose.
Still seeing everything inside. Use the top case for quick-access items like lipsticks, liners, and touch-up products.
You’ll reach for throughout the day. Keep the bottom case for base makeup and skincare, arranged upright so bottles stay secure.
Transparent panels help you check what’s inside. Pack lighter items on top and heavier products in the lower layer to keep it stable.
Great for trips or flights when you want to remove one section without unpacking the other. Two levels, two functions, no mixing.

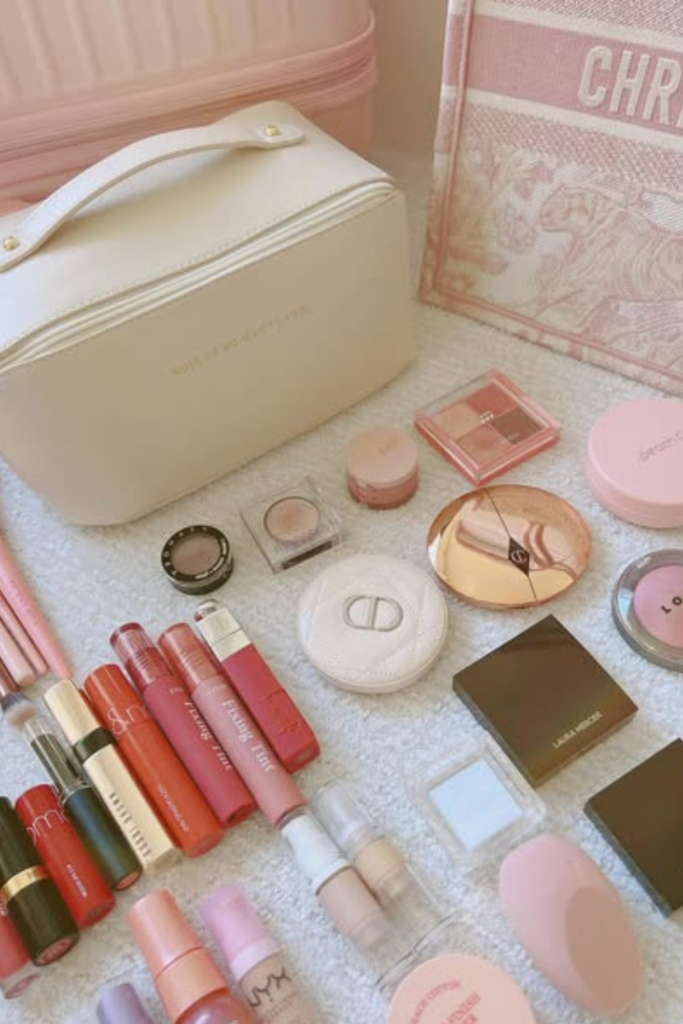
Pre-Sort Before Packing
Rushing to zip everything in is where clutter begins. Lay your products out first and decide what actually needs to travel.
Group base makeup together, keep lip products in one line, and separate tools from creams, once sorted.
Place everyday essentials inside the bag first and keep backups out. Store compacts flat at the base.
Slide tubes along the sides, and keep brushes in their own section. Pre-sorting works best before short trips.
Seeing everything outside the bag helps you remove extras and build a clean, intentional setup instead of stuffing random items inside.
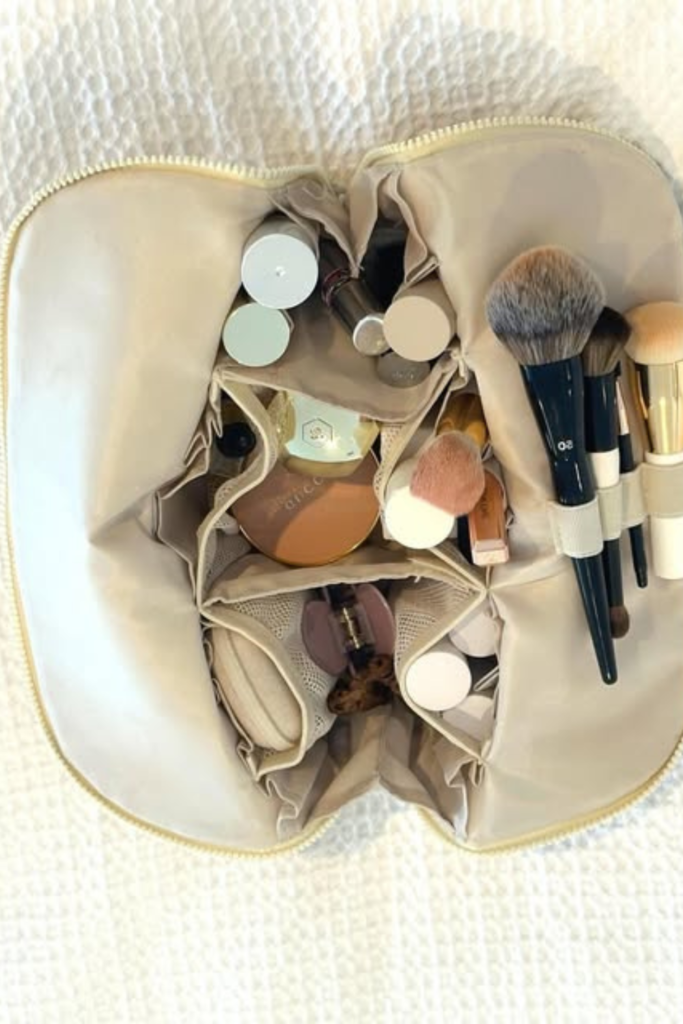
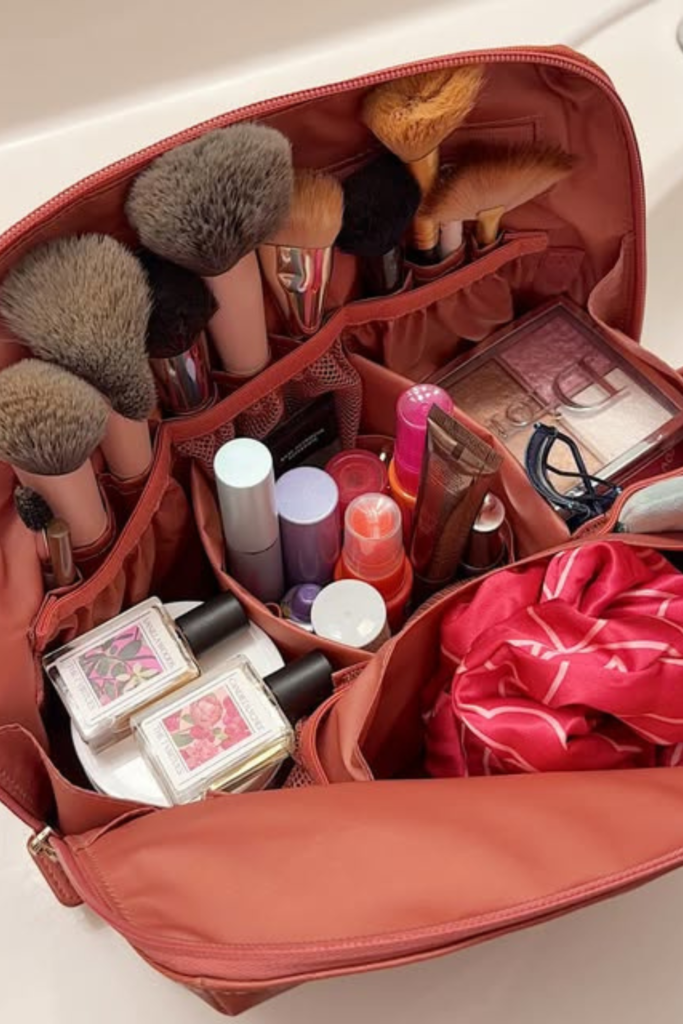
Tool Wall Layout
Messy brushes ruin an organized bag in no time. Tool wall layout keeps every brush upright and separated from creams.
Slide larger face brushes into deep side slots to keep bristles from losing shape. Reserve smaller loops for eye brushes.
Slim tools, nothing bends. Center compartments work best for bottles and tubes, arranged upright by height.
Flat mesh pockets can hold palettes or mirrors without stacking them on top of liquids. Ideal for longer trips.
Brushes stay on the wall, products stay in the middle, and your setup stays clean instead of crowded.
FAQs
How Do I Stop My Makeup From Moving Around in My Bag?
Movement happens when there’s empty space. Once products have room to slide, they will. Fill gaps with structure, not random stuffing.
Use dividers, elastic pockets, or smaller pouches inside your main bag so every item has a fixed spot. Keep heavier bottles along the outer edges.
Avoid stacking products loosely on top of each other. If something can roll, it needs a slot. A tight layout keeps everything in place even when your suitcase shifts during travel.
Should I Separate Skincare and Makeup While Traveling?
Mixing both in one open space usually creates clutter. Skincare bottles are heavier and often liquid, while makeup items are smaller and more delicate.
Keeping them in separate sections or pouches speeds up your routine and makes it safer. Store liquids together in one compartment and color products in another.
That way, if something leaks, it doesn’t ruin powders or brushes. Separation also helps you grab only what you need instead of unpacking everything every time you get ready.
You may like to read!
- 26 Dresser Organization Ideas
- 26 Japanese Organization Ideas
- 22 Junk Drawer Organization
- 22 Junk Room Organization
- 16 Trunk Organization Ideas

Fasial is the founder of the Fizzy Flare. He has been a passionate blogger since 2021. He ran three different websites in the past few years. Now he is focusing on Fizzy Flare to build an audience and help them organize their life.