How to Build a DIY Plywood Storage Bench – Stylish, Affordable, and Functional
This post may contain affiliate links: full affiliate disclosure.
You need more storage space. You also need a place to sit. Buying a bench from the store costs too much or does not fit the space you have.
Now you are thinking about building your own using plywood.
But every guide you find leaves out steps or assumes you already know what to do.
You just want clear instructions that show you how to build a strong bench without wasting materials or making mistakes.
In this guide I will tell you exactly that – what tools to use, how to cut plywood neatly, how to build a sturdy frame, and how to finish it properly.
Let’s jump into it!
Contents
- 1 Why People Build a Plywood Storage Bench Themselves
- 2 Tools and Materials You Actually Need
- 3 Plan the Right Bench Size for Your Space
- 4 Step-by-Step: How to Build the Storage Bench Frame
- 5 How to Reinforce the Bench So It Holds Adult Weight
- 6 Install the Lid Without Gaps or Wobble
- 7 Finishing Touches That Make It Look Store-Bought
- 8 Conclusion
Why People Build a Plywood Storage Bench Themselves
You need storage, but you do not want to spend a fortune on a bench.
Most store-bought options are either too small, too flimsy, or just do not fit your space. That is why building your own bench with plywood is a smart choice.
Plywood is strong, affordable, and easy to work with.
You can cut it to the exact size you need, making it perfect for entryways, mudrooms, bedrooms, or anywhere you want seating and storage in one.
When you build it yourself, you get the right size, the right style, and save a lot of money.
Save this article for later! 👇👇
Related: DIY Recessed Shelves Between Studs
Tools and Materials You Actually Need
You do not need a full workshop to build this bench. If you have a saw, a drill, and a little space to work, you are ready to start.
Here is exactly what you need – no more, no less.
Tools
- Circular saw or table saw – to cut the plywood
- Drill or driver – to drive screws and attach hinges
- Measuring tape – to measure sizes accurately
- Straight edge or speed square – to mark straight lines
- Clamps – to hold parts steady while you drill
- To smooth the edges you need a sander
- Pencil – to mark your cuts
Materials
- 3/4-inch plywood sheet – one full sheet (4×8 feet) is usually enough
- Wood screws – 1 ¼-inch for joining panels, 2-inch for thicker areas
- Wood glue – to strengthen all joints
- Hinges – 2 to 3 basic butt hinges or a continuous piano hinge
- Wood filler – to cover screw holes for a clean finish
- Paint, stain, or sealer – to give the bench the look you want
- Edge banding (optional) – to give cut edges a polished look
- Lid support (optional) – for smoother and safer opening
Plan the Right Bench Size for Your Space
Before you start cutting, make sure you know exactly how big your bench needs to be.
Do not guess – measure the area where the bench will go. Walls are not always straight, and floors can be uneven, so take your time to get it right.
Here is what you need to measure:
- Width: Measure the total space where the bench will fit. If it is going between two walls, measure both the front and back. If the numbers are different, use the smaller one.
- Height: A standard bench height is 18 inches from the floor to the top. This is a comfortable height for sitting and leaves enough room for storage inside.
- Depth: Choose a depth between 16 and 18 inches. This is deep enough to sit comfortably without taking up too much space.
Write everything down before you start cutting. One wrong measurement can ruin the entire project.
Related: Rolling Under Bed Storage DIY
Step-by-Step: How to Build the Storage Bench Frame
Follow these steps in order. Don’t rush – each one makes the next easier and more accurate.
Step 1: Cut the Plywood to Size
Use your plan to cut all the pieces. You’ll need:
- 1 top/lid panel
- 1 bottom panel
- 2 side panels
- 1 front panel
- 1 back panel
- Optional: 1 or 2 vertical dividers
Tip: If you do not have a saw, then you must ask any hardware store to cut the plywood for you.
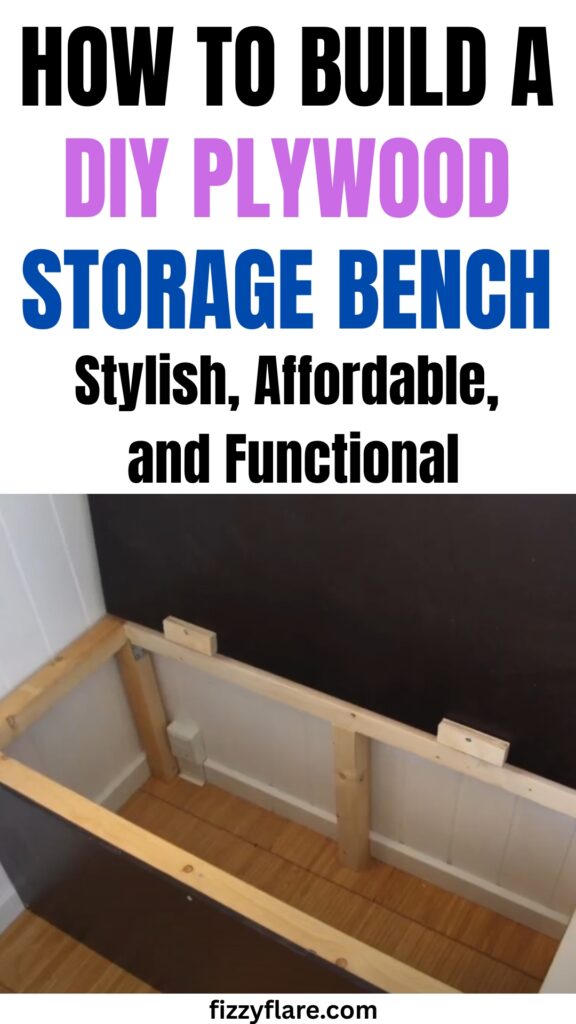
Step 2: Build the Box Frame
Attach the side panels to the back panel using wood glue and 1 ¼-inch screws.
Clamp the corners to keep them steady while you drill.
Then, attach the front panel to the side panels the same way. Remember, at this point, you should have a rectangular box.
Step 3: Add the Bottom Panel
Place the bottom panel inside the frame so it rests on the edges of the side, front, and back panels.
Use glue and screws to secure it. This step strengthens the bench and ensures it stays square.
Step 4: Add Internal Support or Dividers
If your bench is longer than three feet, add a vertical divider in the middle.
This will prevent the top from sagging when someone sits on it.
Secure the divider with glue, screws, and a level to make sure it is straight.
Step 5: Check All Joints
Go over the entire frame to make sure all joints are tight and square.
If you notice any wobbling, add an extra screw or clamp. Give the glue enough time to dry completely.
Your bench frame is now finished and sturdy. The next step is attaching the lid – stay tuned for tips on getting it perfectly aligned.
How to Reinforce the Bench So It Holds Adult Weight
- Add a center divider if your bench is more than 3 feet wide.
- Build a basic frame inside the base using 1×3 or 2×2 boards.
- Secure all joints with both wood glue and screws.
- Strengthen the underside of the lid with a strip of wood (1×2) if it is wide.
- Check for any movement before finishing, and tighten anything that is loose.
Install the Lid Without Gaps or Wobble
Place the lid flat on top of the bench and align it with the back edge. Leave a small gap – about 1/8 inch – so it does not rub when you open it.
Use two or three butt hinges, or a single piano hinge, and screw them into the back panel and the lid.
To keep the lid steady when it is closed, add a small cleat under the lid or on the inside back wall.
Before you tighten the screws completely, open and close the lid a few times to make sure it moves smoothly and stays level.
Related: How to DIY Pegboard Tool Organizer
Finishing Touches That Make It Look Store-Bought
At the end you have to sand the surface with 120-grit sandpaper, then finish with 220-grit for a smooth finish.
Fill screw holes and gaps using wood filler, and sand again once it dries. If the edges of the plywood feel rough, add edge banding or trim to give it a cleaner look.
You have to choose a paint that can complement your space – use stain for a natural wood appearance or paint for a bold statement.
For a polished result, consider adding a cushion on top or simple hardware like pull handles or soft-close lid supports.
Small details like these will make your bench look more finished and professional.
Conclusion
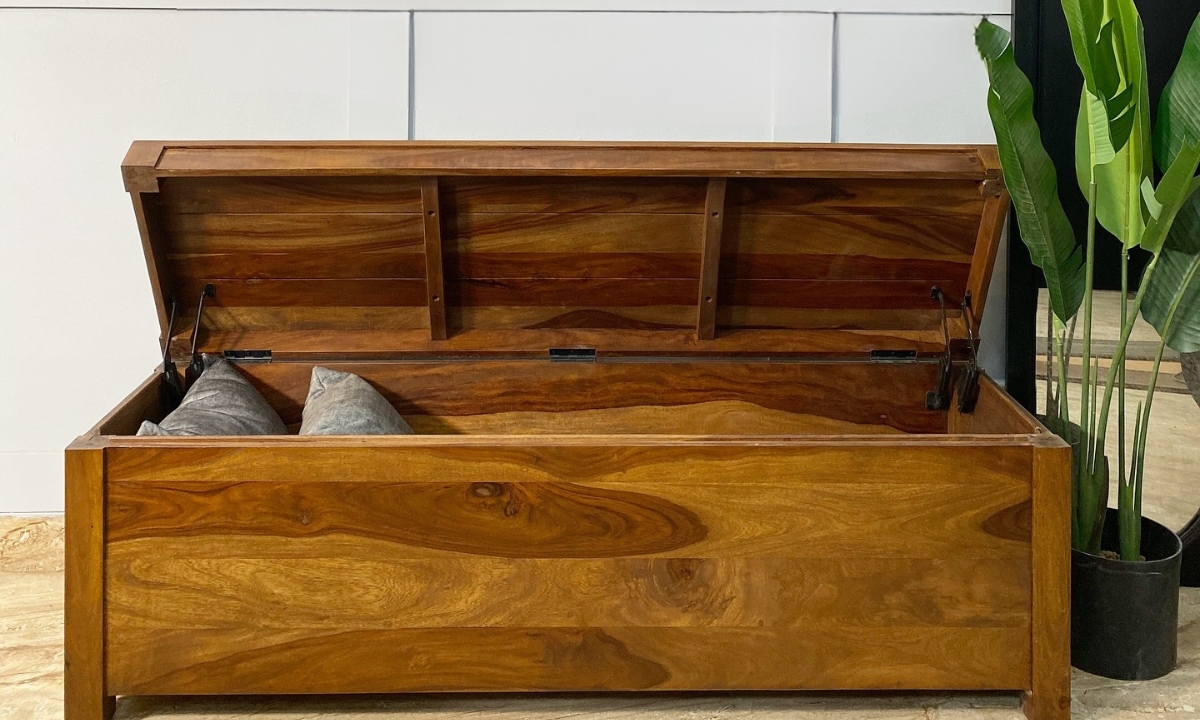
This bench gives you storage, seating, and a clean look without costing much.
It is made from strong plywood, reinforced to hold the weight of adults, and built with simple tools you probably already own.
You followed a clear plan, avoided common mistakes, and added finishing touches that make it look unique.
It fits your space, does its job, and lasts for years. That is what makes this DIY project worth your time.

Fasial is the founder of the Fizzy Flare. He has been a passionate blogger since 2021. He ran three different websites in the past few years. Now he is focusing on Fizzy Flare to build an audience and help them organize their life.