14 DIY Bracelets With String Ideas for 2026

This post may contain affiliate links: full affiliate disclosure.
You cut the string, start tying knots, and halfway through, you realize it is too short.
Or even worse, you finish the bracelet, and the edges curl up like a stubborn ribbon that refuses to lie flat.
If you have ever tried making a bracelet with string, you know the frustration, uneven knots, loose ends that will not stay tied, or a design that looks nothing like the tutorial.
I have been there too, staring at a tangled mess of string and wondering if I should just give up.
But the truth is, these problems are not your fault, they happen because most guides leave out the important details.
In this article, I will show you the exact steps, tips, and solutions that actually make DIY string bracelets work.
Contents
- 1 What String Should You Use?
- 1.1 Mix Bold Beads with Simple String
- 1.2 Keep It Minimal with a Single Accent Bead
- 1.3 Twist Colors for a Bold Everyday Look
- 1.4 Add a Charm for a Personal Touch
- 1.5 Use Metallic Beads for a Luxe Finish
- 1.6 Add Seashells for a Boho Vibe
- 1.7 Go Bold with Rainbow Patterns
- 1.8 Keep It Classic with Gold Beads
- 1.9 Create a Delicate Look with Seed Beads
- 1.10 Highlight the Centerpiece with Contrast String
- 1.11 Keep It Chic with Simple Symbols
- 1.12 Try Macramé Knots with Cute Charms
- 1.13 Add a Floral Charm for Playful Style
- 1.14 Play with Color Blocking and Charms
- 2 FAQS
What String Should You Use?
The mistake that beginners make is choosing the wrong string. If you pick yarn or thin sewing thread, the knots will not hold, and the bracelet will look messy.
If the string is too thick, it will not bend or weave the way you want. This is why the type of string you use is more important than you might think.
For friendship bracelets, embroidery floss is the best choice. It is affordable, easy to find, and comes in every color you can think of.
If you want a natural, boho style, hemp cord is a great option. It is strong but still flexible.
For bracelets that can handle showers and daily wear, waxed polyester cord works best.
Save this article for later! 👇👇
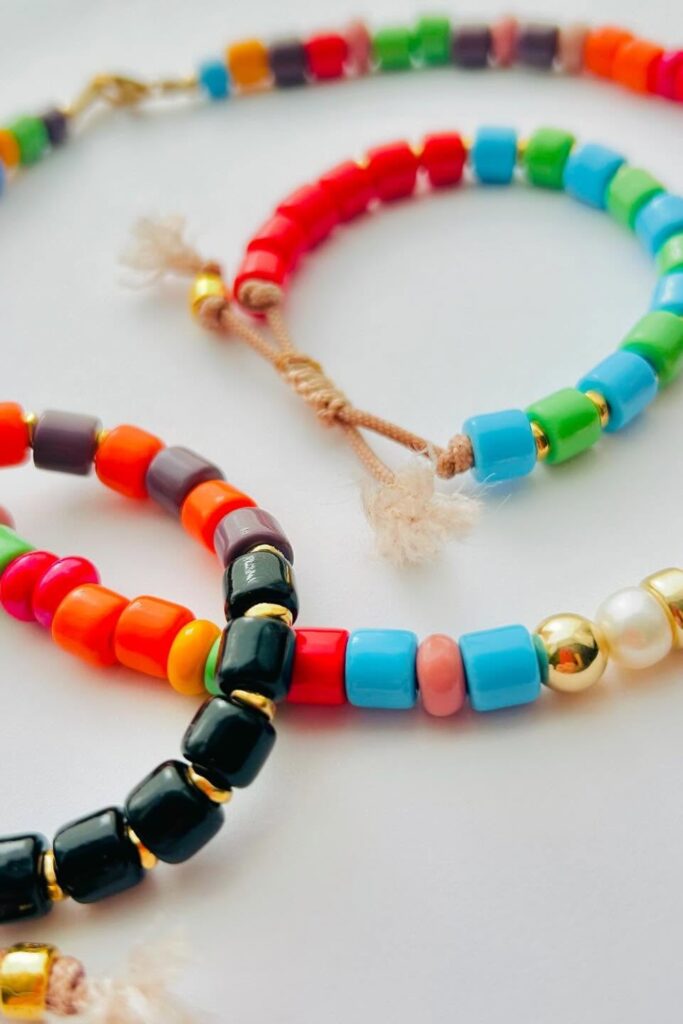
Mix Bold Beads with Simple String
A beaded string bracelet like this works great when you want something bright that feels easy to wear.
The secret is threading large plastic or acrylic beads onto waxed cord, then adding a few metallic or pearl beads to keep things balanced instead of overwhelming.
Make an adjustable sliding knot so it fits any wrist, and group your bead colors in short sections for a tidier appearance.
Keep It Minimal with a Single Accent Bead
If you want a bracelet that looks detailed without taking hours, try a twisted cord design like this.
All you need is two or three strands of contrasting colors – gold with black, red with cream, or even metallic with matte and then twist them tightly before knotting the ends.
Add a sliding knot so it’s adjustable, or finish with a charm for a personal touch.
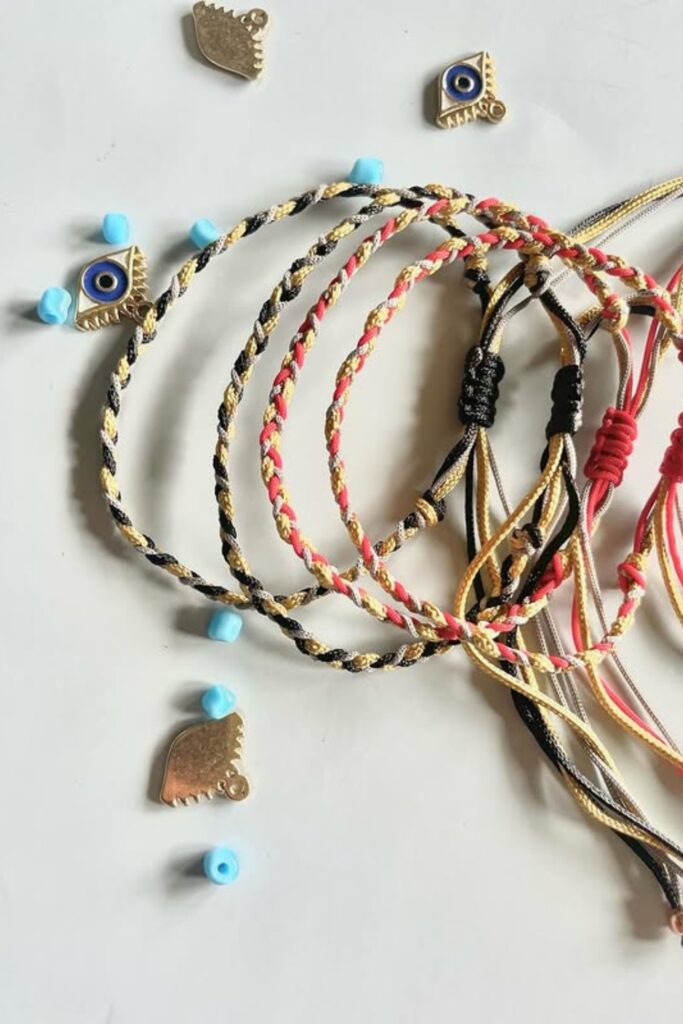
Twist Colors for a Bold Everyday Look
If you want a bracelet that looks intricate but does not take hours to make, try a twisted cord design like this.
Use two or three strands in contrasting colors-gold with black, red with cream, or metallic with matte.
Twist them tightly and knot the ends. Add a sliding knot to make it adjustable, or attach a charm for a personal touch.
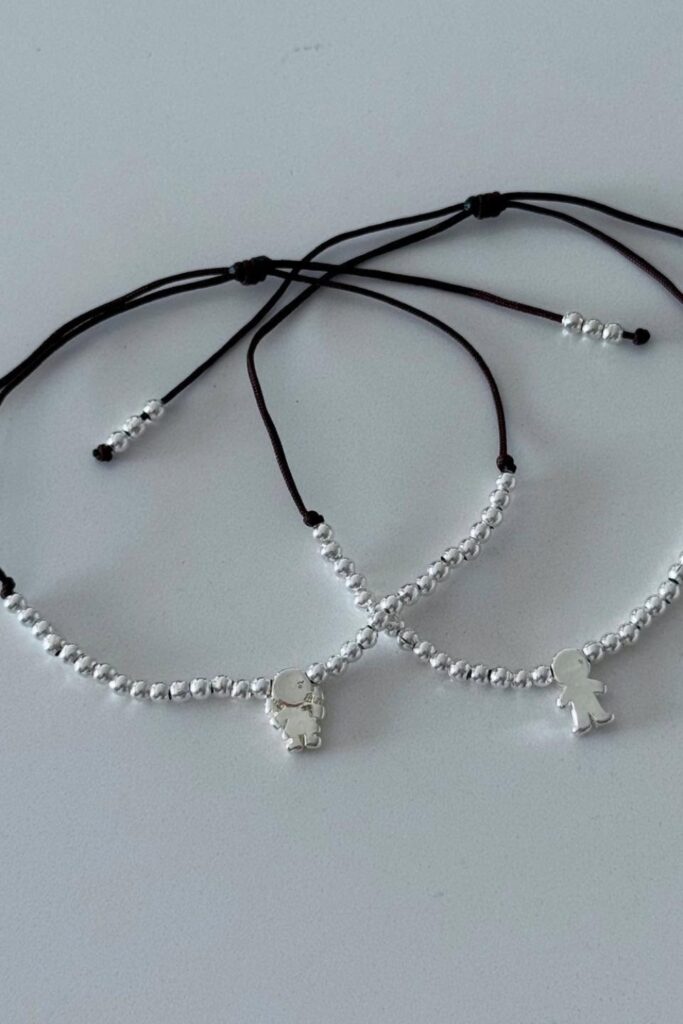
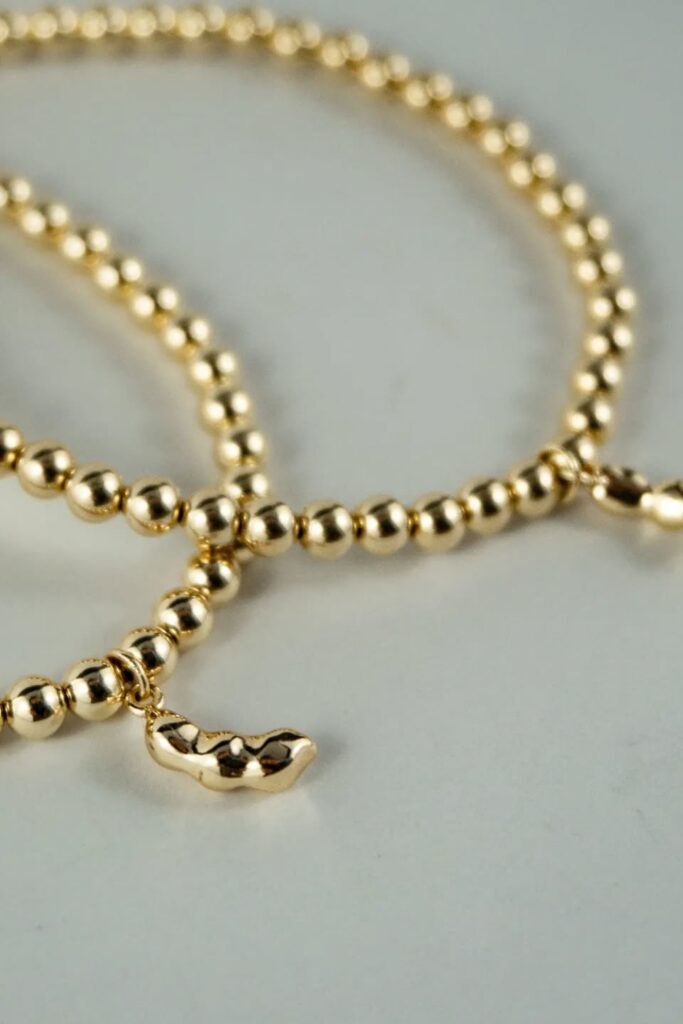
Add a Charm for a Personal Touch
Want your bracelet to feel more special? Add tiny metal beads with one charm in the center.
A silver figure charm makes the whole piece pop while keeping things simple.
To make it, thread small silver beads onto black nylon cord and leave room in the middle for your charm.
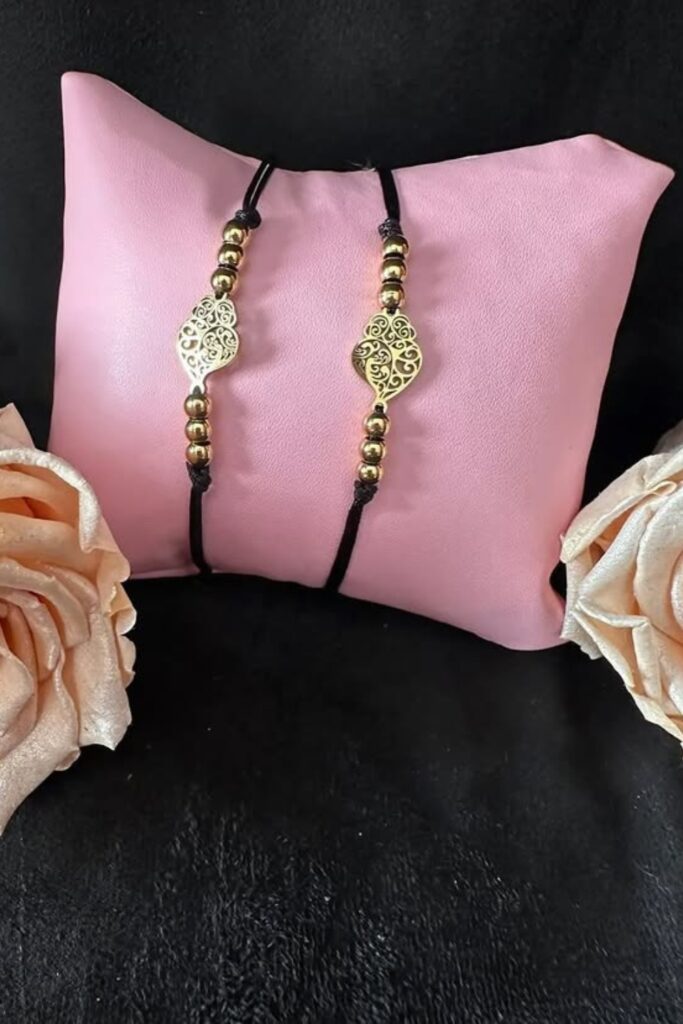
Use Metallic Beads for a Luxe Finish
When you want a bracelet that looks a bit more polished, metallic beads are an easy way to upgrade.
This design uses gold-toned beads and a detailed charm, strung on a simple black cord to make the shine pop.
To make it, thread four or five metallic beads on each side of the charm, then tie sliding knots to secure the ends.
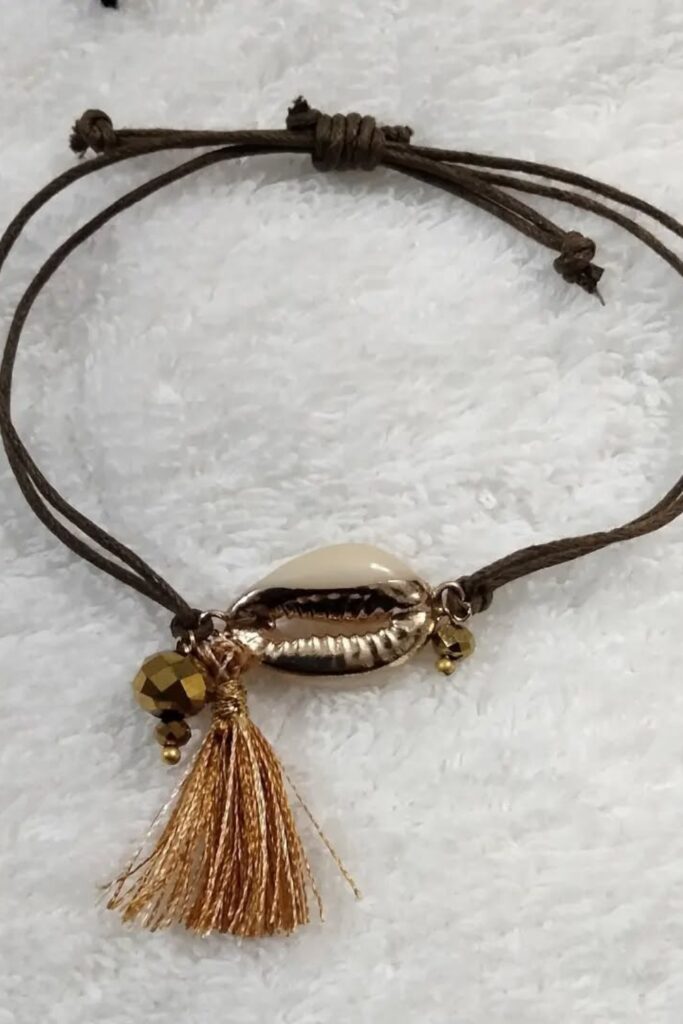
Add Seashells for a Boho Vibe
Want your bracelet to feel perfect for summer or beach days? Add a cowrie shell as the main piece.
Here, the shell pairs with a golden tassel and a few metal beads for extra texture.
To make it, use waxed cord in earth colors like brown or tan, thread the shell through the center, and tie knots on both sides to keep it in place.
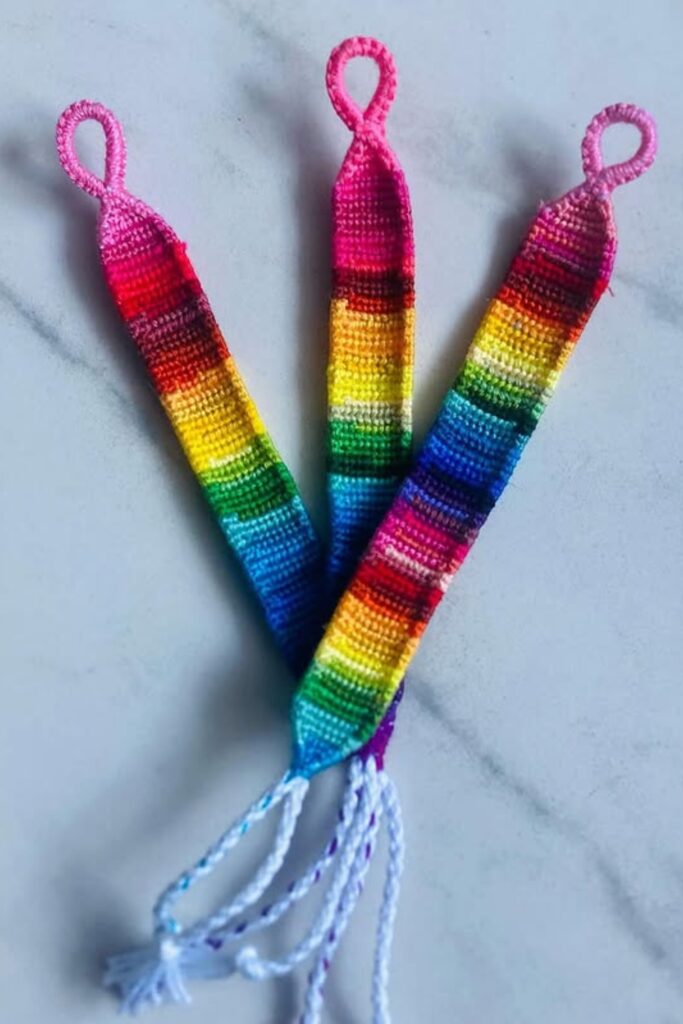
Go Bold with Rainbow Patterns
If you want a bracelet that really stands out, go for a rainbow pattern.
Use embroidery floss in gradient colors and knot it row by row to make clean stripes that blend into each other.
The wide band makes it great as a pride accessory, a festival bracelet, or a fun summer gift for a friend.
Keep It Classic with Gold Beads
If you want a bracelet that never goes out of style, stringing small gold beads is a simple way to make one.
Use uniform metallic beads for a clean and polished look, and add a tiny charm in the center to give it some personality.
This bracelet is perfect for stacking, giving as a gift, or wearing every day as a simple and elegant piece.
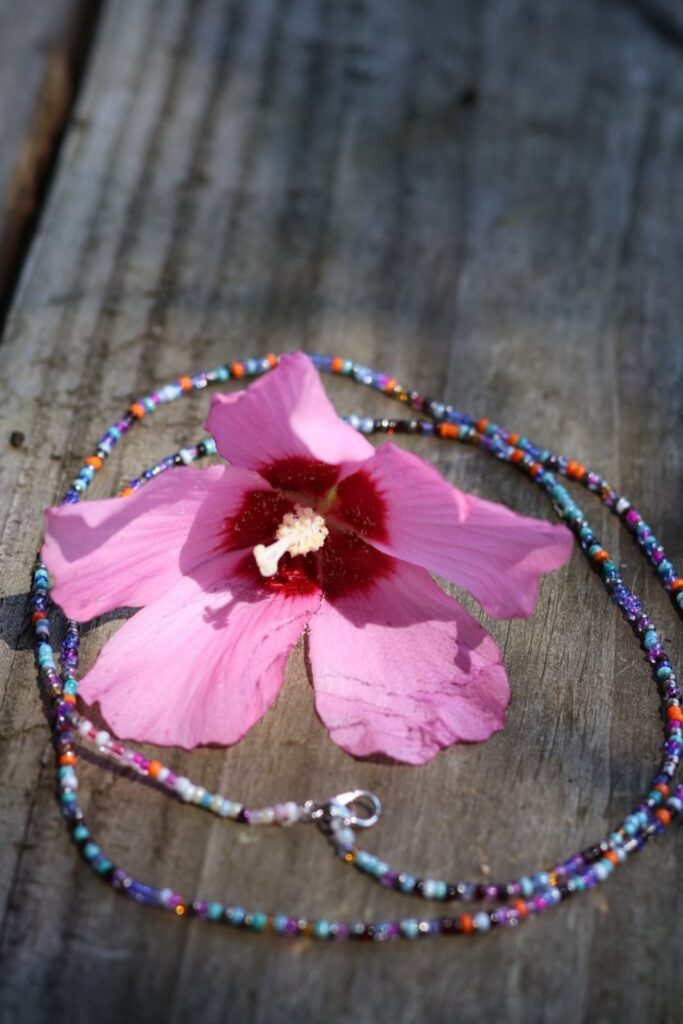
Create a Delicate Look with Seed Beads
If you love bracelets that feel light and delicate, seed beads make the perfect choice.
This design uses tiny multicolored glass beads that you string together on fine beading wire, then you finish it with a lobster clasp for a clean, professional look.
This bracelet works great when you layer it with chunkier styles or wear it alone when you want just a touch of color on your wrist.
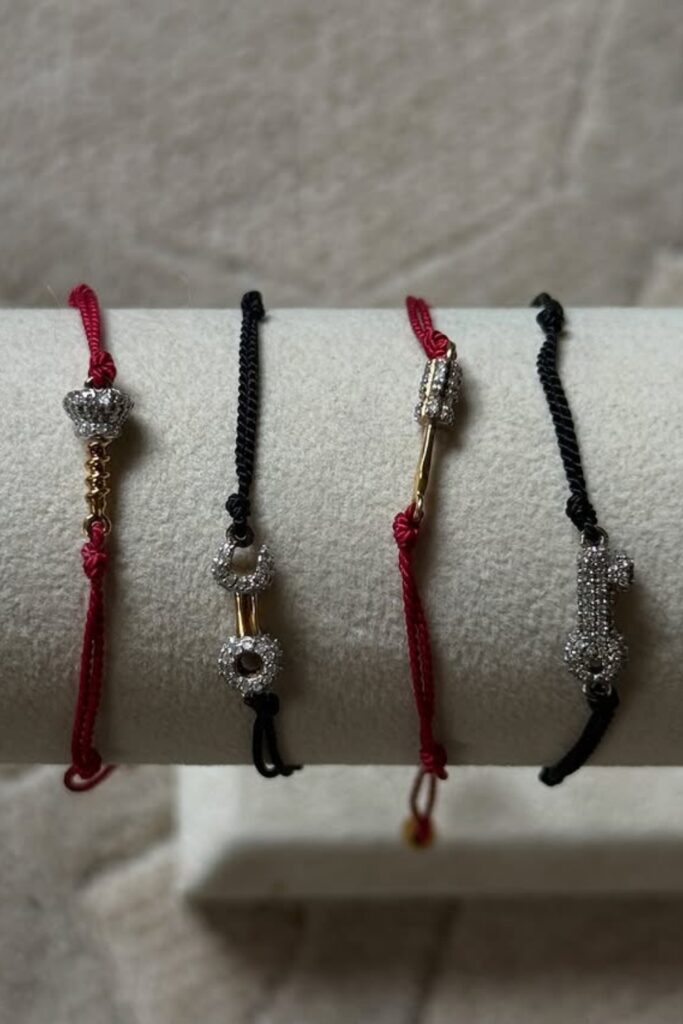
Highlight the Centerpiece with Contrast String
When you work with decorative charms, the best way to make them stand out is by pairing them with simple, solid-colored string.
This design uses red and black cords to frame crystal-studded charms, creating a bold contrast that highlights the centerpiece.
To recreate this look, tie your string tightly around the charm using a macramé or square knot, and secure the ends with sliding knots.
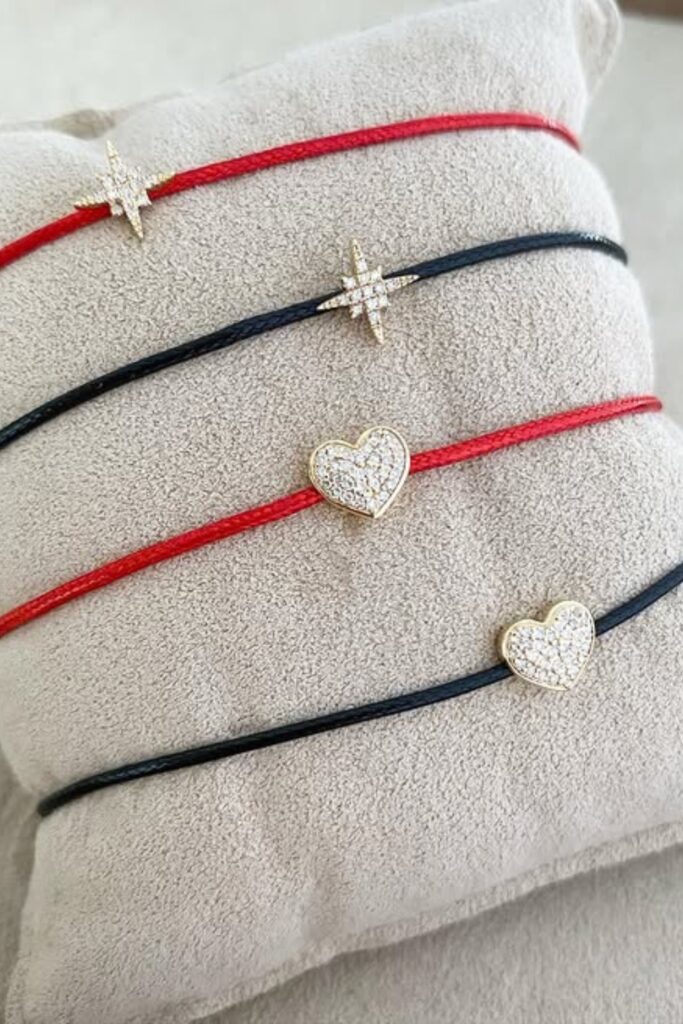
Keep It Chic with Simple Symbols
If you love simple jewelry that still looks special, pick one charm on a plain cord.
This design uses red and black strings with delicate heart and star charms to create a clean but eye-catching look.
This style works perfect for daily wear or as matching bracelets you can share with friends.
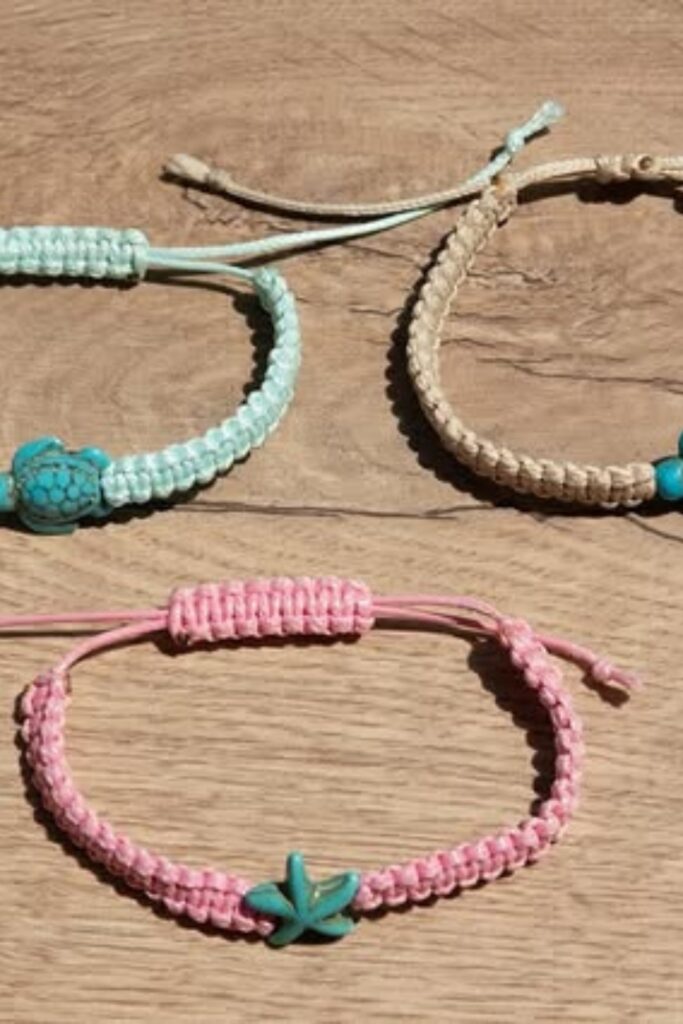
Try Macramé Knots with Cute Charms
If you want a bracelet that looks intricate but is easy to make, macramé knots are a perfect choice.
These designs use square knots to create a woven band with a starfish or turtle bead as the centerpiece.
To make one, take two base cords and weave another cord back and forth using simple square knots.
Place your charm in the center and keep knotting until the bracelet reaches the length you want.
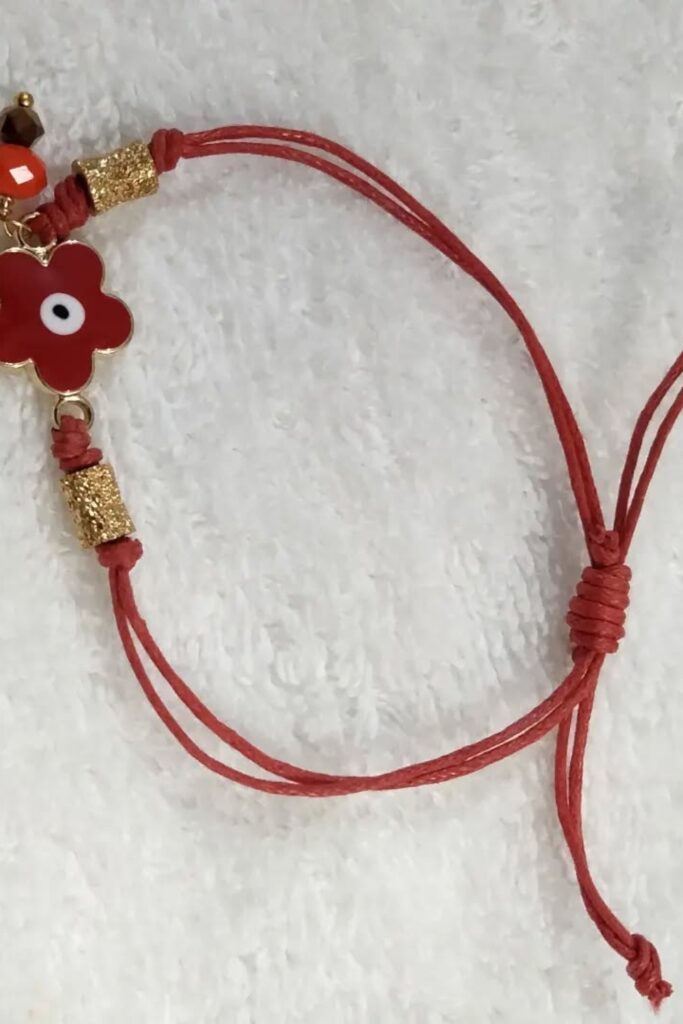
Add a Floral Charm for Playful Style
If you want a bracelet that brings joy and playful charm, a flower charm makes the perfect focal point.
This design pairs a bright red cord with a red-and-gold flower charm, then adds textured beads and crystals that catch the light.
To make it yourself, slide your charm onto the middle of the waxed cord, place a few gold spacers on both sides, and finish with sliding knots so you can adjust the fit easily.
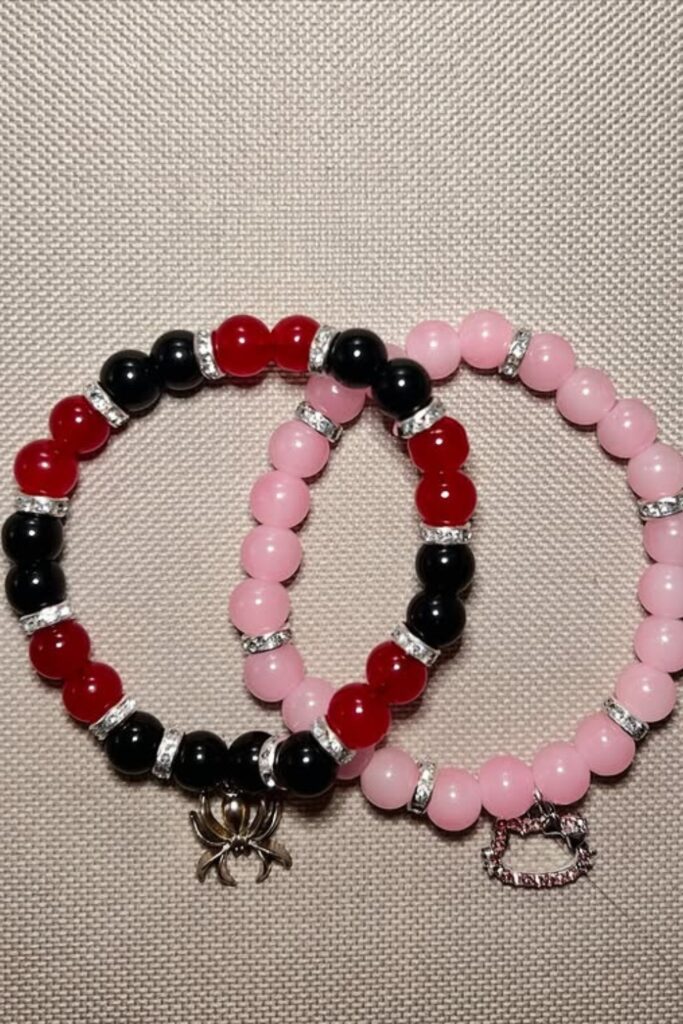
Play with Color Blocking and Charms
Want your bracelet to pop? Mix bold bead colors in blocks and add a charm that shows your personality.
This design takes red, black, and pink beads and puts them in repeating sections. Rhinestone spacers sit between them to add sparkle.
To make it yourself, thread your beads onto stretchy cord, drop in spacers for shine, and tie a tight knot that you hide inside a bead.
FAQS
How do I stop my string bracelet from fraying?
Fraying happens when you use cords that are not sealed. The easiest way to fix this is to apply clear nail polish or fabric glue to the knot ends.
If you are using nylon or polyester cord, you can seal the tips by carefully melting them with a lighter.
Be careful not to burn the bracelet – a quick pass over the flame will do the job.
How much string should I cut for a bracelet?
A good rule to follow is to cut the string about three times the length of your wrist.
For most adults, this means cutting each strand to around 30 to 40 inches for basic knot designs.
If you are planning to make a wider pattern or add braids, cut the string even longer to be safe.
It is always better to have extra string that you can trim later than to run out halfway through making your bracelet.
You may also like to read!
- 10 Coffee Filter Coral Reef DIY Ideas
- DIY Patchwork Hoodie You Can Actually Make at Home
- 24 DIY Bird Houses Ideas

Fasial is the founder of the Fizzy Flare. He has been a passionate blogger since 2021. He ran three different websites in the past few years. Now he is focusing on Fizzy Flare to build an audience and help them organize their life.