24 Cherry Birthday Party Theme for 2026
This post may contain affiliate links: full affiliate disclosure.
Most people love the idea of a cherry-themed birthday, but when they actually try to set it up, things start falling apart.
The colors don’t match, the decorations look random, and what worked indoors doesn’t look right outside. You end up with a mix of ideas.
If you want your setup to look put together in any space, whether it’s your living room or a backyard, you need a clear plan that works in both settings.
In this article, you’ll see how to design a cherry theme birthday party with these 24 ideas.
Let’s jump in!
Contents
- 1 How Do You Design a Cherry Theme That Works Both Indoors and Outdoors?
- 1.1 Statement Backdrop
- 1.2 Cherry Arch
- 1.3 Cake Corner
- 1.4 Stage Setup
- 1.5 Picnic Vibe
- 1.6 Entry Moment
- 1.7 Photo Spot
- 1.8 Cake Focus
- 1.9 Balloon Frame
- 1.10 Favor Station
- 1.11 Floor Dining
- 1.12 Outdoor Dining
- 1.13 Glam Setup
- 1.14 Soft Garden
- 1.15 Night Lounge
- 1.16 Number Feature
- 1.17 Hanging Detail
- 1.18 Styled Entry
- 1.19 Minimal Corner
- 1.20 Dessert Display
- 1.21 Picnic Table
- 1.22 Layered Corner
- 1.23 Balloon Mix
- 1.24 Soft Contrast
- 2 FAQs
How Do You Design a Cherry Theme That Works Both Indoors and Outdoors?
Start by locking in one clear style before you buy anything. If you mix soft pink “cute cherry” items with bold red retro pieces.
Your setup will look scattered. Pick one direction and stick to it so everything feels connected in any space.
Focus on colors that look good everywhere. Red, white, and a touch of green work well under indoor and natural lighting.
Balloon garlands, table runners, and simple backdrops can move easily from a wall to a garden fence without losing their impact.
If you keep your setup portable and your color palette tight, your cherry theme will look consistent no matter where you place it.
Save this article for later! 👇👇
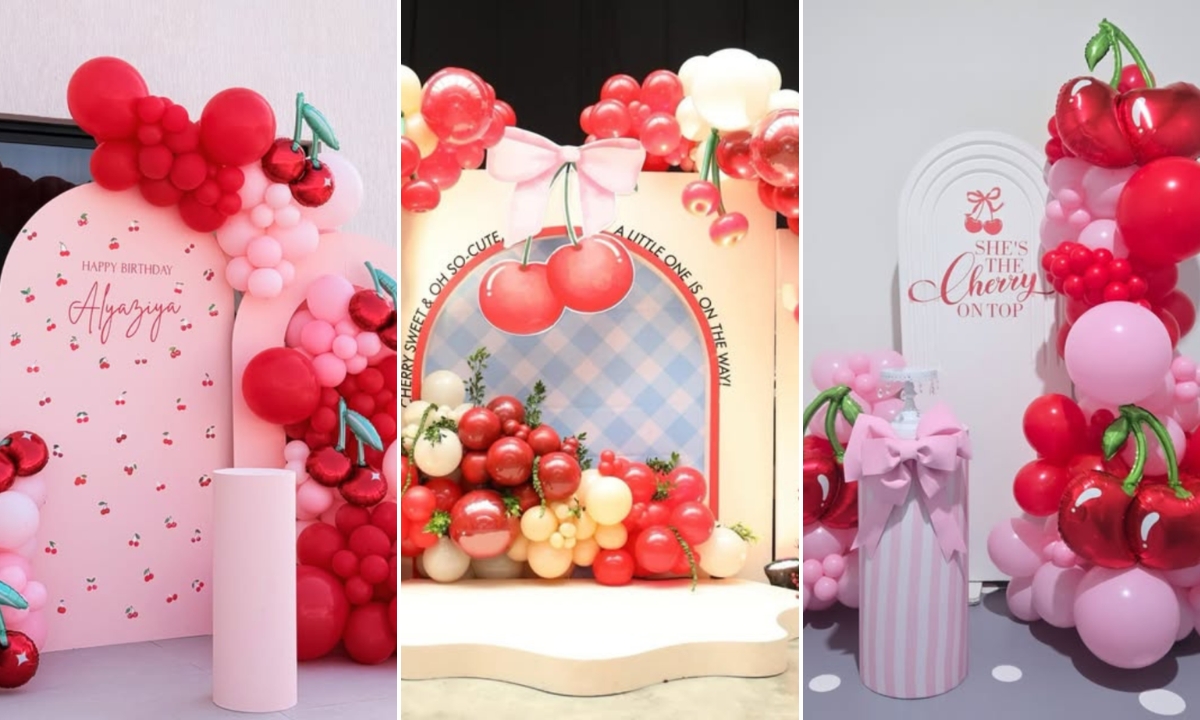
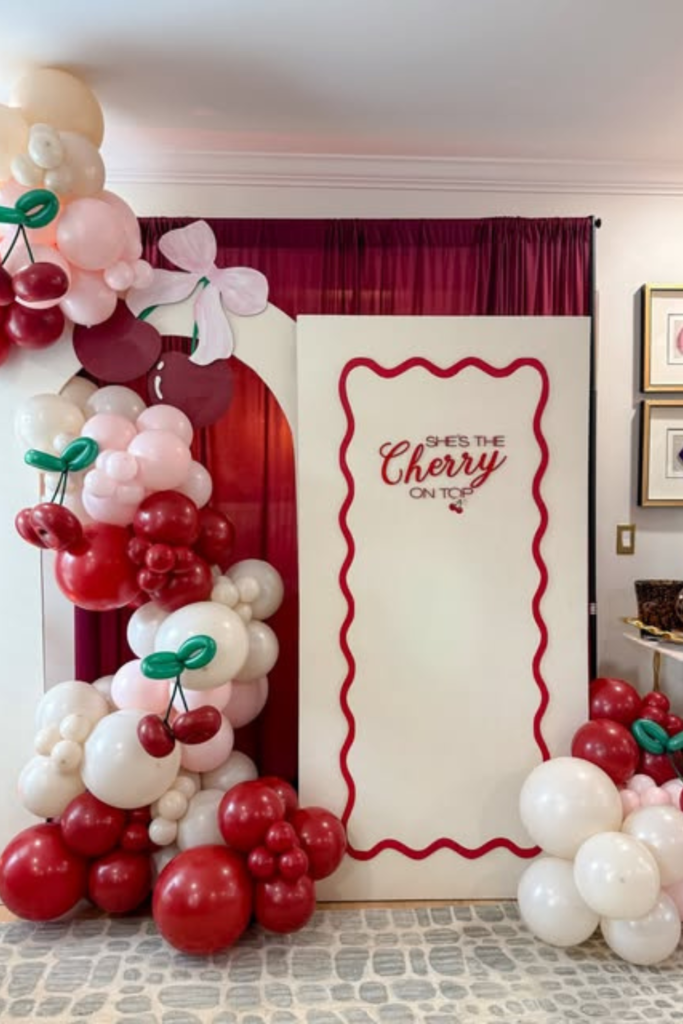
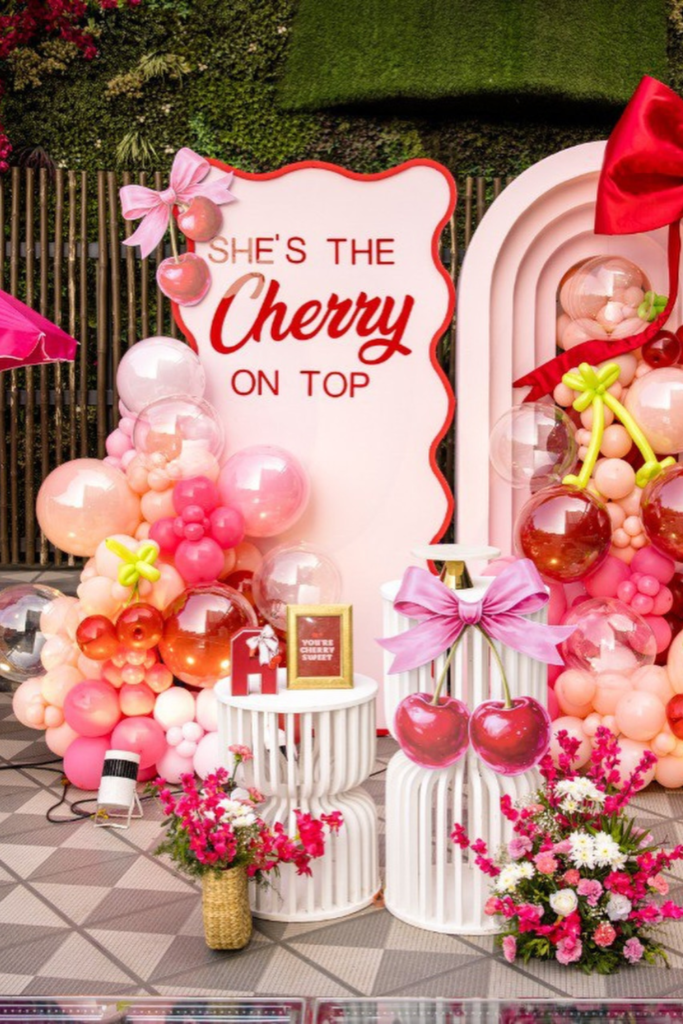
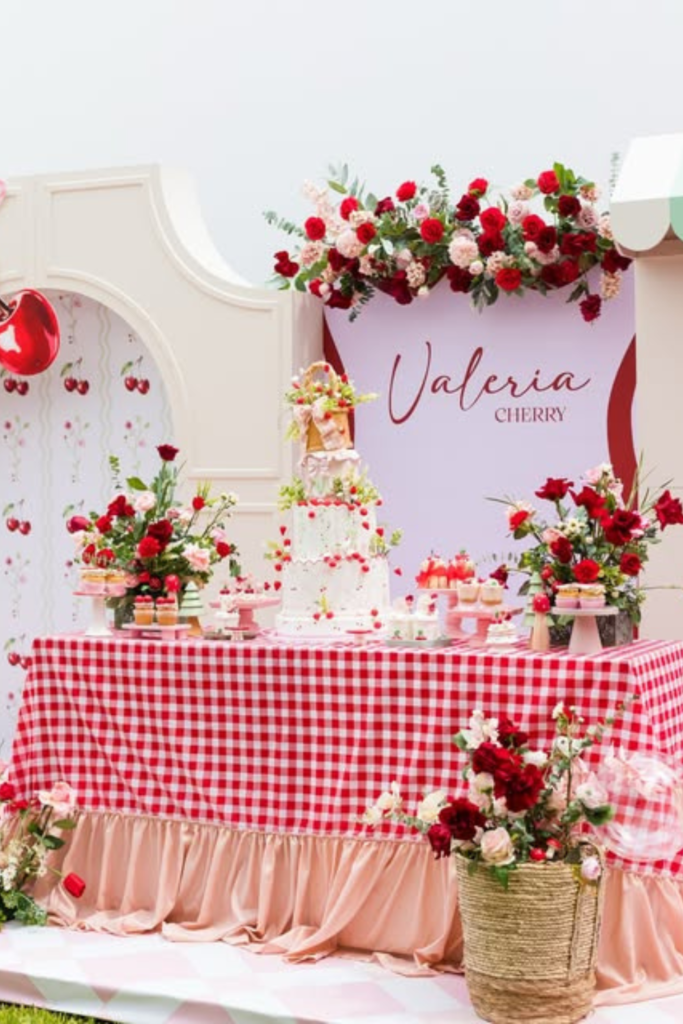
Statement Backdrop
Walk into the room and let one wall do all the talking. Build a layered balloon arch using pink, red, and white clusters.
Anchor it to a simple panel backdrop so everything feels structured rather than messy. Place your dessert table right in front.
Soft indoor lighting works best here warm white bulbs or a nearby lamp will keep the pink tones looking smooth instead of harsh.
Add one oversized cherry graphic or bow detail to tie everything together without overcrowding the space.
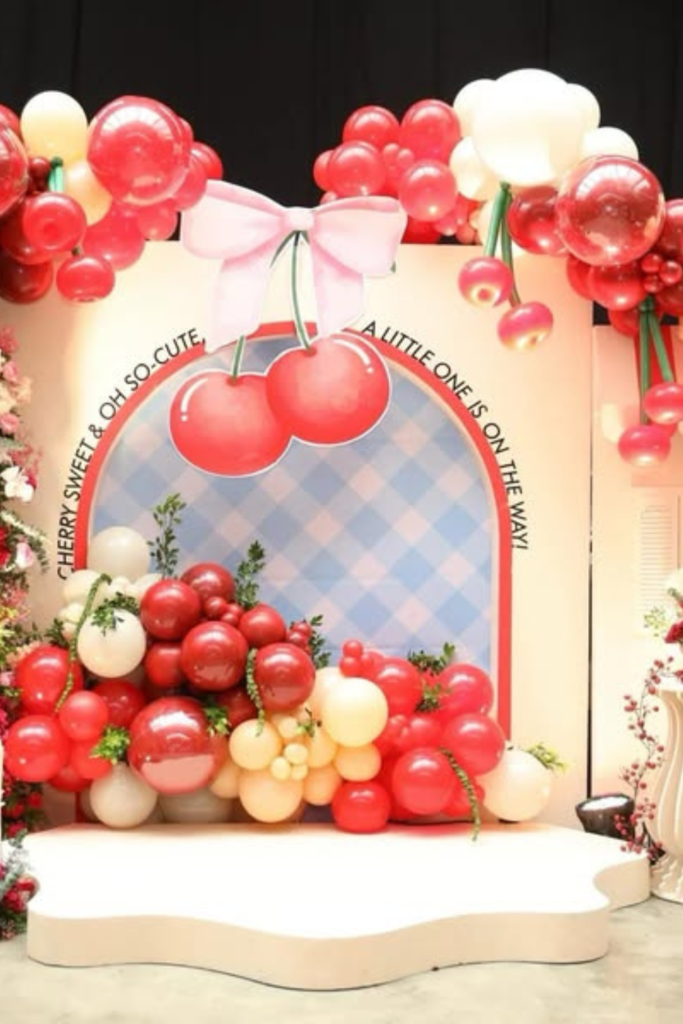
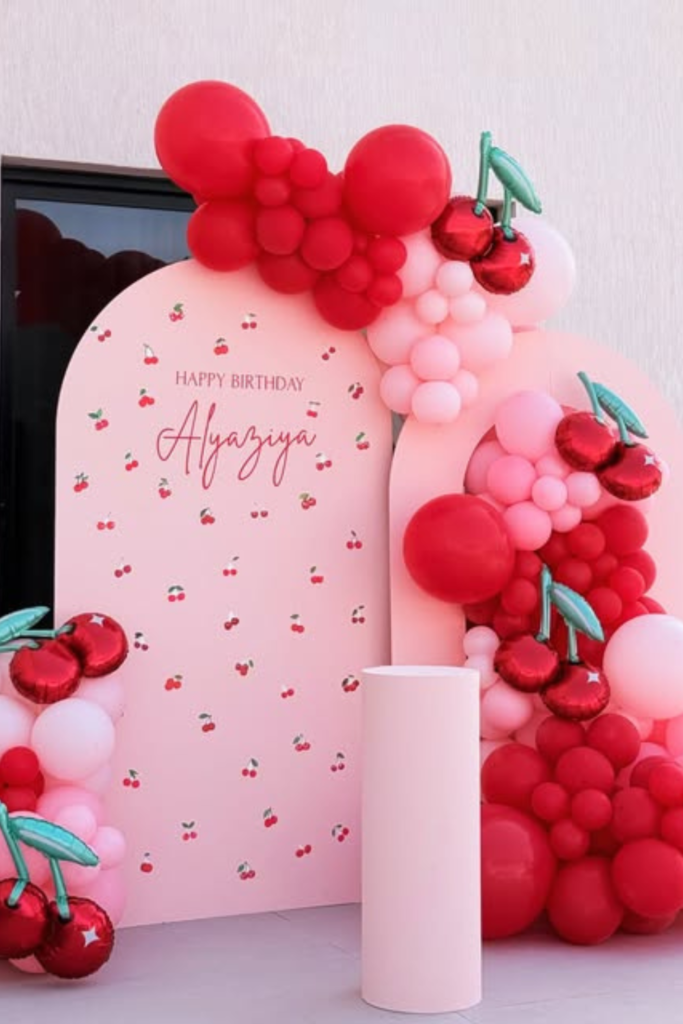
Cherry Arch
Use a curved arch panel with a cherry graphic to frame the scene, then keep balloons lower and tighter around the base so it doesn’t feel heavy.
Works best for indoor corners or small outdoor areas with limited space. Add fresh or faux red and white flowers at the bottom to soften the setup.
Natural daylight or soft diffused light keeps the reds rich without making them look too shiny or overpowering.

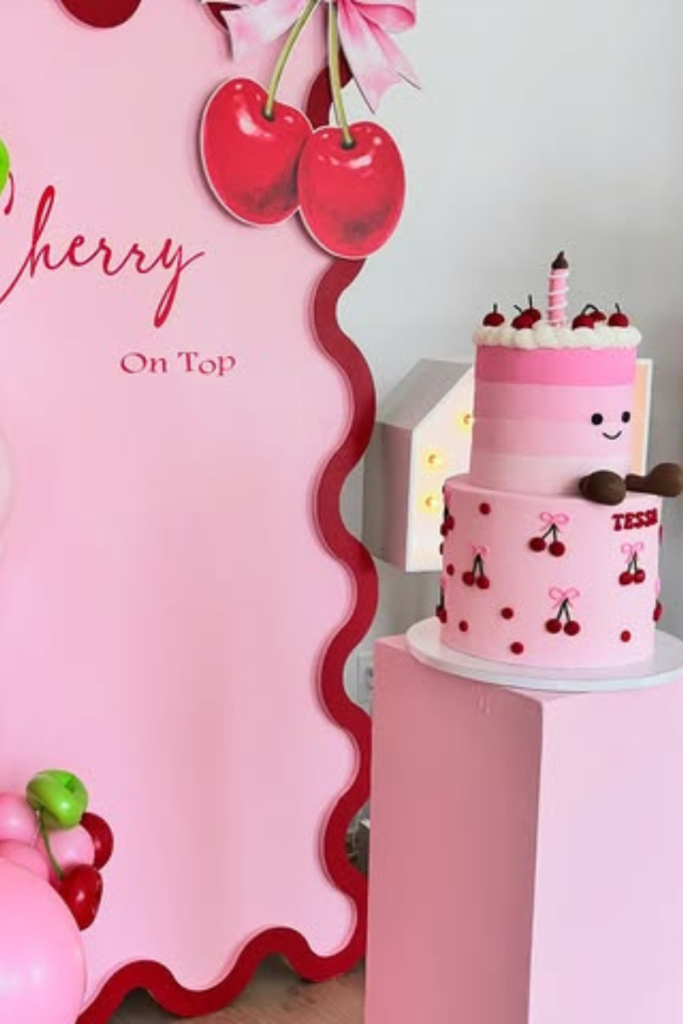
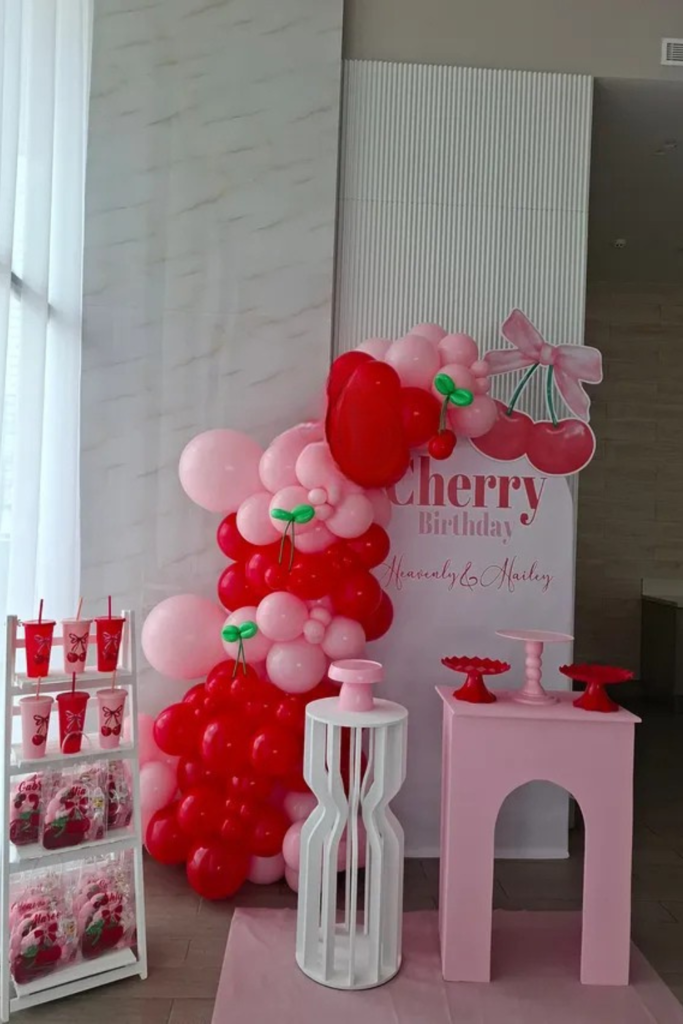
Cake Corner
Push your cake into its own spotlight. Use a bold pink panel with a wavy edge to give the setup a styled feel without needing too many props.
Keep balloons clustered on one side only, then mix in small cherry accents to break the monotony, works best indoors.
You can control the background and keep it clean. Add soft side lighting or a nearby LED glow so the cake details pop.
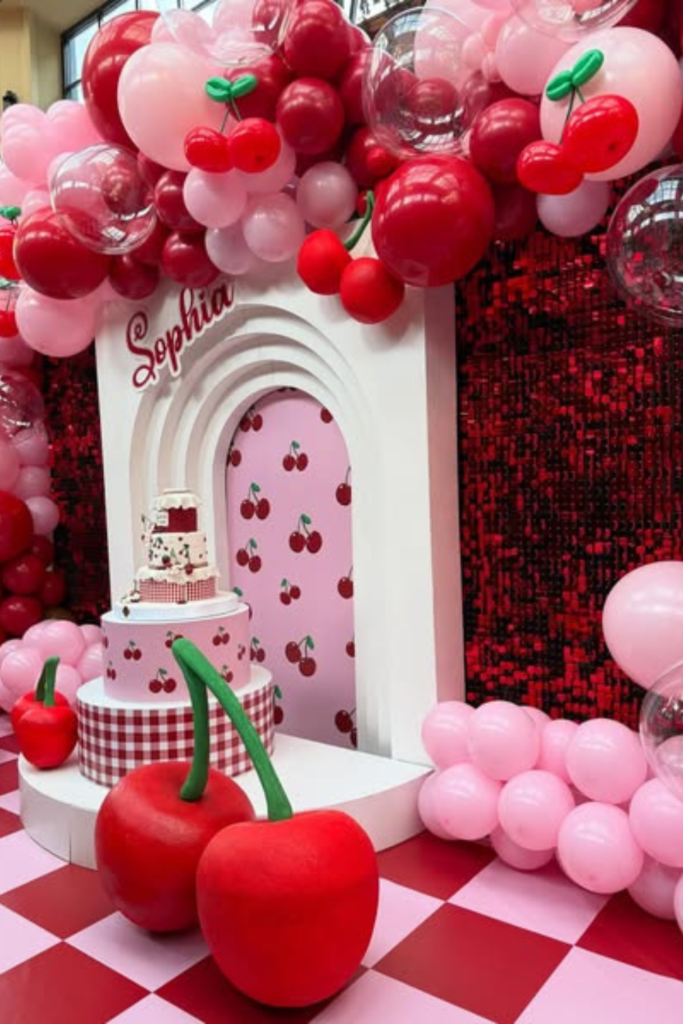
Stage Setup
Turn your backdrop into a full scene instead of just a photo spot. Add cherry props and greenery to break the solid red tones and give it depth.
Build a raised platform and frame it with layered balloon clusters at both the top and base so the space feels complete from every angle.
Use warm overhead lighting and soft ambient lighting to create a rich look without casting dark shadows behind the balloons.
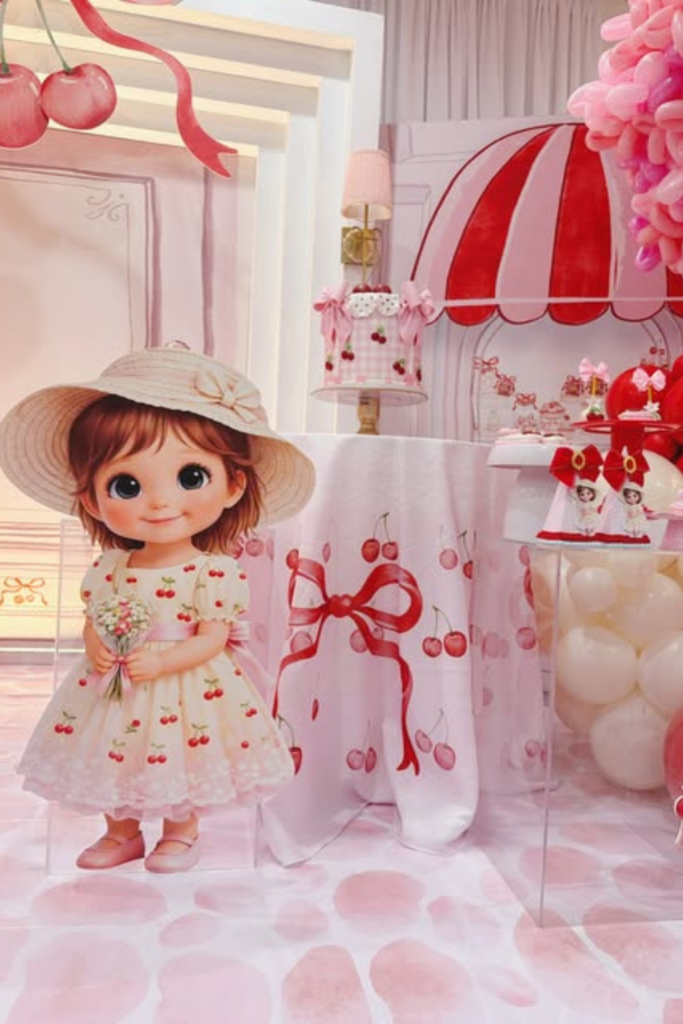
Picnic Vibe
Switch the mood completely with a soft picnic-style setup that still fits the cherry theme, works best outdoors or near open light.
Use a checkered or patterned backdrop with curved panels to make it feel relaxed rather than formal.
Keep the cake table simple, then add oversized cherry cutouts and balloon clusters on one side to balance the space.
Natural daylight is enough; skip heavy lighting and let the pastel tones and red accents stand out on their own.
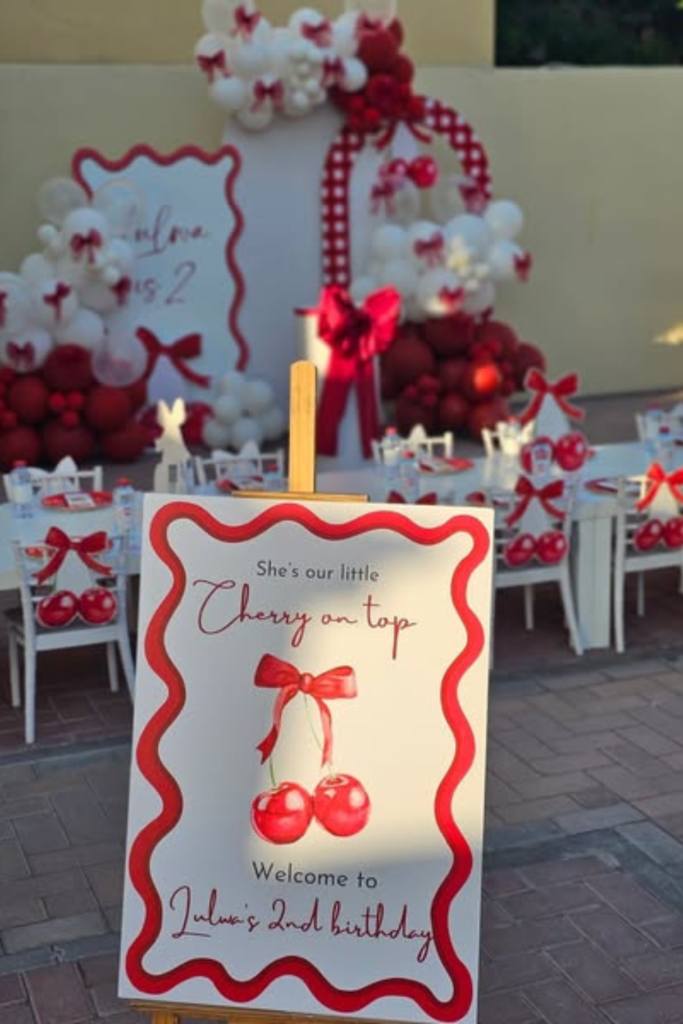
Entry Moment
Set the tone right at the entrance so guests feel the theme before they even walk in. Use a simple arched panel with a short message.
Add a pedestal with a bow detail to soften the look and tie in the “cherry on top” feel. This works best for indoor entryways or small outdoor gates.
Use soft front lighting or natural light so the reds stay glossy without casting heavy shadows behind the setup.
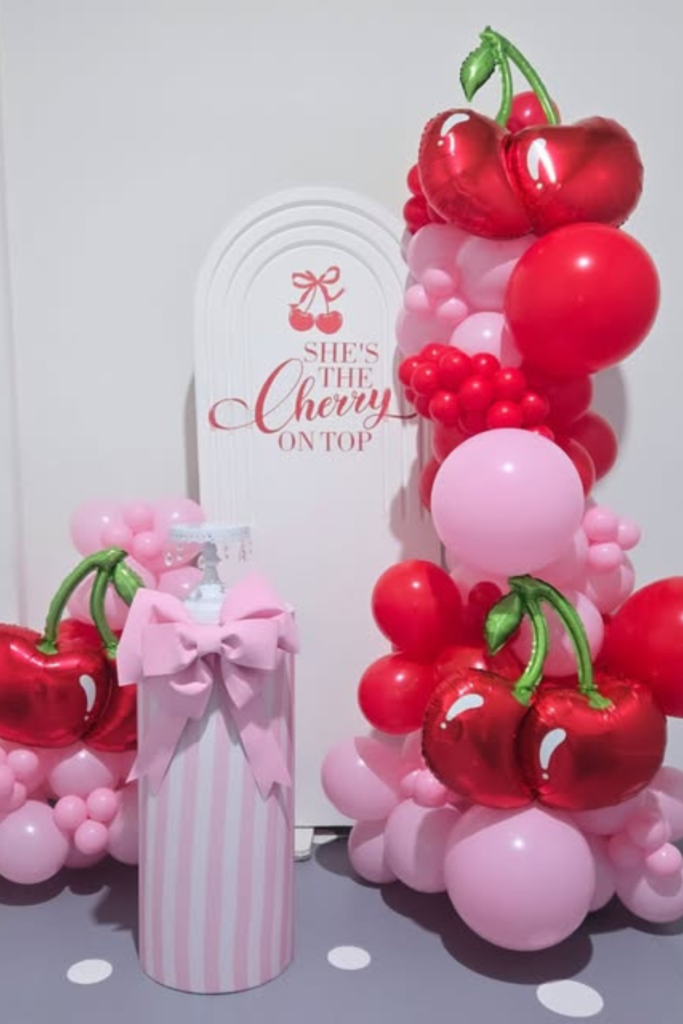
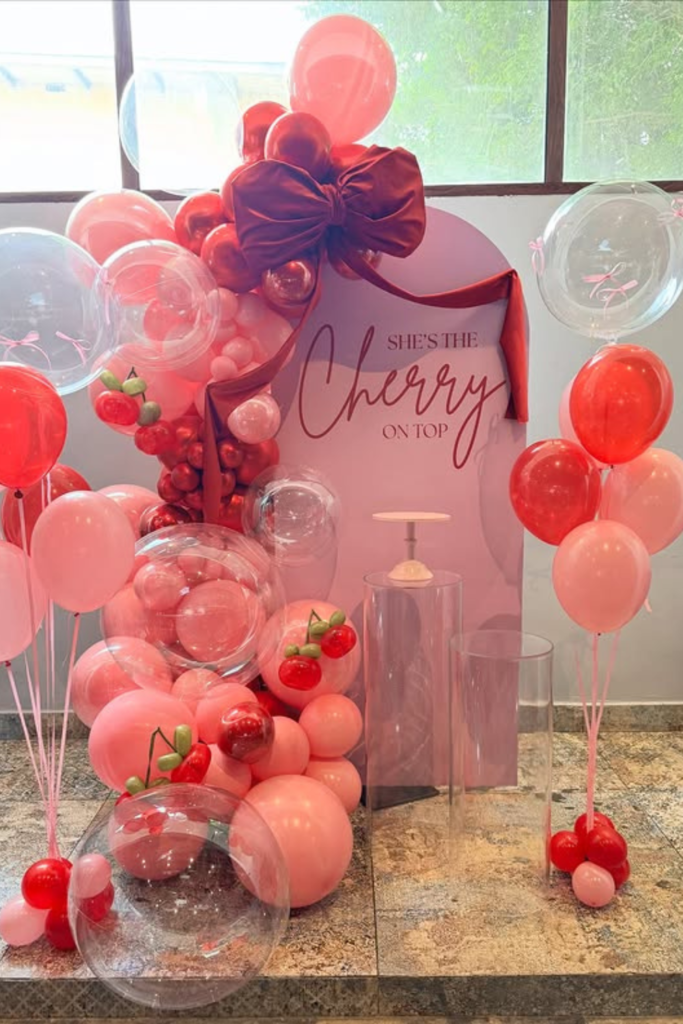
Photo Spot
Create one clean photo area instead of letting people take random pictures everywhere. Add small cherry accents inside the balloons to keep the theme.
Use a tall panel with a simple border to frame the space, then build a balloon cluster on one side only to keep it balanced.
Use soft front lighting or window light so faces look clear and the reds don’t turn too dark in photos, works best for indoors.
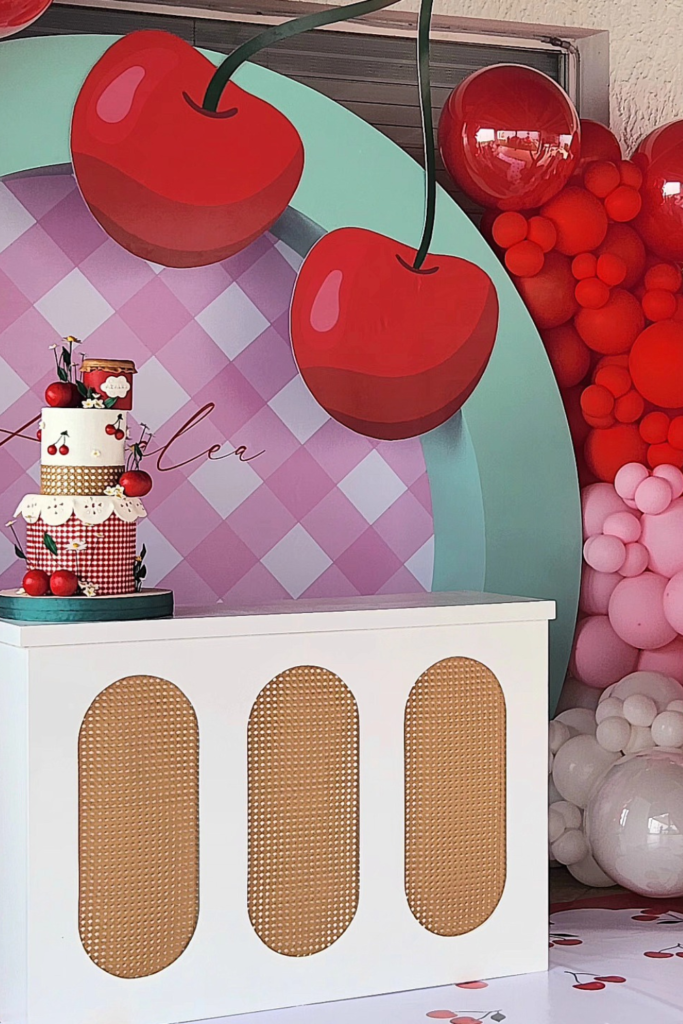
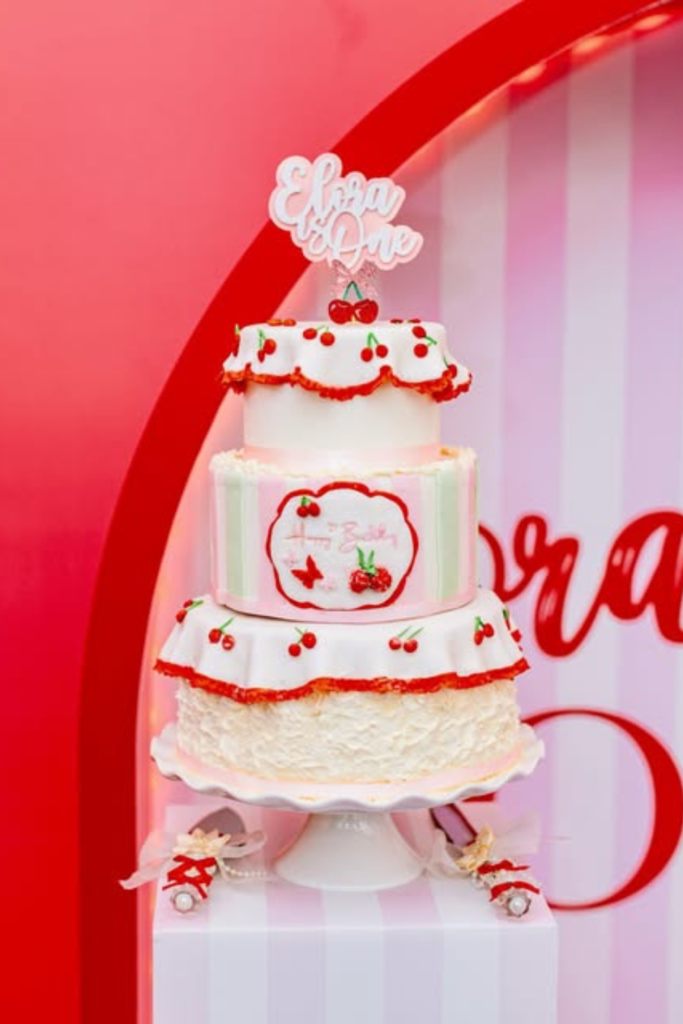
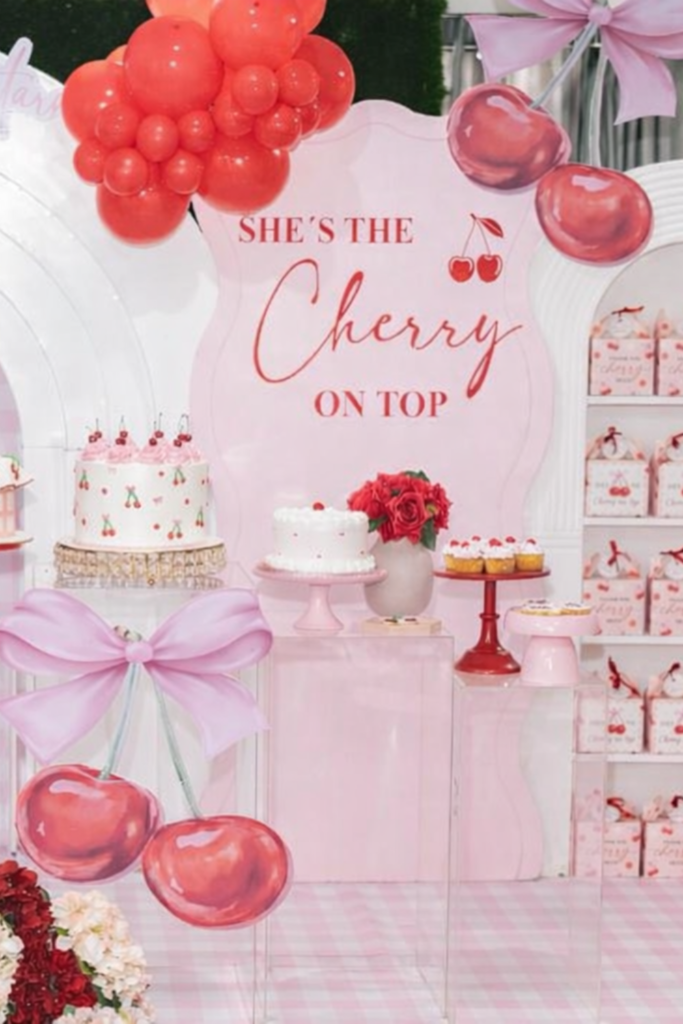
Cake Focus
Give your cake its own clean stage. Place it on a simple pedestal and use a curved backdrop behind it to frame the shape naturally.
Keep the cake details small; tiny cherries and soft piping work better than heavy designs. This setup works best both indoors and outdoors.
Use soft front lighting or natural daylight so the textures and small details show clearly without creating sharp shadows.
Balloon Frame
Skip plain walls and build your backdrop using balloons as the main structure. Stack red and pink clusters around a soft arch panel.
Keep one side heavier and the other lighter to avoid a crowded look. Works well both indoors and outdoors near a wall or entrance.
Use natural light if outside, or soft diffused lighting indoors, so the glossy balloons don’t reflect too harshly.
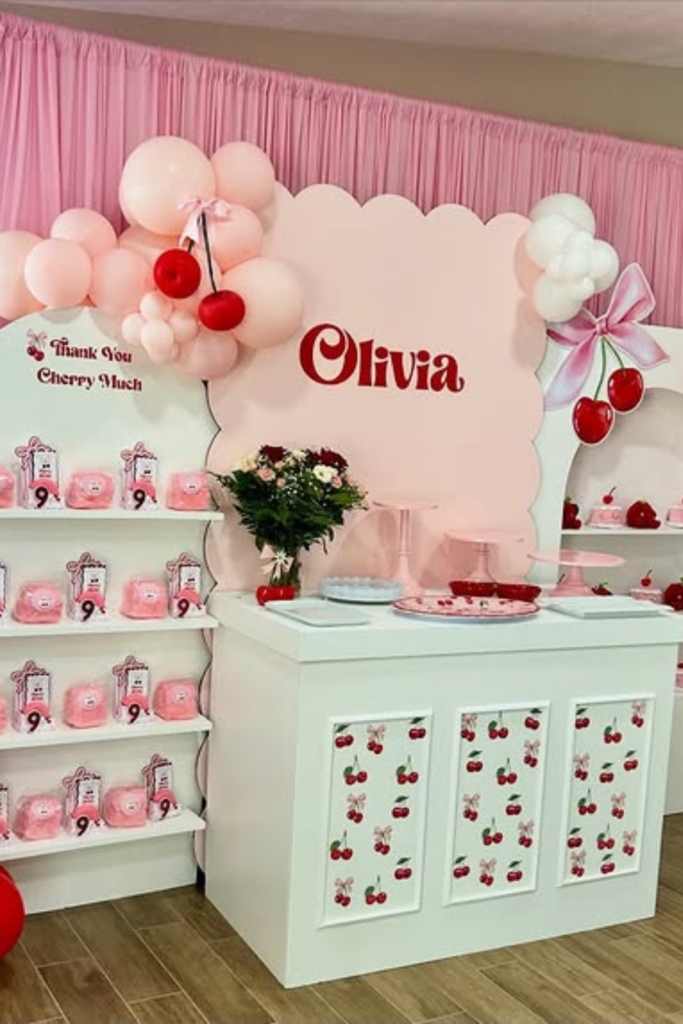
Favor Station
Turn one corner into a grab-and-go setup so guests don’t crowd your main table. Use shelves to display favors neatly.
Keep the main table clean with just a few trays and a soft backdrop panel behind it, works best indoors, where you can control the layout.
Add soft overhead lighting or a nearby lamp so the small details on favors stay visible and don’t get lost in shadows.
Floor Dining
Bring guests down to the floor to create a setup that feels different from a typical party table. Lay out a long, low table with cushions.
Keep plates, cups, and ribbons in the same red and pink tones so everything ties back to the theme, works best for indoors.
Use natural window light during the day, then add soft candles or warm lights in the evening to keep the setup cozy without harsh shadows.

Outdoor Dining
Set up a full dining area outside so the theme extends beyond a single backdrop. This works best in open outdoor spaces with even lighting.
Use small tables and chairs with simple white bases, then tie red bows or cherry accents onto each chair to keep everything connected.
Use natural daylight, then add soft string lights or warm bulbs as the sun goes down to keep the space visible without washing out the colors.
Glam Setup
Go bold with shine so the setup feels more like a statement. Keep the floor patterned so the whole area feels styled, not just the wall.
Use a sequin backdrop to reflect light, then layer balloon clusters across the top with clear bubbles and cherry details for depth.
Use overhead lights and soft spot lighting so the sequins sparkle without creating harsh reflections in photos.
Soft Garden
Let the outdoor space guide your setup. Use light-colored panels with soft prints so they blend with greenery instead of fighting it.
Add balloon clusters on both sides, but keep them airy, not too dense. Place a few large cherry props and clear boxes filled with balloons to add height.
This works best in gardens or open yards. Rely on natural daylight, and if needed, add subtle warm lights later so the setup stays soft and not overly bright.
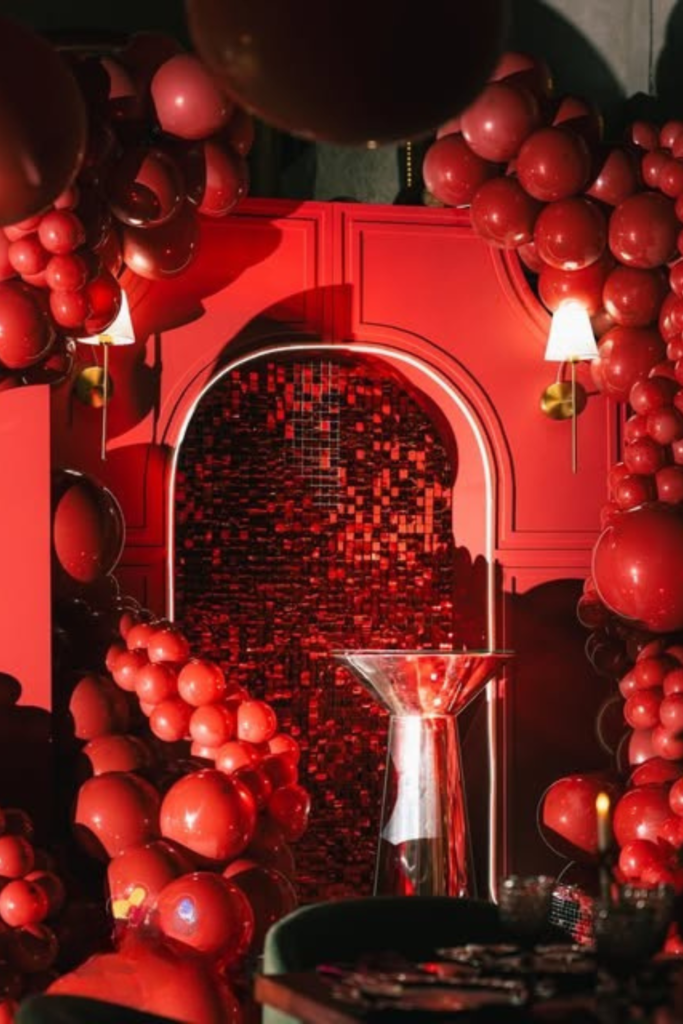
Night Lounge
Shift the mood entirely by designing a darker, more intimate corner for the evening. This works best indoors or in a covered outdoor area at night.
Use deep red panels and dense balloon clusters to make the space feel enclosed. Add a sequin backdrop inside an arch to catch the light.
Layer lighting with warm wall lamps and a soft spotlight on the center table so the setup glows without losing the rich red tones.
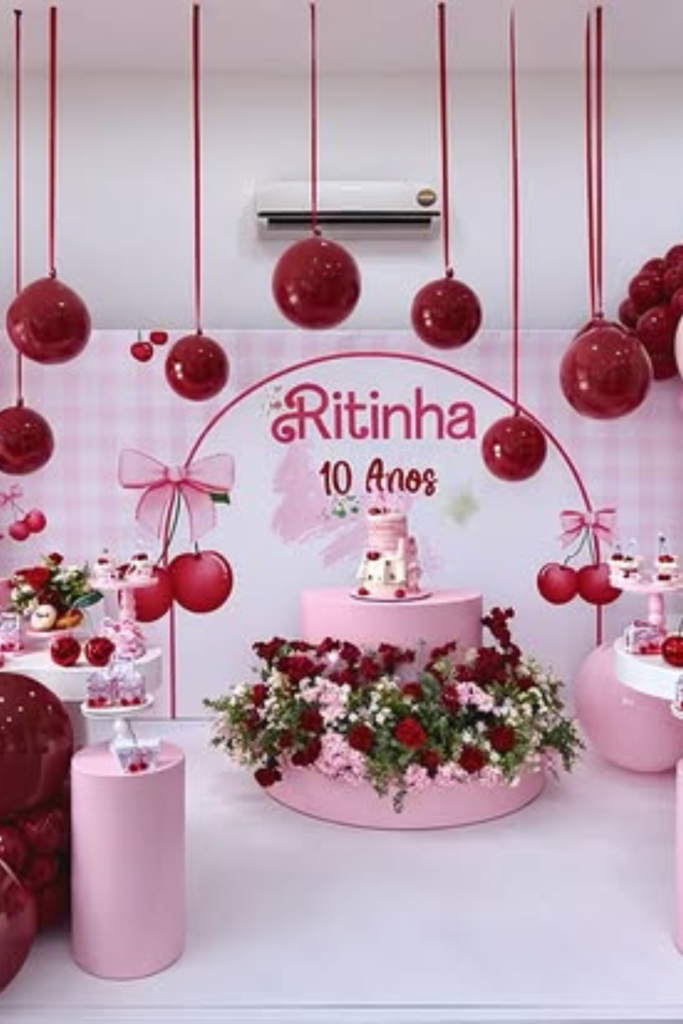
Number Feature
Make the age part of the setup, rather than just adding candles to a cake. Use a large number prop and place it right in the center.
Surround it with soft pink panels and balloon clusters to keep everything balanced. Add small cherry props near the base to keep the theme clear.
Use natural daylight, then switch on built-in number lights or soft LEDs in the evening so the number still stands out clearly.

Hanging Detail
Pull attention upward so your setup feels full. Keep the main tables simple underneath so the hanging elements stay the focus.
Hang cherry balloons or red spheres from the ceiling at different heights to create depth across the space.
Use soft overhead lighting combined with natural window light so the hanging pieces don’t cast heavy shadows and still look clean in photos.
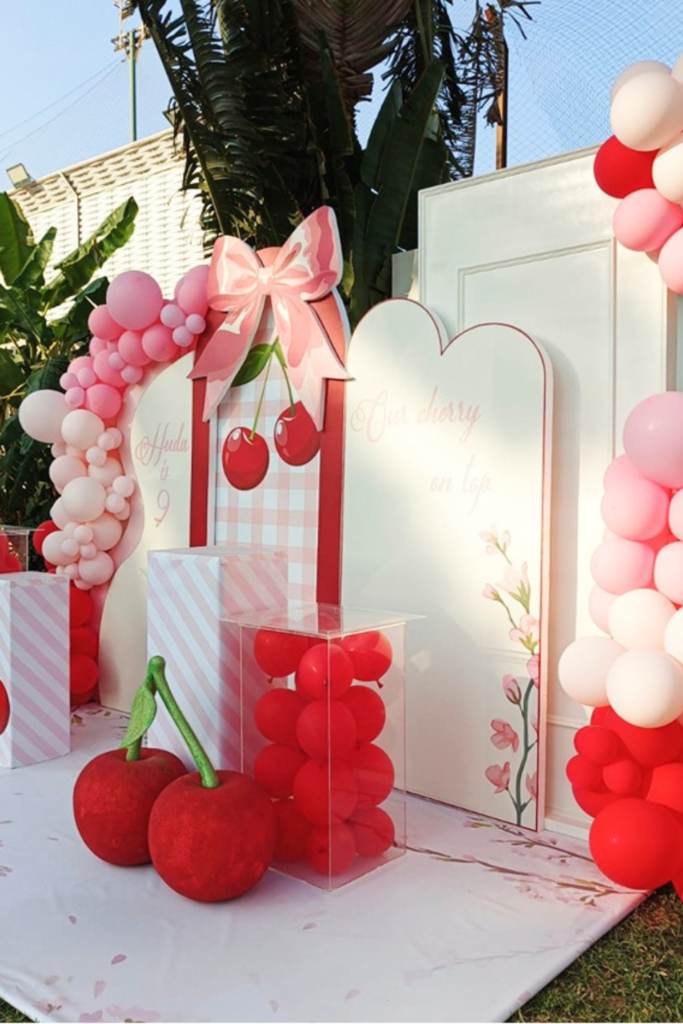
Styled Entry
Use two panels to frame the space, then fill the sides with soft balloon clusters and a few cherry accents to keep it light.
Add small tables in front with bows or props to give the area a layered feel, not a flat one. This works best outdoors near a walkway or gate.
Use natural daylight, then place a few ground spotlights facing upward so the setup stays visible and balanced in the evening.
Minimal Corner
Keep things simple when you don’t have much space to work with. Set up one clean corner with a balloon cluster.
A small backdrop, and a couple of dessert stands. Add a neon or script name sign so the setup still feels personalized.
This works best indoors near a window. Skip heavy lighting and let soft daylight keep the colors fresh and the setup easy to manage.
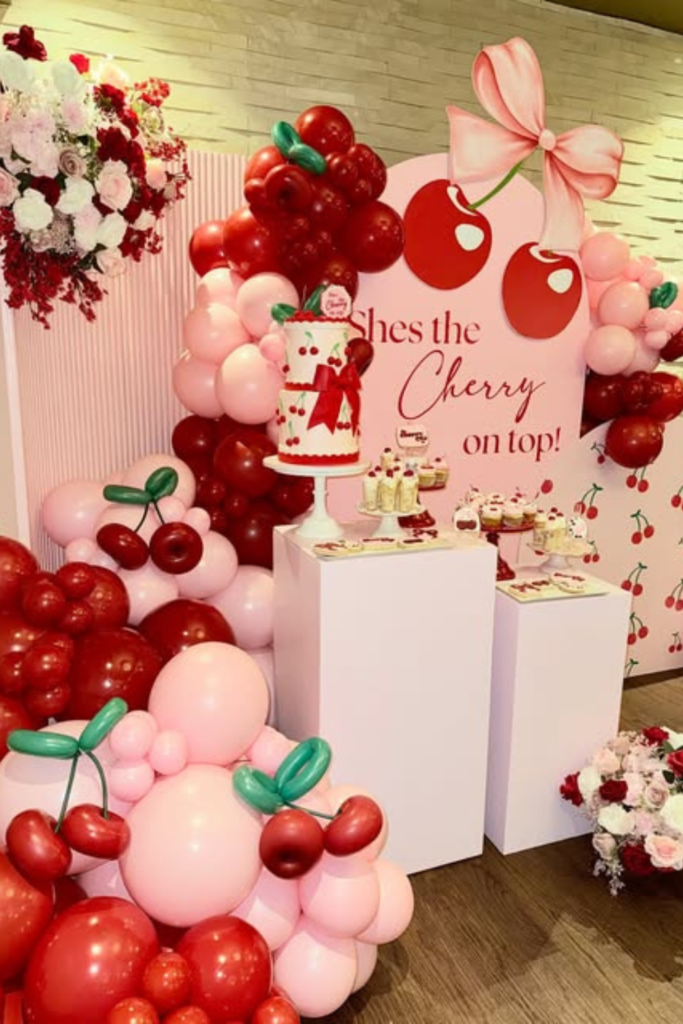
Dessert Display
Turn your dessert table into a full visual setup. Use different height stands so cakes and cupcakes don’t sit flat.
Match everything with cherry details to keep it cohesive. Add shelves on one side for favors so the space feels complete.
Use soft front lighting or window light so colors stay soft and desserts look clean in photos, this setup best for indoors.
Picnic Table
Bring in a picnic-style table to instantly change the feel of your setup. Use a red checkered cloth to make the cherry theme stand out.
Layer fresh flowers across the table and backdrop to soften the bold red tones and add texture, works best for outdoors.
Use daylight for a fresh feel, then add soft warm lights or candles later so the setup stays visible without losing its soft details.
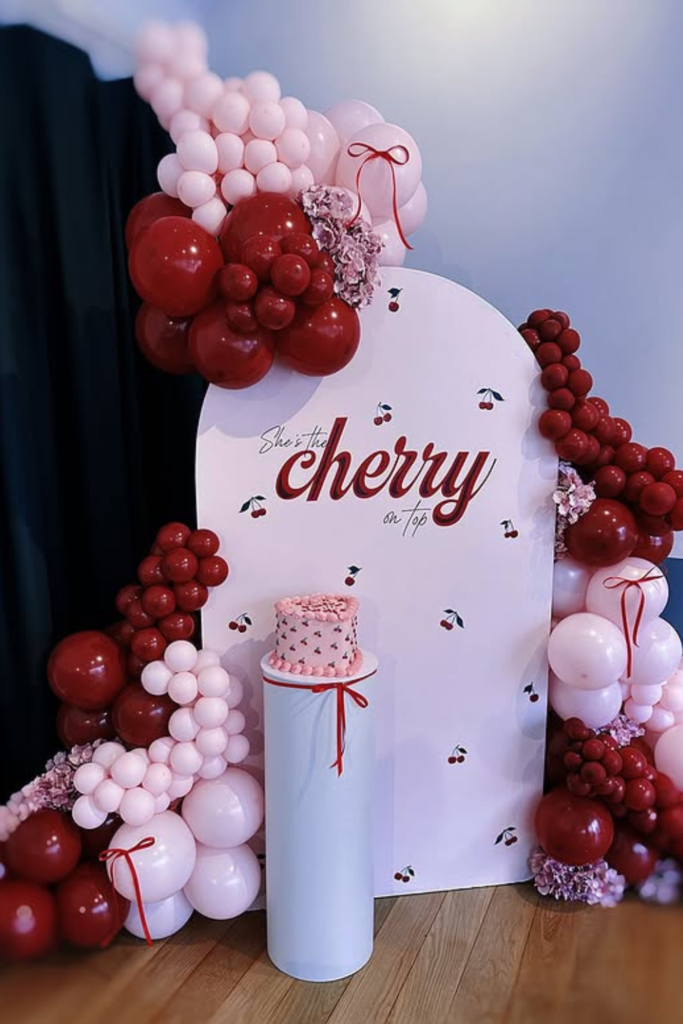
Layered Corner
Place two or three pedestals at different heights, then wrap balloon clusters around the base so the setup feels grounded.
Add a backdrop with one strong cherry graphic so the theme reads instantly. This works best indoors, where corners often feel empty.
Use warm overhead lighting with a soft side light so the layers stand out and don’t blend into one flat setup.
Balloon Mix
Blend different balloon styles to create a rich setup. Combine matte pink and red balloons with clear bubbles to break the heaviness.
Add contrast, tie in a fabric bow at the top to soften the look and visually connect everything. This works best indoors, near a window.
Perfect for natural light hits the clear balloons. Skip strong overhead lights and use soft daylight so reflections stay clean and don’t distract.
Soft Contrast
Break the heavy red look by mixing in softer tones to balance the setup. Use deep red balloons on one side and lighter pink clusters on the other.
Add small florals in between to soften the transition. Keep the backdrop simple so the contrast stands out clearly.
Use a soft side light or diffused lighting so both light and dark tones show properly without one overpowering the other.
FAQs
How do you keep a cherry theme from looking too busy?
Stick to one clear color direction and limit your elements. If you already have balloons, don’t overload the space with too many props.
Use one focal point like a backdrop or table, then keep the rest simple. When everything matches in color and placement, the setup feels clean instead of crowded.
What’s the easiest way to match decorations in a cherry party?
Start with a clear color palette: red, pink, and white, and don’t go outside it. This keeps everything looking connected. Pick one style early, whether it’s cute, retro, or glam.
When your balloons, tableware, backdrop, and even the smallest details follow the same style and colors, the whole setup comes together naturally.
You may like to read!

Fasial is the founder of the Fizzy Flare. He has been a passionate blogger since 2021. He ran three different websites in the past few years. Now he is focusing on Fizzy Flare to build an audience and help them organize their life.