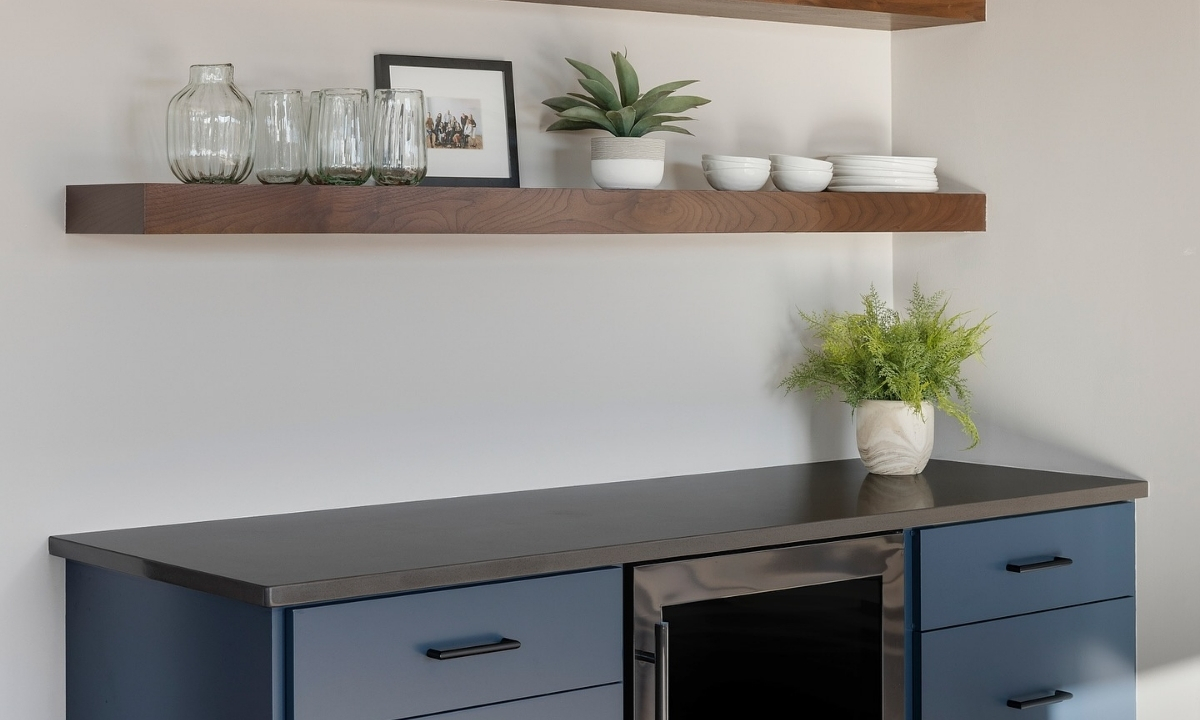
How to Build a Floating Shelf in Just 5 Easy Steps
This post may contain affiliate links: full affiliate disclosure.
Have you ever tried to find the perfect floating shelf for your space, only to feel frustrated by high prices or sizes that just do not work?
Maybe you have checked out DIY tutorials online and felt lost in complicated steps, missing details, or confusing instructions.
You just want a shelf that fits, looks good, and stays on the wall – without needing special skills or a contractor’s toolbox. This guide is here to help.
Let me show you how to make a floating shelf the simple and reliable way, so you can finally get the custom look you want without any guesswork.
Contents
Why Most Floating Shelf Guides Don’t Work
Most floating shelf guides miss the real-life problems you face.
They skip over how to deal with uneven walls, what to do if there is no stud where you want the shelf, or how to stop the shelf from sagging.
Instructions are often too technical or leave out important details, like how to anchor the shelf safely or finish the edges neatly.
Photos are often unclear, and weight limits are rarely explained, leaving you unsure of how much the shelf can hold.
This leads to shelves that tilt, sag, or even fall off the wall.
You need a guide that walks you through each step, fixes common mistakes, and helps you build a shelf that is sturdy and looks great – no guessing needed.
What You Need (Tools & Materials)
You will need a drill, a stud finder, a level, a tape measure, a saw, a pencil, and sandpaper.
For materials, get a wood shelf board cut to the size you need, a floating shelf bracket that matches your shelf’s length and weight, screws, and heavy-duty wall anchors in case you cannot drill into a stud.
If you want a polished look, use wood filler to cover the screw holes and pick up paint or stain for the final finish. Lay everything out before you begin.
This way, you will not waste time looking for a tool or part while you are in the middle of the project.
Step-by-Step: Building Your Floating Shelf
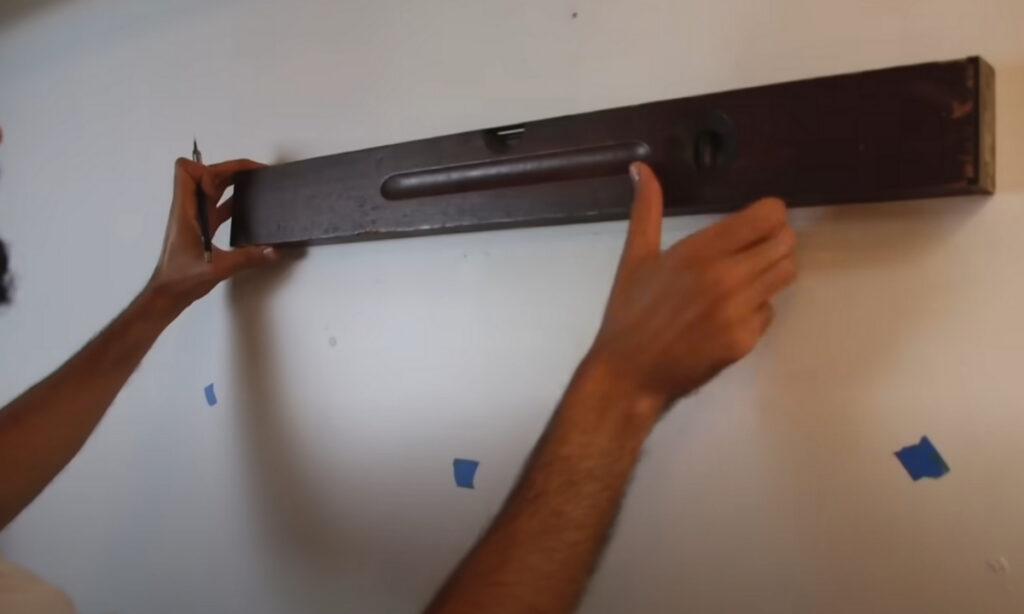
Step 1: Measure and Mark
Decide where you want to place the shelf. Use a tape measure to mark the height and length on the wall.
Find the studs using a stud finder and mark their positions. Use a level to draw a straight, horizontal line.
Step 2: Cut and Prep the Shelf
Measure the shelf board to match the marks on your wall. Cut the board to the correct size.
Sand all the edges until they feel smooth. If you want a polished look, paint or stain the shelf at this stage. Allow it to dry completely.

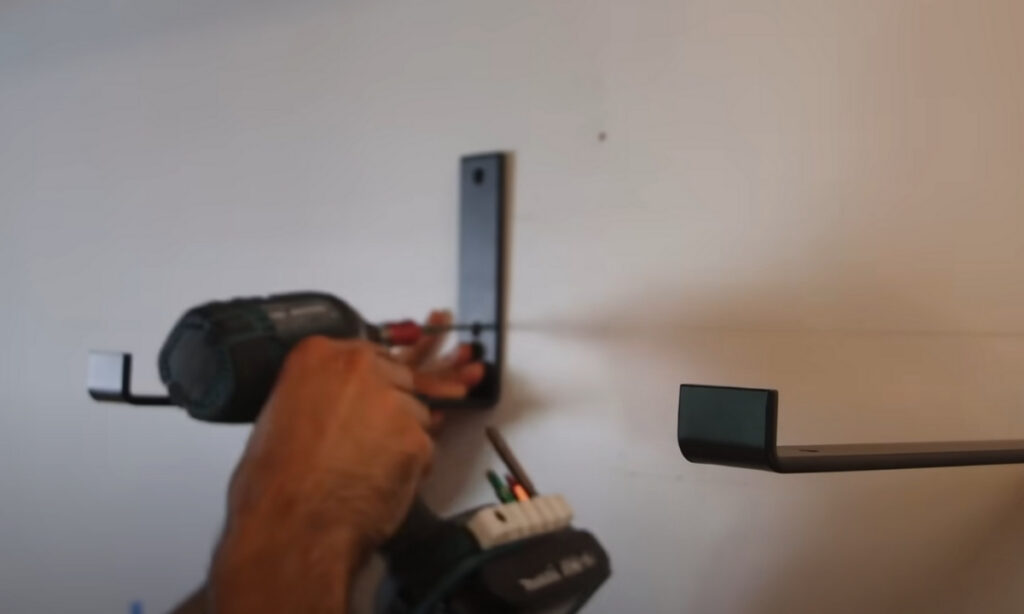
Step 3: Install the Bracket
Hold the bracket against the wall, lining it up with your level line and at least one stud.
Mark where the screw holes will go. Drill small pilot holes at the marks. If you do not hit a stud, use strong wall anchors. Secure the bracket tightly with screws.
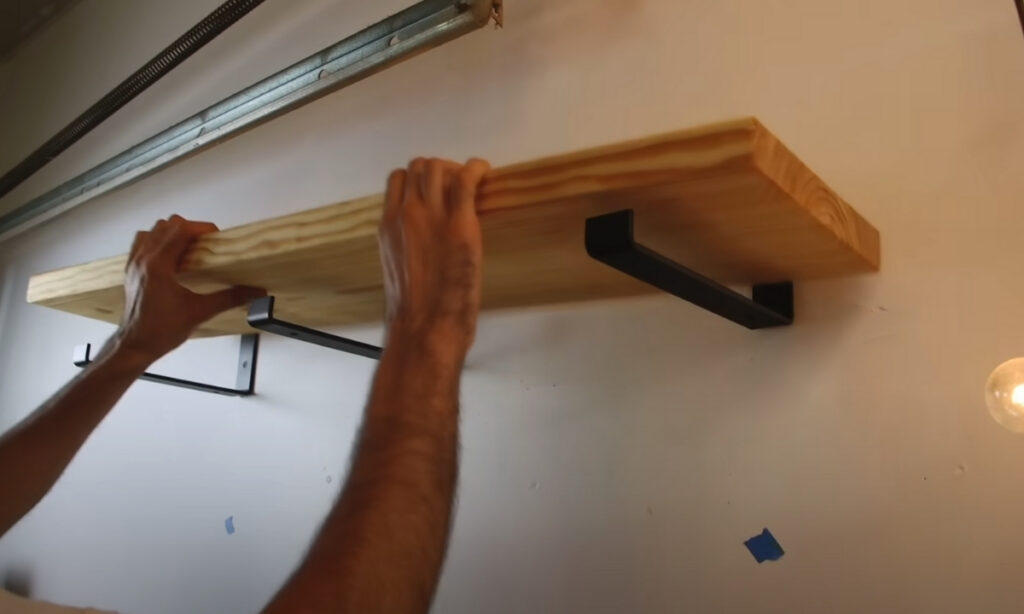
Step 4: Mount the Shelf
Slide the shelf onto the bracket or place it above the L-brackets. Secure the shelf by driving screws into it from underneath or behind.
Step 5: Check and Finish
Place the level on the shelf and check that it is straight. Press down gently to see if it moves.
If it wobbles, tighten the screws. Fill any holes you can see with wood filler. Touch up the surface with paint or stain if needed.
“Your floating shelf is ready to use. Do not overload it – always follow the weight limit of the brackets.”
Common Issue During DIY Floating Shelf
1) Can’t Find Studs
If you cannot find studs where you want to hang your shelf, use heavy-duty wall anchors or toggle bolts designed to hold more weight.
For longer shelves, add a second bracket or consider using a French cleat to evenly distribute the load.
2) Shelf Leveling Issues
When a shelf is not level, it needs adjusting. Always check the bracket with a level before drilling.
If you have already mounted the shelf and it looks crooked, loosen the screws, reposition the bracket, and tighten them again.
For small uneven areas, place thin shims behind the bracket or the shelf itself.
3) Loose Shelf
A wobbly or loose shelf often happens when screws are not tight or properly anchored.
Ensure at least one screw goes directly into a stud or a solid anchor. If the bracket itself moves, reinstall it using longer screws or stronger wall anchors.
4) Gape Between Wall & Shelf
Small gaps between the shelf and the wall can be filled with clear caulk or wood filler for a clean, flush look.
For larger gaps, use wood shims painted to match the color of your wall or shelf.
5) How to Hide Visible Screw Holes
To hide visible screw holes, fill them with wood filler. Once the filler dries, sand it smooth and finish with paint or stain as needed.
If the brackets are visible and it bothers you, hide them with decor or opt for hidden brackets in your next project.
6) How Many Brackets
A shelf that droops in the middle typically means there is not enough support or the items on it are too heavy.
Remove the heavier items, add a center bracket for more strength, or use a thicker board for better durability.
Inspect all brackets and anchors to make sure they are not showing signs of stress or strain.
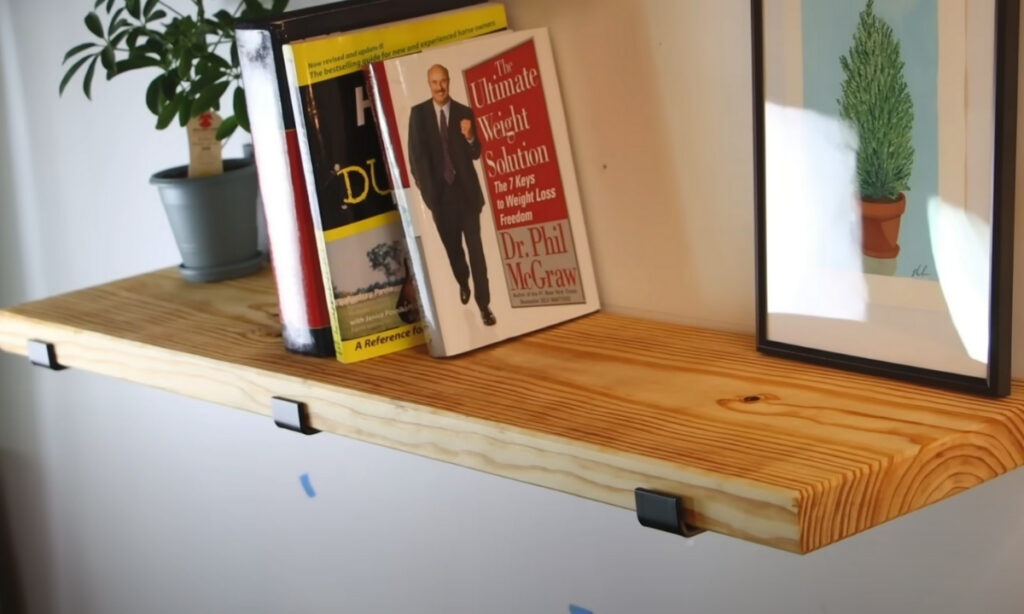
Styling and Maintenance Tips
Here are the tips to style your DIY floating shelf to make it even more attractive:
- Keep your shelf looking neat by avoiding overcrowding. Combine a few books with plants, candles, or framed photos to create balance.
- Leave some empty space so the shelf feels intentional and not crammed. For a modern vibe, arrange items in similar colors or materials.
- If you prefer a cozy look, include something textured like a small basket or ceramic piece.
- Dust your shelf regularly using a dry or slightly damp cloth. Do not soak wood or MDF, as excess moisture can cause warping.
- Touch up paint or stain if you notice any chips or scratches.
- If you decide to remove the shelf, fill the holes with spackle and paint over them to match your wall.
Conclusion
Building a floating shelf does not take advanced skills or expensive tools.
With the right hardware and careful planning, you can create a sturdy and clean design that fits your space.
Always measure carefully, use the correct anchors, and double-check your work before placing items on the shelf.
Inspect the shelf regularly for loose screws or sagging. A well-built floating shelf is practical and easy to maintain if you stick to these basic steps.

Fasial is the founder of the Fizzy Flare. He has been a passionate blogger since 2021. He ran three different websites in the past few years. Now he is focusing on Fizzy Flare to build an audience and help them organize their life.