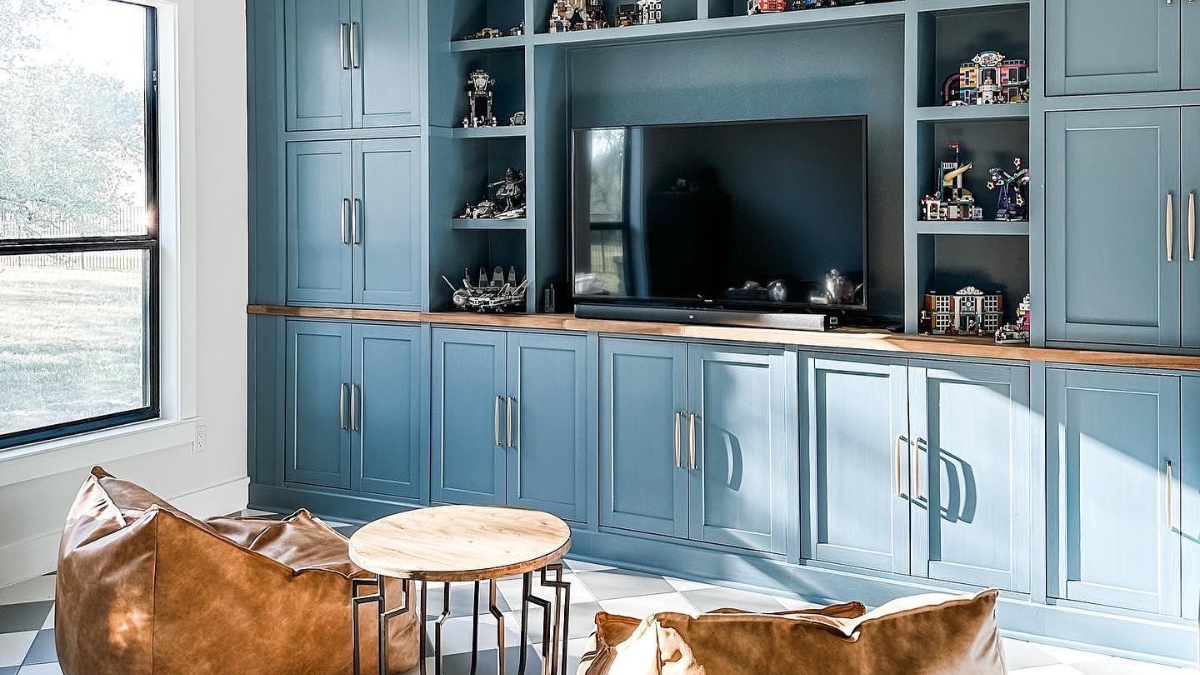
How to Make a Living Room DIY Built-In Cabinets with 5 Easy Steps
This post may contain affiliate links: full affiliate disclosure.
If your living room always feels messy and nothing you buy seems to fit just right, you are not alone.
Store-bought bookshelves take up room without adding much style. Custom built-ins? They cost too much.
That is why many people choose to make their own built-ins – they want storage that fits their space and looks good.
But knowing where to begin, what materials to use, or how to make it look polished can feel like a big challenge.
In this article, I will guide you through everything, from selecting the right wall to adding trim that gives it a professional finish.
Let’s get started!
Contents
- 1 Why DIY Built-Ins Make Sense Today
- 2 Choose the Right Wall and Built-In Type
- 3 Materials and Tools You Actually Need
- 4 Build the Base Because Foundation is Important
- 5 Add Shelves and Supports Like a Pro
- 6 Make It Beautiful: Styling Tips That Works
- 7 Built-In Ideas for Every Space
- 8 Don’t Mess Up These Common Steps
- 9 Conclusion
Why DIY Built-Ins Make Sense Today
Built-ins are no longer just for large homes or expensive custom projects. If you don’t have enough space and tired of mismatched furniture, then built-ins can offer a smart solution.
They provide storage that fits your wall perfectly, looks polished, and saves floor space compared to bulky cabinets.
The best part? You control the cost. By using stock cabinets or basic materials, you will achieve a high-end look without spending a lot of money.
Unlike store-bought units, you can design built-ins to fit your needs- whether it is for a TV, books, decorations, or even toys.
Whether you want to reduce clutter, add style, or make your living room feel more organized, built-ins combine function and design without the high price tag.
Choose the Right Wall and Built-In Type
- Choose a wall with purpose. The best spots are behind the TV, next to the fireplace, or around a window.
- Stay away from awkward corners or tight walkways where built-ins might feel out of place or block movement.
- Full-wall built-ins are perfect for long, blank walls in large rooms.
- For smaller spaces, go for vertical shelves or slim towers on either side of a window or sofa.
- Design with your needs in mind. Use closed cabinets for storage, open shelves for display, or a mix of both.
- Keep the look balanced. If you are building around a TV or fireplace, make the shelves symmetrical.
- Think ahead. Leave room for technology, decorations, or even baskets for toys.
Materials and Tools You Actually Need
You do not need expensive tools or advanced carpentry skills to create DIY built-ins.
You have to start with affordable materials like medium-density fiberboard, plywood, or pre-assembled stock cabinets from a home improvement store.
These materials are smooth, easy to cut, and look great when painted.
Stick to basic tools:
- A drill with wood screws
- A level to keep your shelves straight
- A stud finder to anchor safely to the wall
- Wood glue and clamps for strong joints
- A miter box or a simple miter saw for cutting corners
- Caulk, primer, and paint for a polished finish
You do not need fancy equipment. You have to focus on making straight cuts, keep your shelves level, and securing the frame to the wall.
Build the Base Because Foundation is Important
Here are the steps to create a strong and level base that will support the entire built-in:
Step 1: Mark Your Base Area
To start you have to mark the location where the cabinet will sit along the wall. For this you can use a pencil and level to mark the area.
Then check measurement carefully and make sure everything is square and centered.
Step 2: Build/ Place the Base Frame
- If you are using stock cabinets, build a platform using 2x4s to create a toe-kick base. This will raise the cabinets slightly above the floor.
- If you are building from scratch, cut plywood to make a base box the same length and depth as your planned built-in.
Step 3: Level Everything Out
Use a long level and wood shims to fix uneven floors. Do not skip this step. A crooked base means crooked shelves.
Step 4: Secure the Base to the Wall and Floor
Drill through the back of the cabinets or base box into the wall studs. Use wood screws that are 2.5 to 3 inches long. Make sure everything is secure and does not wobble.
Step 5: Leave Space for Trim
If you plan to add decorative trim or baseboard later, push the base half an inch back from the front edge. This helps create a seamless, built-in look.
Add Shelves and Supports Like a Pro
- First of all start with vertical side panels made from plywood or MDF. These panels support your shelves and create the structure.
- Secure the side panels to the wall studs with wood screws. Use a level to make sure everything lines up perfectly.
- Use ¾-inch plywood/ MDF for the shelves. Because this thickness will keep them strong and prevents sagging.
- Mark the height for each shelf on both side panels before attaching anything. This ensures your shelves stay straight and evenly spaced.
- Add cleats, which are wood strips, underneath each shelf. These make the shelves sturdy and are simple to attach without needing complex woodworking methods.
- Add a 1×2 trim board to the front edge of each shelf. This will give the shelves a clean and polished look.
Plan your shelf spacing carefully:
- 12 to 15 inches is ideal for books and decorations.
- 18 inches/ more works well for taller items.
Do not make shelves longer than 36 inches without adding support in the center. Longer shelves will sag over time without proper reinforcement.
Save this article for later! 👇👇
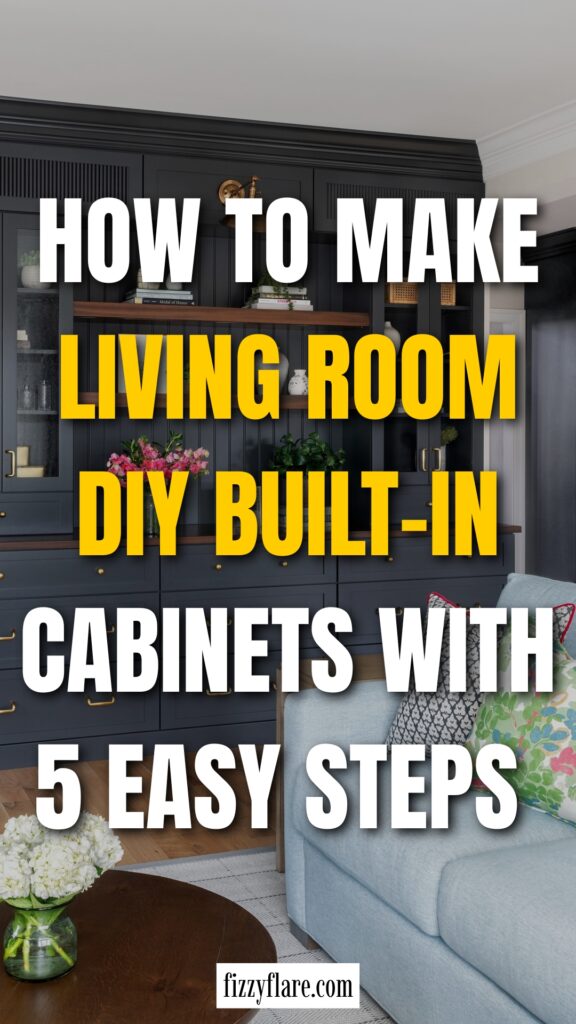
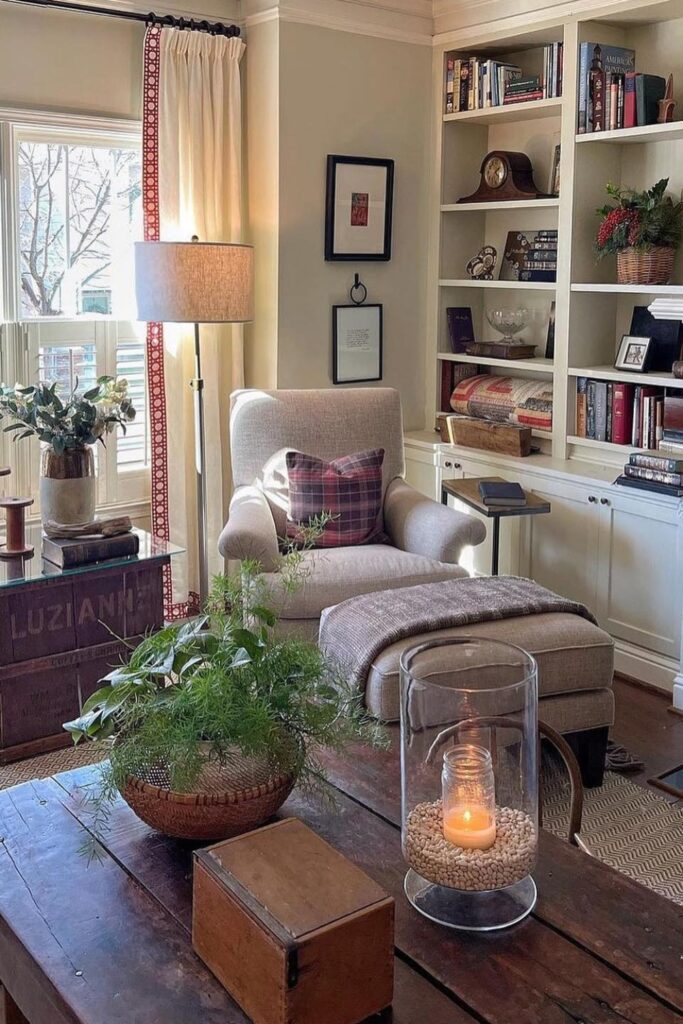
Make It Beautiful: Styling Tips That Works
Group items in sets of three – like a vase, a photo, and a book. It looks balanced and natural, without feeling rigid or forced.
Vary heights and shapes – place taller pieces next to shorter ones to create more dimension and avoid a flat arrangement.
Leave some empty space – do not pack shelves too tightly. Open gaps help each piece stand out on its own.
Stick to two or three colors – this keeps the shelves looking tidy and coordinated. Use baskets or bins on lower shelves to conceal items such as chargers, remotes, or toys.
Stack books in different ways – mix horizontal stacks with vertical ones to add structure and variation.
Related: DIY Recessed Shelves Between Studs
Built-In Ideas for Every Space
- TV Wall – Add shelves or cabinets on both sides of the TV. Leave the center open for a clean and balanced look.
- Fireplace Sides – Use the space on both sides of the fireplace for built-ins. This creates symmetry and adds storage.
- Full Wall – Perfect for large walls. Floor-to-ceiling shelves with base cabinets make the most of the space.
- Window Wall – Install narrow built-ins on each side of a window. This keeps the natural light while adding storage.
- Corner Spot – Make use of small corners with tall shelves or closed cabinets. This works well for small living rooms.
Don’t Mess Up These Common Steps
- Make sure the base is level.
- Drill directly into the wall studs.
- Paint all the pieces before putting them together.
- Use wood screws for a strong hold.
- Leave enough space for the trim.
- Double-check all your measurements.
- Do not skip using shims to fix uneven surfaces.
Related: How to DIY Pegboard Tool Organizer
Conclusion
You do not need custom woodworking or a big budget to build clean, sturdy, and stylish built-ins.
With thoughtful planning, the right materials, and careful steps, you can create a design that fits your space and works for your needs.
You now have the skills to build something that adds both storage and style, and looks like it was always part of your home.

Fasial is the founder of the Fizzy Flare. He has been a passionate blogger since 2021. He ran three different websites in the past few years. Now he is focusing on Fizzy Flare to build an audience and help them organize their life.